


With the ability to create powerful databases and track custom workflows, Notion is quickly becoming the go-to information hub for teams of all sizes. So if you're looking for an easy way to connect your WordPress site with Notion and easily create Notion database items from your forms, you're in luck!
We have recently announced our WordPress Zapier Integration which allows you to connect your opt-in popup forms with 5,000+ apps. With this integration, you can send the submitted data directly to a Notion database whenever someone fills in your forms. Whether it's a simple contact form or more complex survey data, in this blog post, we'll explain why you should connect WordPress forms to Notion and how you can do it using FireBox and Zapier.
So let's get started!
Why Connect WordPress Forms to Notion?
Notion is quickly emerging as one of the most popular applications for managing knowledge and data. With its flexibility and intuitive user interface, it's no wonder why many companies are using it as their primary database management system.
As a site administrator, you know the importance of capturing leads and getting more conversions. You also understand that collecting user data is integral to providing better customer service and tailoring your product or service offerings.
By connecting your WordPress forms to Notion, you can seamlessly send user submissions to your Notion databases without manually entering each piece of data. This saves time and makes it easier for your business to manage customer information quickly and accurately.
For example, suppose a visitor subscribes to a mailing list through an opt-in popup on your WordPress website. In that case, the form submission is immediately sent to Notion, which is stored in an organized database, freeing time and effort from the site administrator's hands! In addition, this integration allows seamless communication between the two platforms, resulting in increased efficiency for any website owner who wants an easy way of collecting user data from visitors who sign up via opt-in popups on their WordPress site.
The benefits of integrating WordPress forms with Notion databases are numerous:
- It saves time.
- It eliminates manual data entry.
- It increases data accuracy by avoiding transcription errors.
- It allows multiple users access to real-time information.
- It enables you to consolidate your data into a single location.
There's no denying that this integration benefits any WordPress site administrator looking for an efficient way of managing their customer's information. And because FireBox integrates directly with Zapier, you can set up all the necessary connections between WordPress forms and the Notion database within minutes.
Let's see how you can make this happen.
How to Create Notion Database Items from WordPress Forms
Let's dive into creating an opt-in email form displayed in a popup, which will automatically send form submissions into Notion every time someone fills in the form.
1. Install FireBox Pro
When creating an opt-in email popup that generates leads and boosts conversion rates, FireBox is your best bet; the optin' plugin doubles as both a form builder and popup builder. The most intriguing part is that you don't need coding skills to use it.
First, you must install FireBox Pro on your WordPress site if you don't already have it.

If you don't know how to install it, see our documentation on installing FireBox Pro for help.
You can easily upgrade from Lite to Pro if you already use the FireBox Lite version. However, after installing or upgrading to Pro, you need to activate your license to ensure you receive automatic plugin updates.
2. Create Your Form
FireBox allows you to create visually striking form popups with your target audience in mind. In addition, it offers various excellent customizable opt-in popup templates to help you get started quickly!
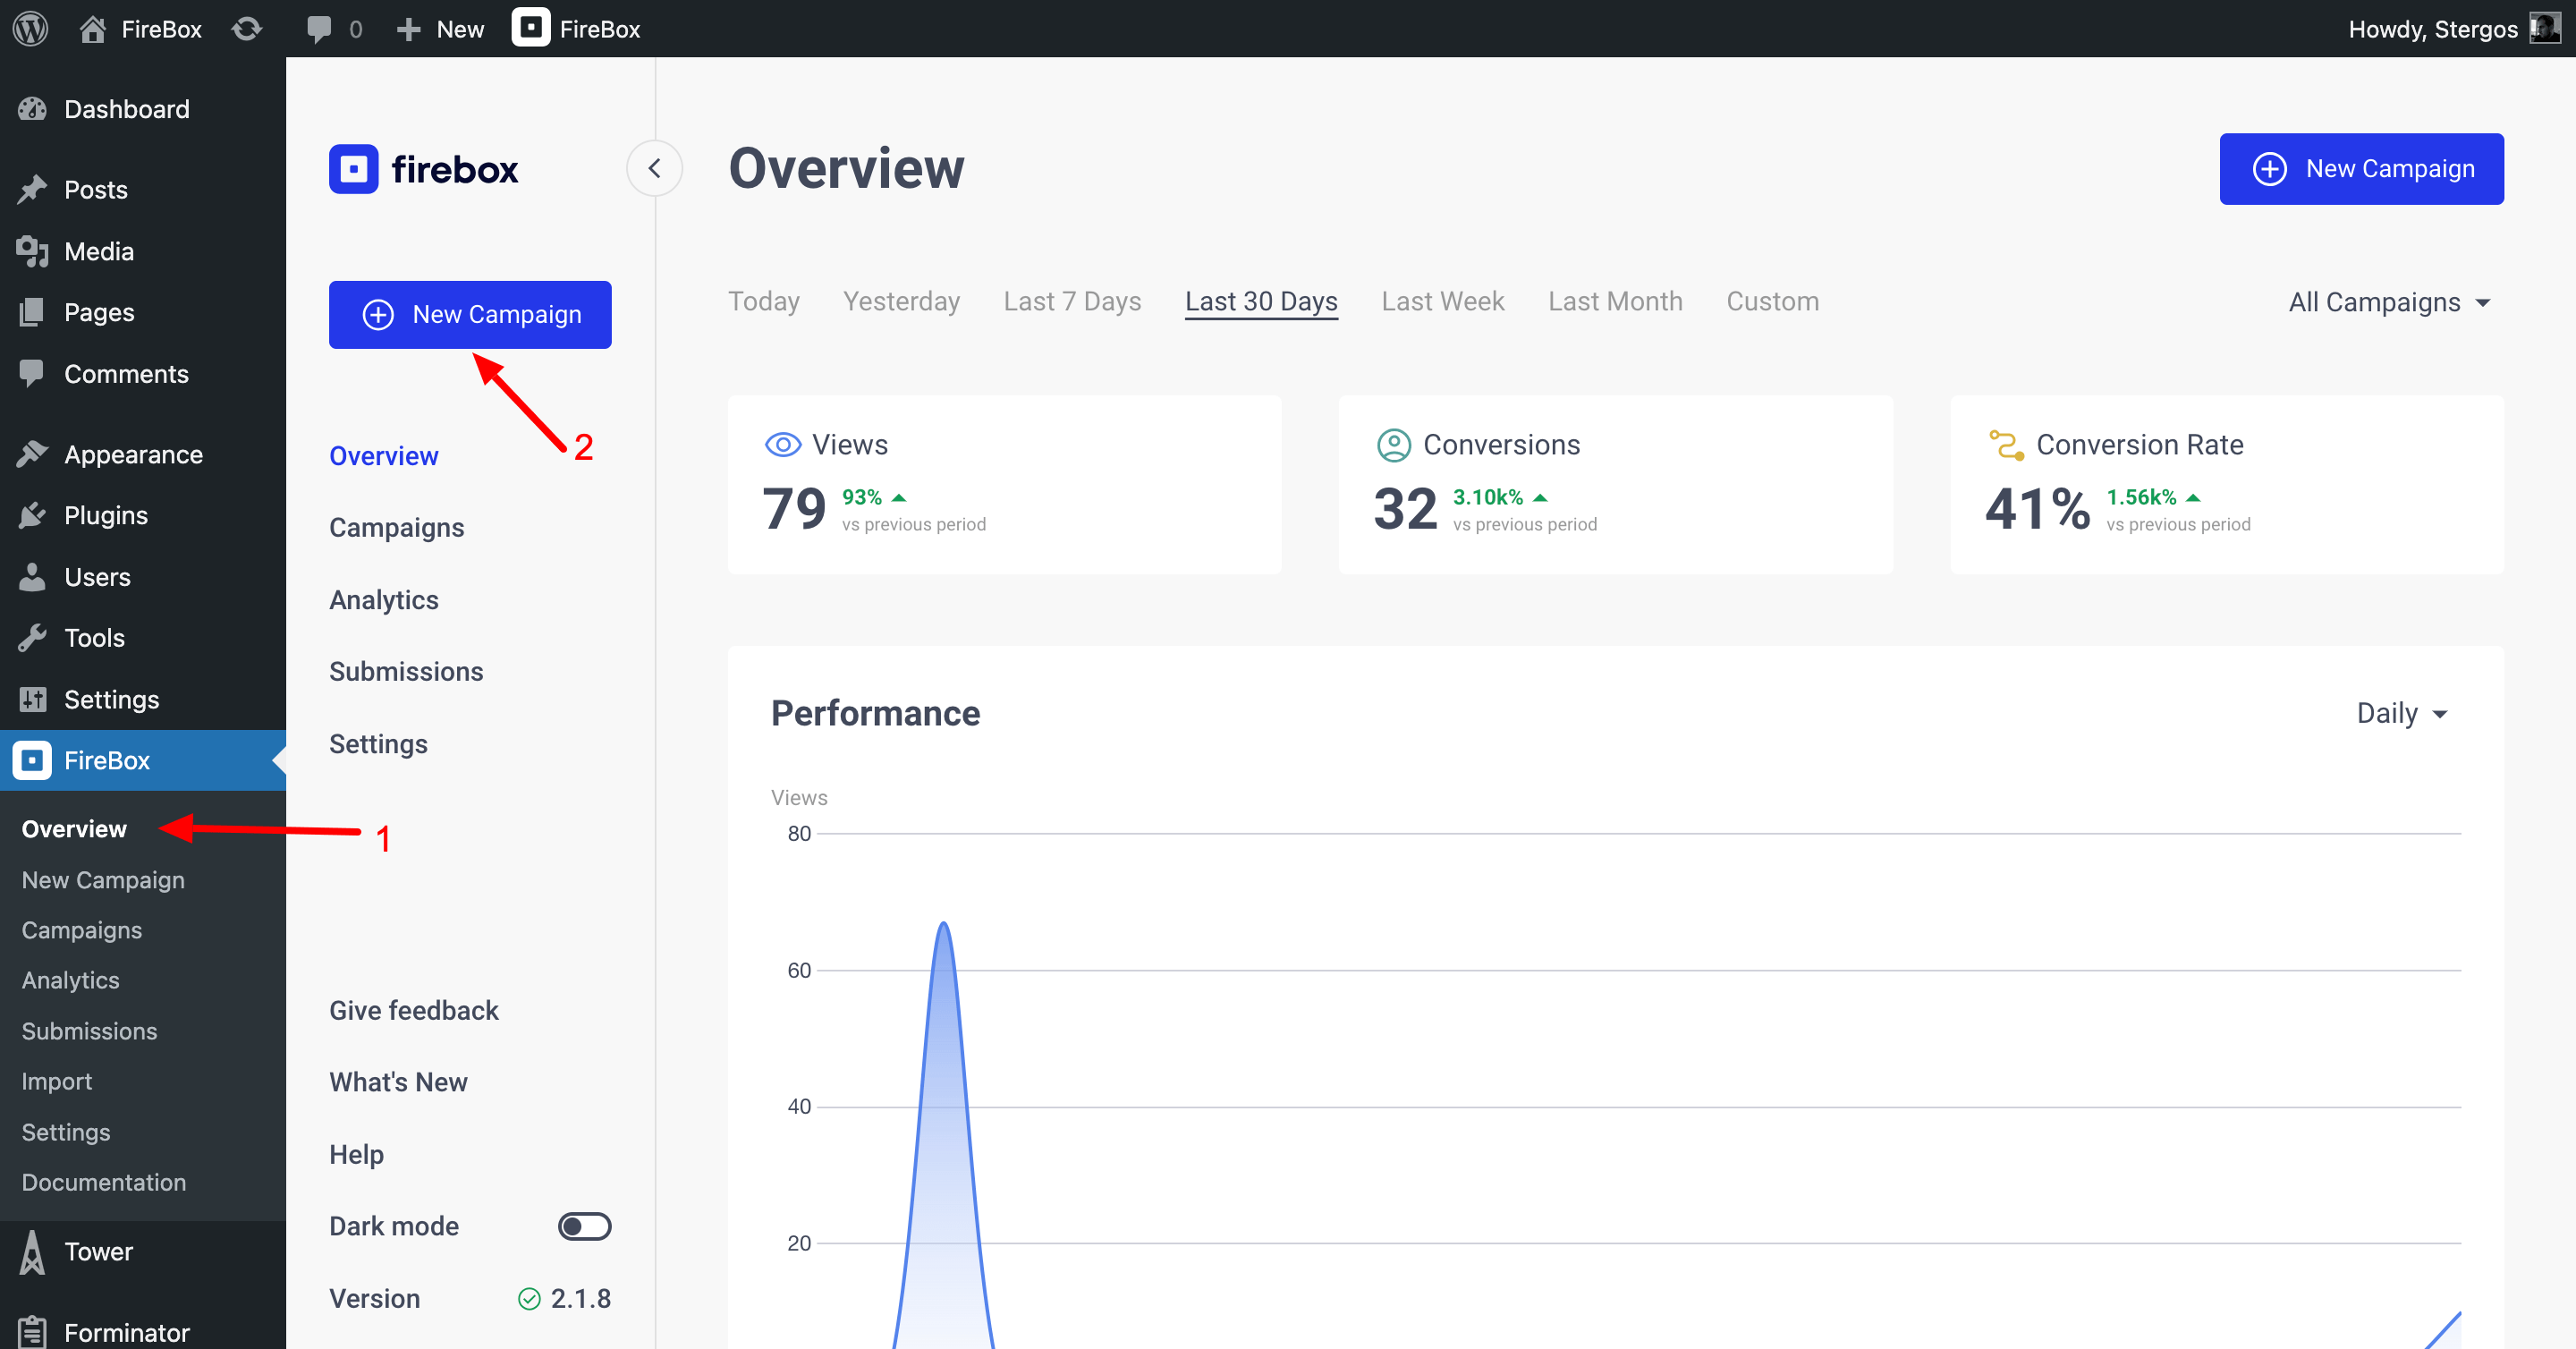
The first step to creating an opt-in form is to go to your WordPress dashboard and find the FireBox plugin. Next, click New Campaign to open the popup library to pick a popup template.
Our article How to add a Free Email Opt-in Popup to WordPress will take you through the steps to create your free email opt-in popup using FireBox. In addition, the guide includes instructions on how to customize the form fields, the design of the popup itself, the display conditions, and more.
3. Create a Test Submission
Once you're done creating your form, you need to submit a test entry. This will help to test our form integration in the next step.
FireBox utilizes the Block Preview, which allows you to preview any draft campaign on your site before you make it public and available to your users.
To submit a test submission, click on the preview (desktop) icon from the top right of the campaign editor and then Preview in new tab, as shown in the screenshot below.
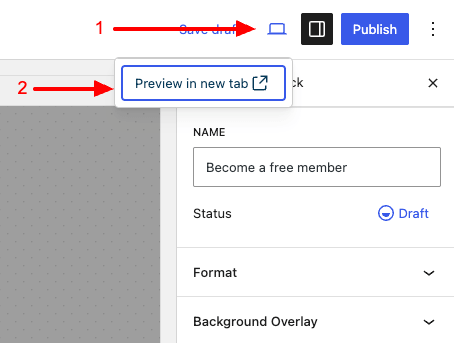
Then fill out your form and submit it.
4. Enable FireBox API
FireBox exposes a JSON-API that allows external apps to access form submissions through certain endpoints. This step is crucial for our integration to connect successfully. To enable it, follow the step below:
- Navigate FireBox > Settings > Advanced.
- Enable the JSON API option.
- In the API Key option below, enter a secret password to protect the API. The password will be used later to authenticate the connection with Notion.
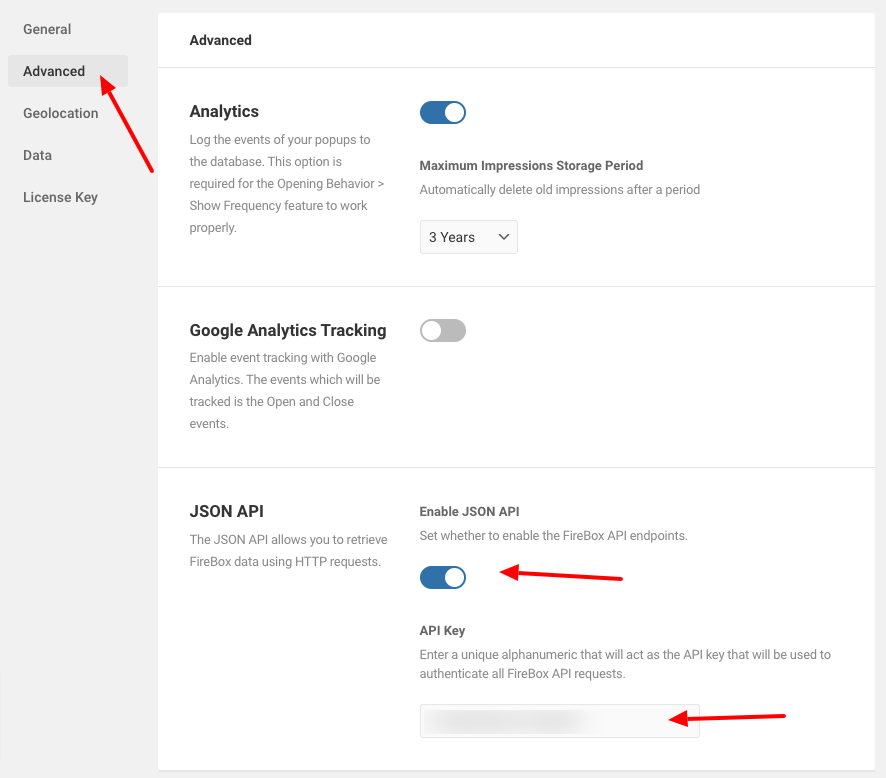
Finally, click Save to save your changes.
To learn more about the FireBox API feature, visit the How to use the JSON API help page.
5. Connect FireBox with Zapier
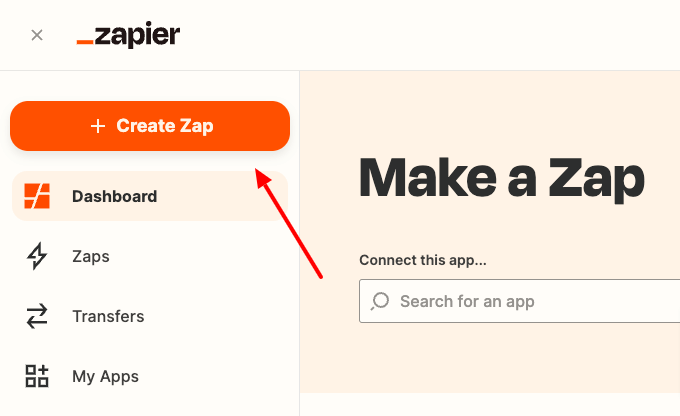
To connect Notion with FireBox, you'll need a Zapier account. Log in to your Zapier account and click Create Zap from the top left corner of your dashboard.
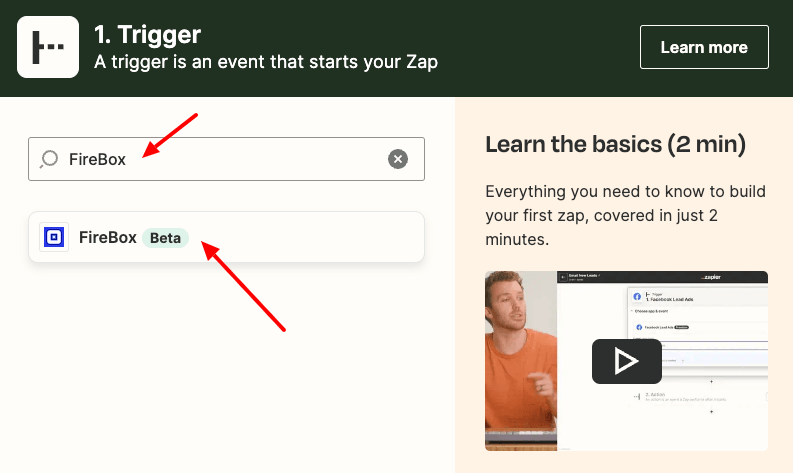
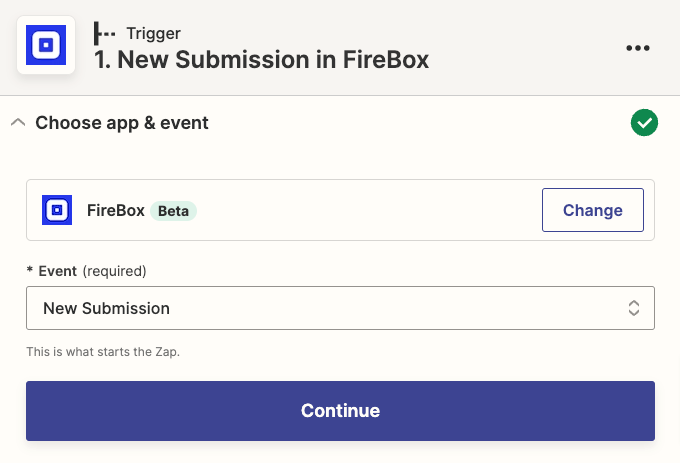
Then, search and choose FireBox as your trigger app.
Next, you’ll need to select the action that needs to take place to trigger your Zap. The only option for FireBox is New Submission, so go ahead and select it from the dropdown and click Continue.
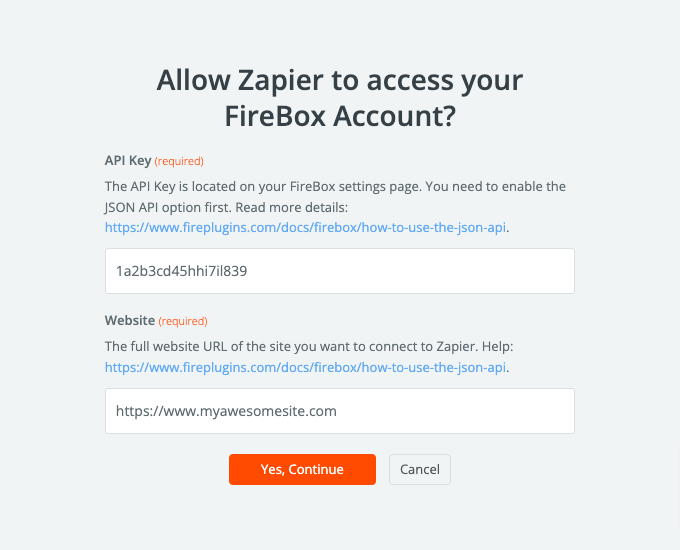
Now Zapier will ask you to log in to your FireBox account. Click the Sign in button.

This will open a popup window where you must enter your site’s URL and the FireBox API key you set in the Enable FireBox API section previously.
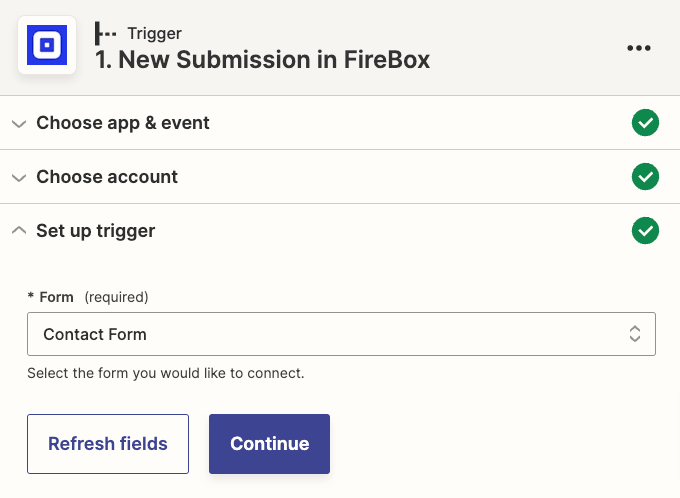
Next, choose the form you created in step 2 from the dropdown and click Continue.
At this point, Zapier will test your connection to make sure it’s working properly. Click Test trigger to begin.
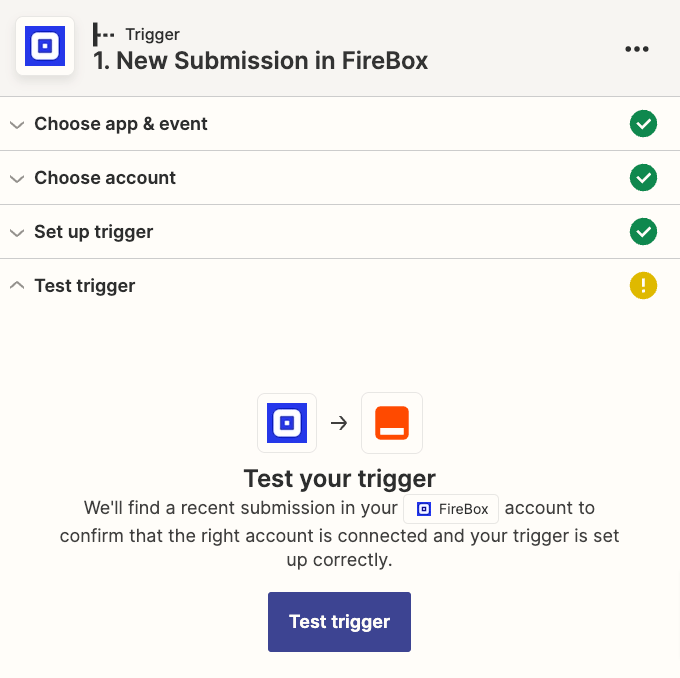
You’ll see your test submission and a success message if you've done everything right.
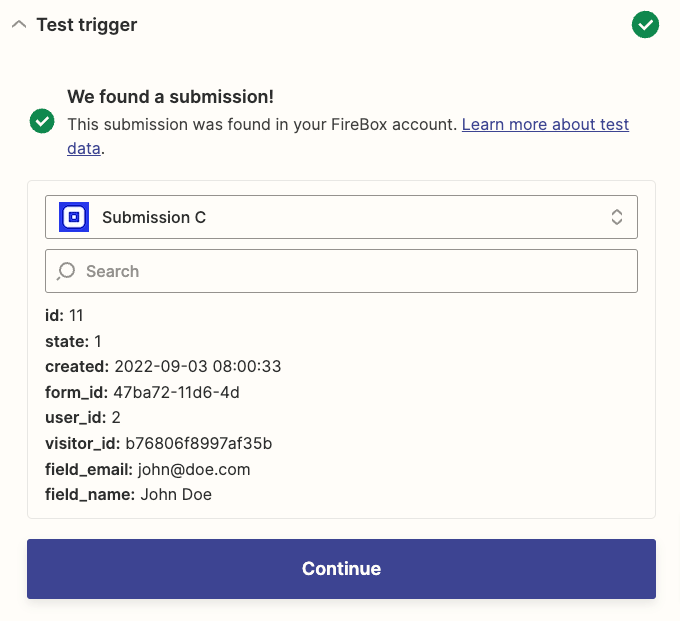
Click Continue to move on to connecting Zapier to Notion.
6. Connect Zapier to Notion
Now that you’ve connected the FireBox plugin with Zapier, it’s time to connect Zapier to Notion.
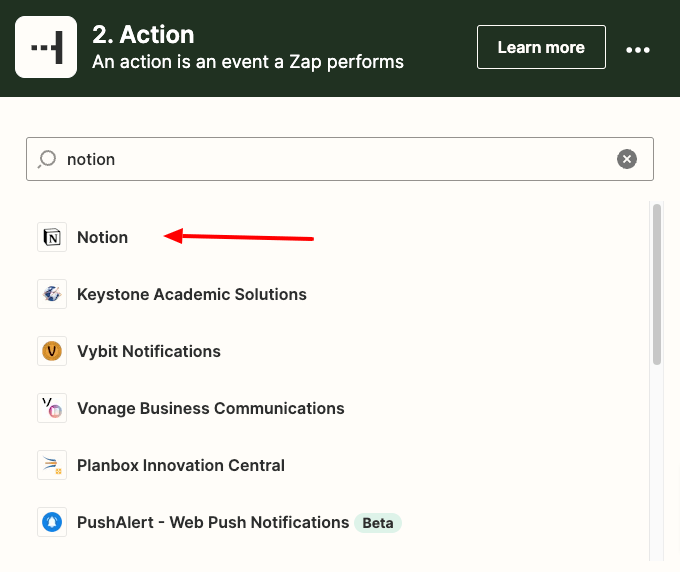
The first step in syncing to Notion is to choose Notion as the action app. Enter Notion in your search bar, and then click on it when it appears.
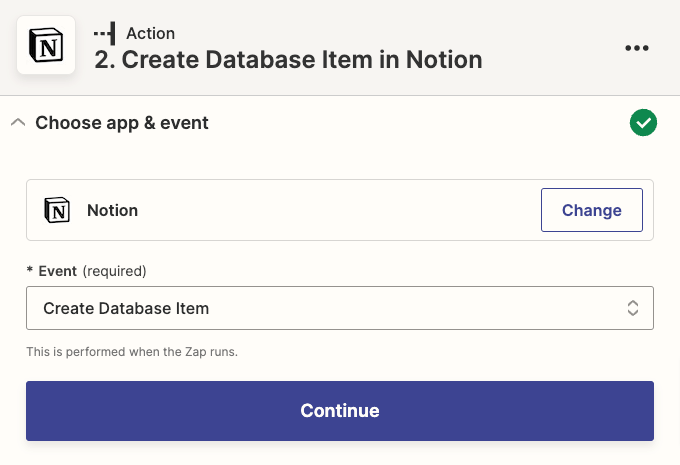
Then, you’ll be asked to select a Notion action. To create a new database item in Notion from WordPress, choose Create Database Item and click Continue.
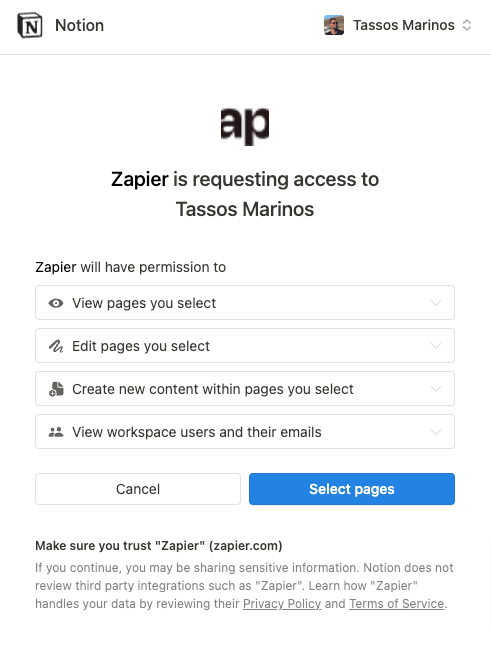
Now you need to connect your Notion account to Zapier. Click the Sign in button again.

In the popup window, click Select Pages to allow Zapier to access your Notion account.
Next, select the page representing the database to which you would like to add the items and click Allow access.

After the popup window closes, click Continue again.
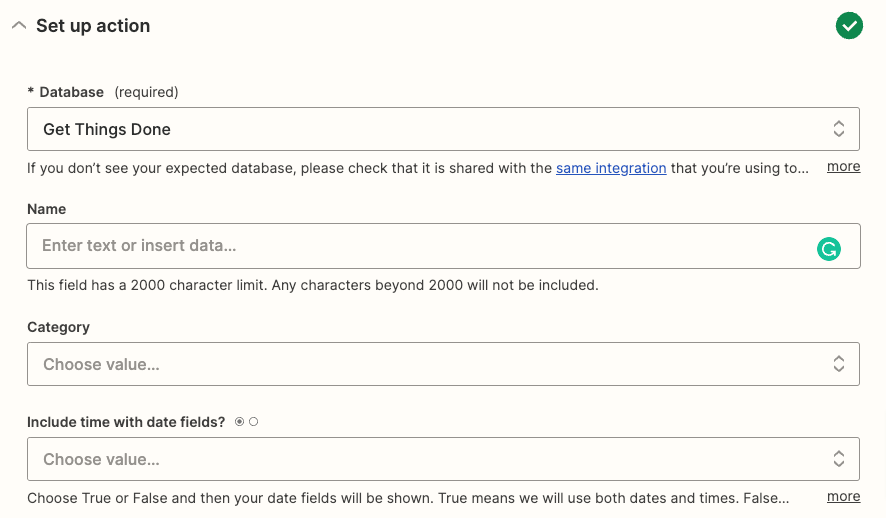
Next, you must set up the action. You will be presented with the Notion database properties you need to fill in to create a new database item whenever someone submits your form. Once you’ve mapped all the fields from your form that you want to send to Notion, click Continue again.
Now Zapier will test your Notion connection just like it did for FireBox. Click on Test action to begin. If you’ve done everything right, you’ll see a success message.
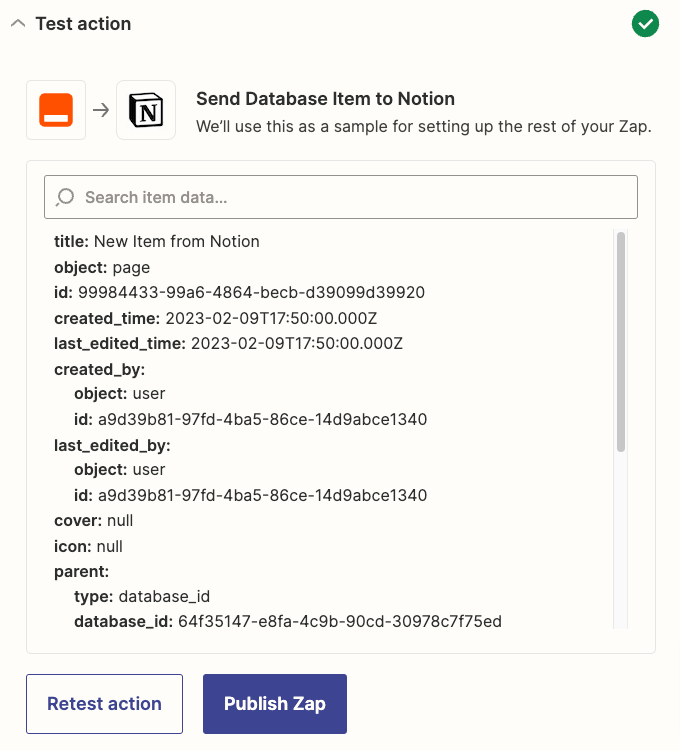
Before you close Zapier, make sure to publish your Zap as well. Click Publish Zap. If everything goes right, you will see a message like in the screenshot below.

Finally, don’t forget to go back to your WordPress site and embed your form in a blog post, page, or widget. That way, customers can find it and fill it out easily.
Conclusion
There you have it! You now know how to integrate your WordPress forms with Notion. When someone completes your form, a new item will be added to your database in your Notion account.
Do you want to grow your business by collecting leads with optimized forms? FireBox helps you build custom lead forms to collect information from potential customers. Give it a try now!
Get FireBox for Free
Enter your WordPress website URL to install instantly.
Trusted by 9,000+ users
0 Comments