


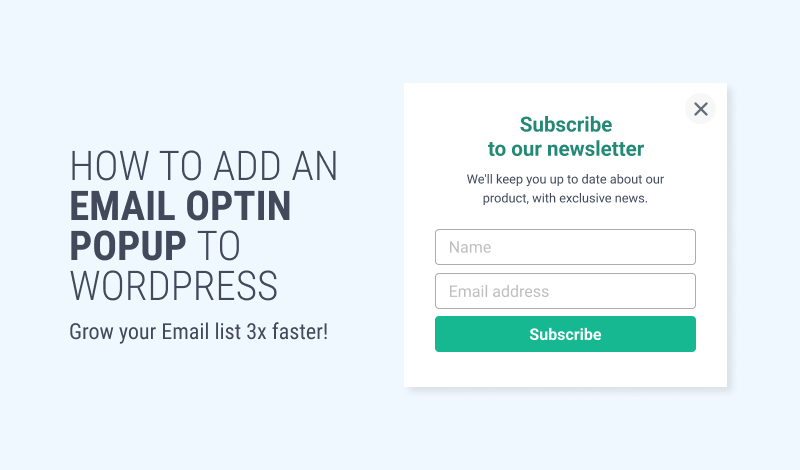
Building and growing your business requires maintaining seamless communication with your customers. As a business owner, your goal is to retain old customers and gain new ones. However, this doesn't happen by chance. You can achieve this by mapping out an effective email marketing strategy that includes using a free email opt-in popup on your WordPress website.
A surefire way to fuel customers' interest in your brand is to add a free email opt-in form to your WordPress website. With an email opt-in form, you can easily grow your email list by collecting your website's visitors' information while offering to supply them with regular informative and educative content.

Aside from these, email lists also give you a more personal platform to project your brand and promote your products and services to your website’s visitors.
In this article, we'll explain what email opt-in is, why it's important, and why you should use a popup for your email opt-in. We also have a dedicated guide on how to create a newsletter popup in WordPress. We'll also show you how to add a free email opt-in popup to your WordPress website using a WordPress opt-in plugin.
Why Your WordPress Site Needs an Email Opt-in Popup
An email opt-in is a marketing strategy that allows you to seek the permission of customers to communicate with them about your business. An email opt-in form, also known as an email signup form, is the main feature used to implement this strategy on websites.
When someone visits your website and fills in an email opt-in form, it means they're interested in your brand and the products and services you offer. It also indicates that they consent to get emails from you.
With the rapid rise of spam messages, different countries have laws that regulate how emails are sent and received. This is why you must seek your clients' consent before sending them emails.
Opt-ins can be displayed in different ways: popups, slide-ins, bars, etc. Displaying your email opt-in forms in a popup makes a lot of sense because your opt-in form appears at strategic locations on your website. Opt-ins in popups would usually show up as soon as a visitor opens your website, when they scroll to the bottom of any page or when they’re about to leave. This increases the probability of conversions.
Growing your email list with email opt-in is one of the most beneficial strategies you can adopt to boost your eCommerce business. With email opt-in forms, you can:
- Access new business opportunities.
- Increase your website traffic.
- Promote more personal relationships with clients.
- Establish a customized communication route with your clients.
- Get feedback from your website visitors.
- Build your business for the long term.
A more structured way to make your email opt-in effective is using a WordPress plugin. WordPress plugins give you a seamless experience while creating and testing opt-in forms. They're also packed with intuitive features that let you customize your opt-in forms without any coding skills or even create a contact form.
You can't go wrong with growing your email list when you use the right opt-in form plugin. In the next section, we'll dive into details about a feature-rich plugin that's perfect for your eCommerce website.
Best WordPress Email Opt-in Popup Plugin
When it comes to creating an email opt-in popup that generates leads and boosts conversion rates, FireBox is your best bet. The optin plugin doubles as both a form generator and popup builder. The most intriguing part is that you don’t need any coding skills to use FireBox.

This feature-rich email opt-in plugin allows you to create visually striking opt-in form popups with your target audience in mind. FireBox also offers several customizable templates that can help you create opt-in forms in no time.
FireBox also comes with many other rich features. Let’s take a look at some of them.
- An intuitive and easy-to-use editor that allows for seamless creation and customization of opt-in forms and popups.
- Strategically positioned popups at different locations on your website.
- Variety of popups like scroll popups, floating bars, slide-in popups, etc.
- Conversion rate analytics to help you know which popups are more effective in boosting conversions.
- Compatibility across different kinds of devices.
- Targeted popups based on visitors' locations, devices, or URLs.
- Frequency settings regulate how much of a popup visitors get to see.
- Allows you to embed forms from other form builders.
- Smart triggers that display user-centered popups.
- Integration with WordPress plugins like WooCommerce, Contact Form 7, Gravity Forms, Ninja Forms, etc.
How to Create a WordPress Email Opt-in Popup for Free
As we mentioned earlier, the easiest way to create a WordPress email opt-in popup is to use a WordPress opt-in plugin. In this section, we'll take you through the steps to create your free email opt-in popup using FireBox.
Step 1: Create a New Popup
The first step to creating your first WordPress email opt-in popup is to create a generic popup. The good thing is that FireBox helps you to achieve this seamlessly. If you don’t already have the plugin, then you’ll have to start there.
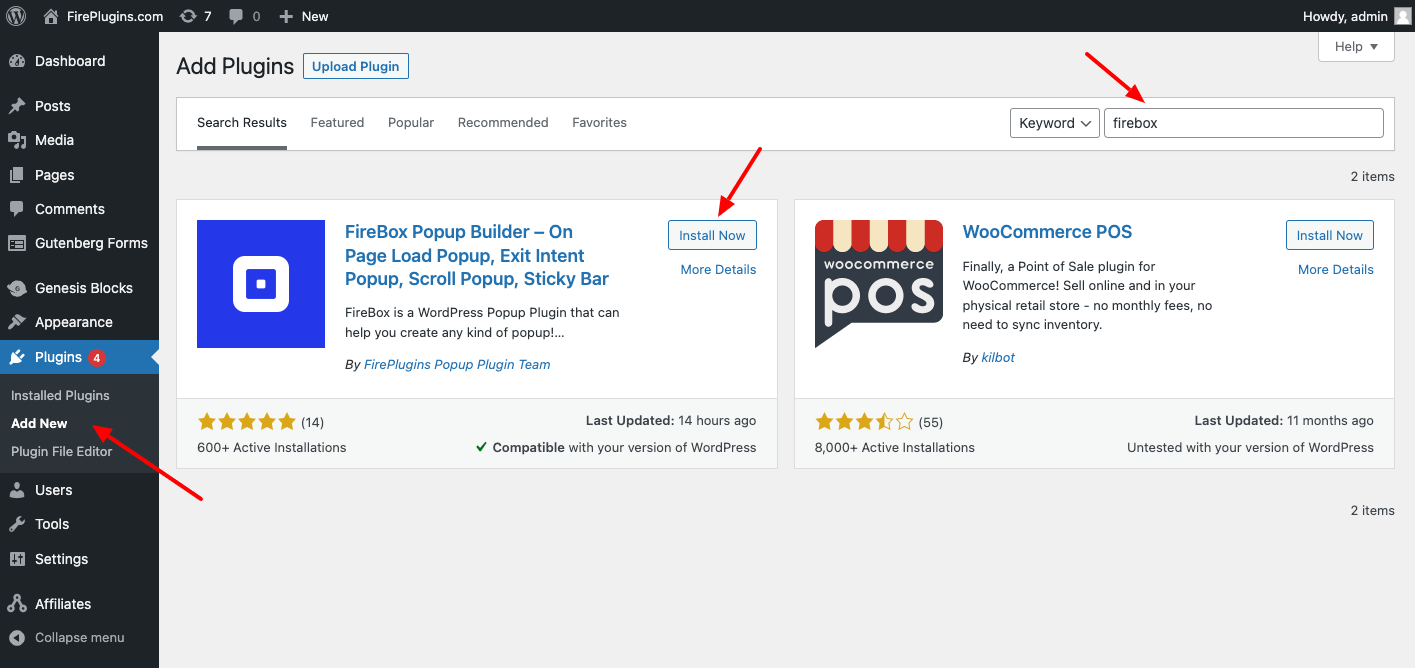
1. Install and Activate FireBox
First off, you need to install the FireBox plugin. In your WordPress dashboard, go to Plugins→Add New. Type ‘FireBox’ in the search box on the top right.
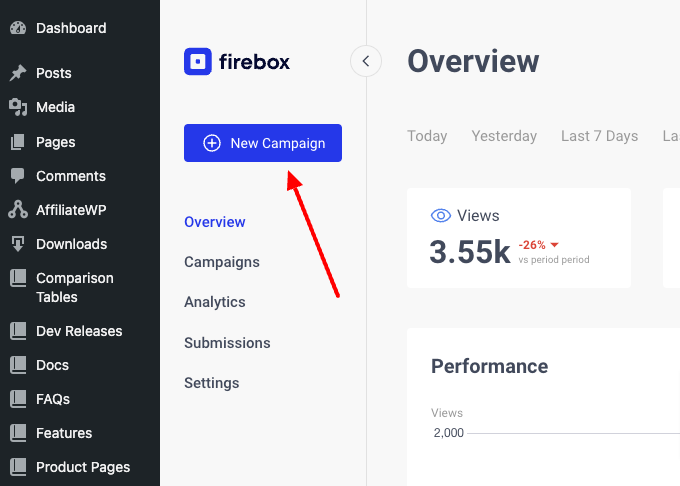
2. Create a New Email Opt-in Popup Form
Now that you have the FireBox plugin installed, let’s look at how to create your first popup. Head to the FireBox plugin in your WordPress dashboard and click New Campaign, as shown in the screenshot below.
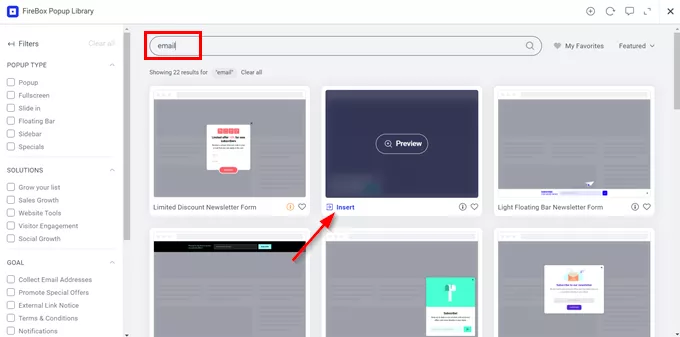
You will see a dialog with lots of pop-up layouts appearing. FireBox has a big collection of ready-to-use popup templates to help you get started.
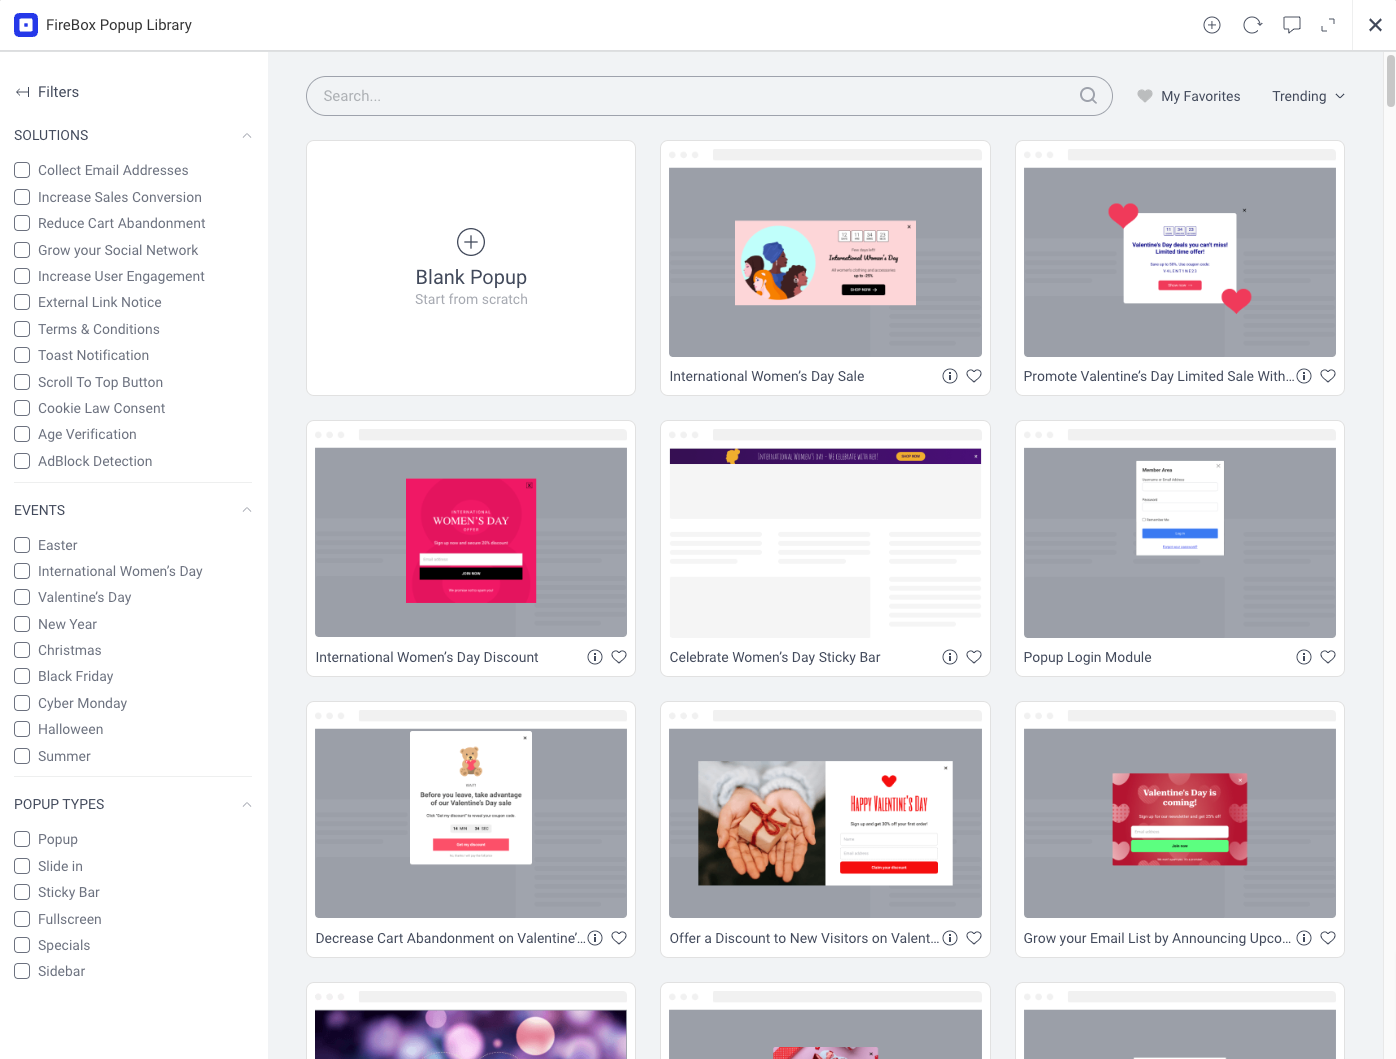
In the Popup Library, type "email," scroll down to select a preferred template of your choice, and click Insert.
Once the form editing page loads, the next thing we need to do is set a name for our form so that we can distinguish it later. To change the name, click on the box and insert the name of your choice.
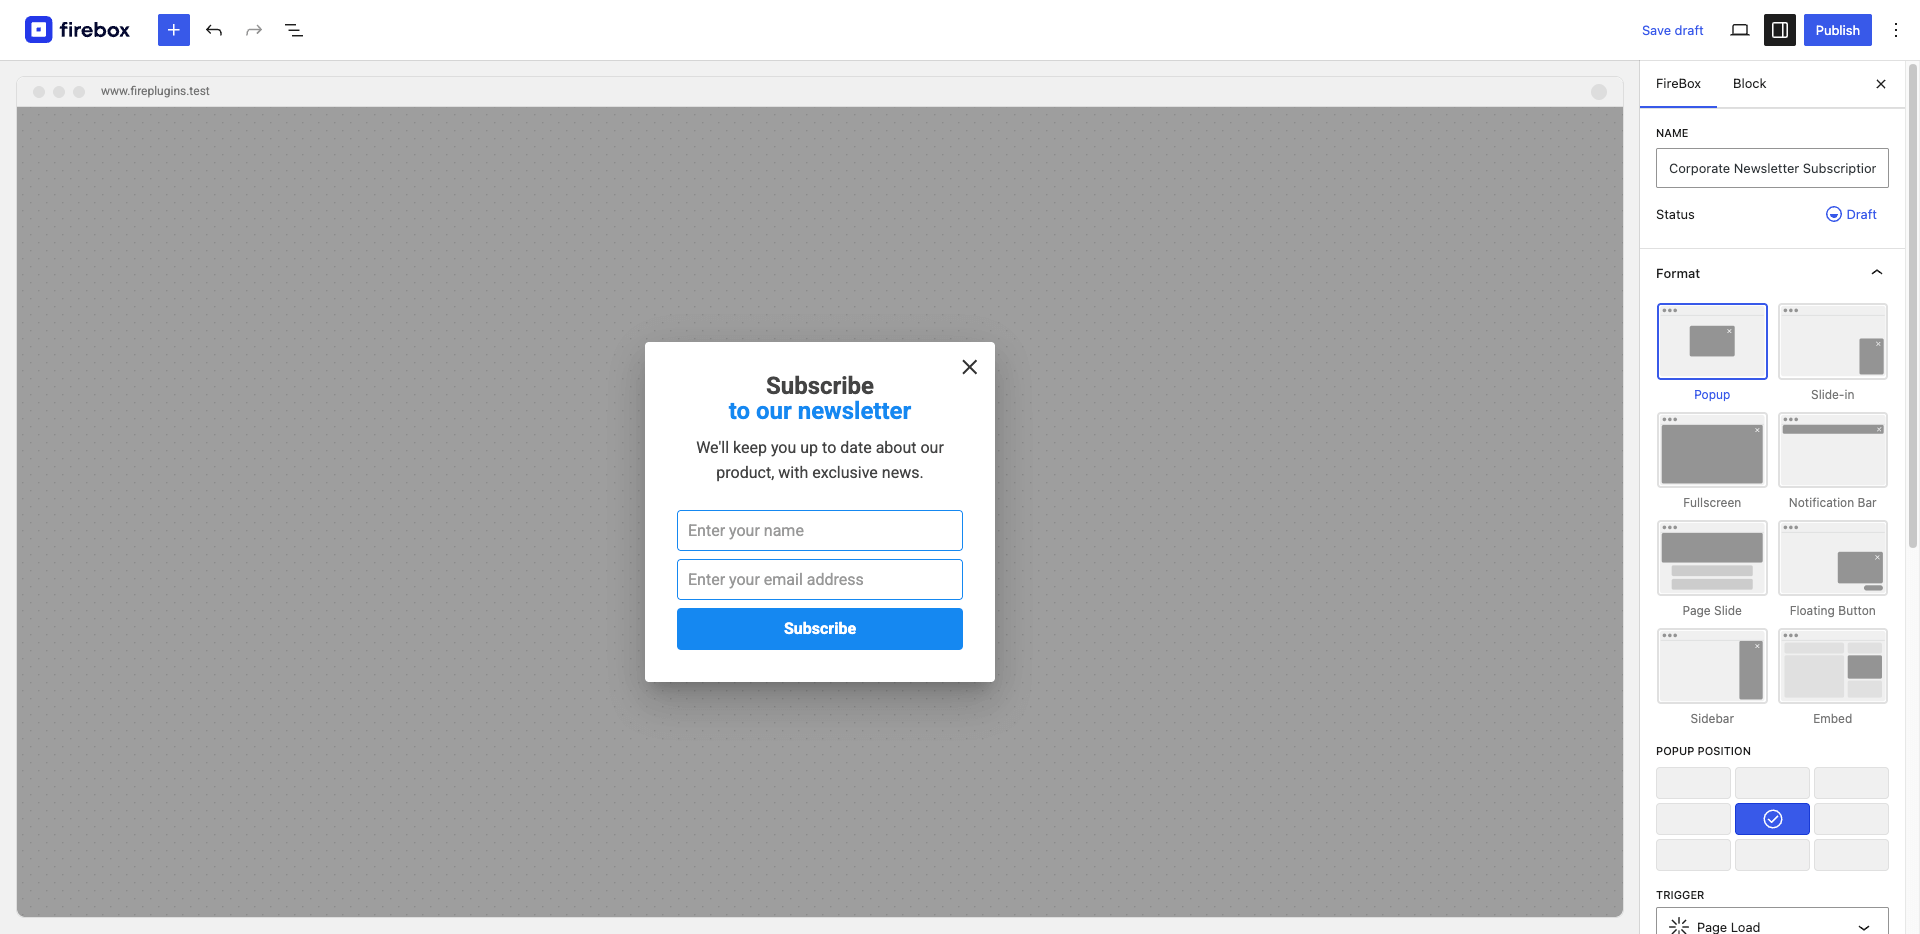
3. Customize the Popup/Form
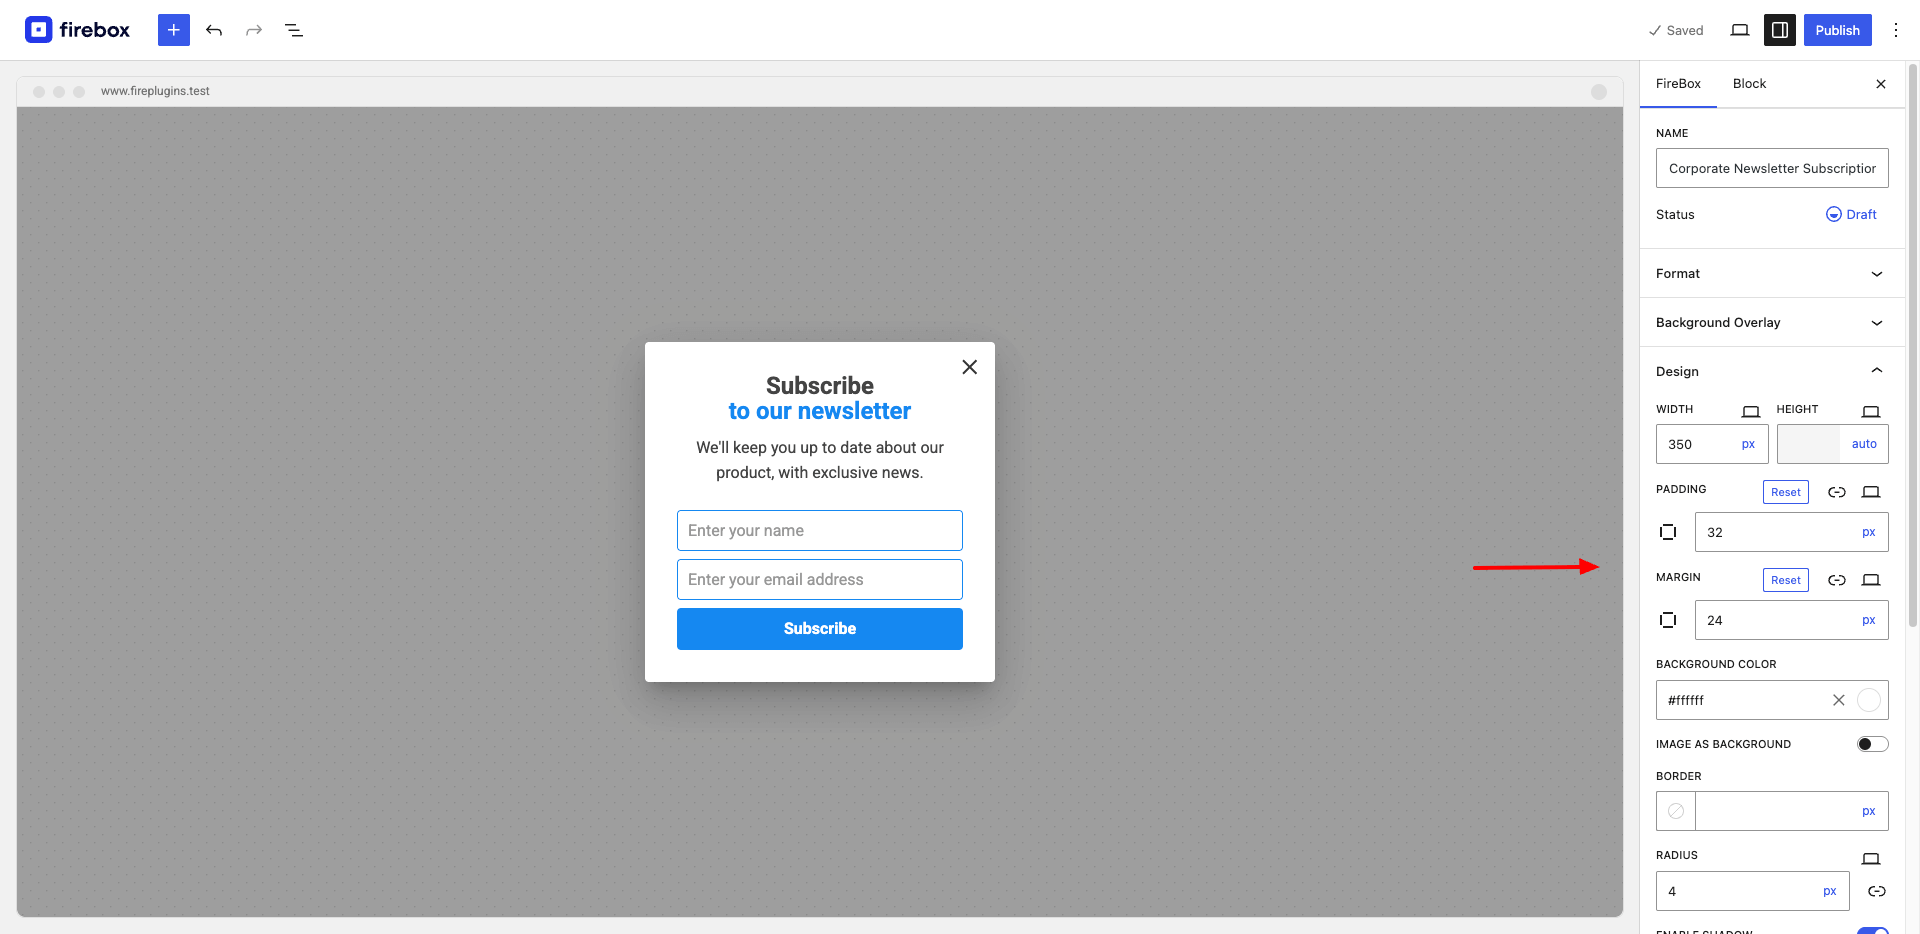
You can optionally customize the form by renaming the fields and labels and changing the popup's colors, padding, and size in the Design panel. You can also add animations and background images.
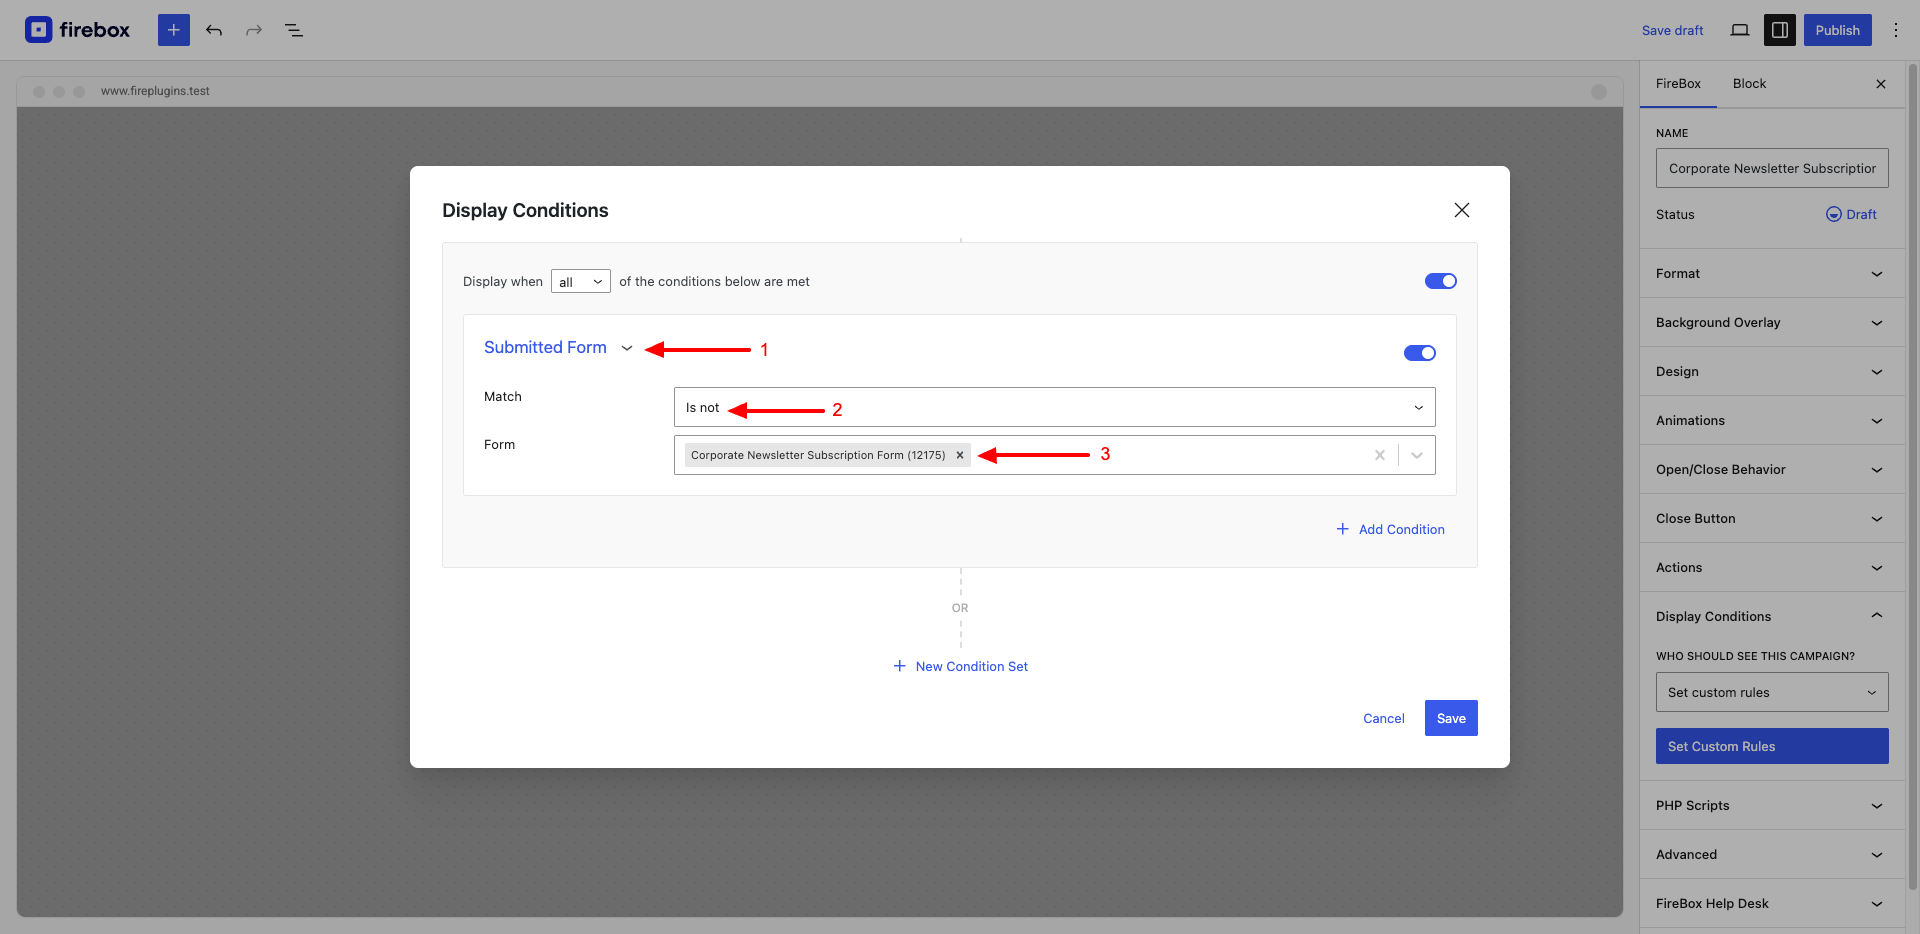
4. Set the Popup Display Conditions
Next, we'd click on the Display Conditions panel. This helps us to control when and where the popup will show up. Here, we can set the popup to appear when visitors access specific menu items, URLs, contents, and pages. We can also schedule the popup to display based on the location or devices of visitors.
For this use case, we're interested in the condition FireBox > Submitted Form. If we want to hide the campaign from users who have already submitted our form, we will need to set "Match" to "Is Not", and select the our form from the dropdown list. That way, existing subscribers don’t get to see the campaign.
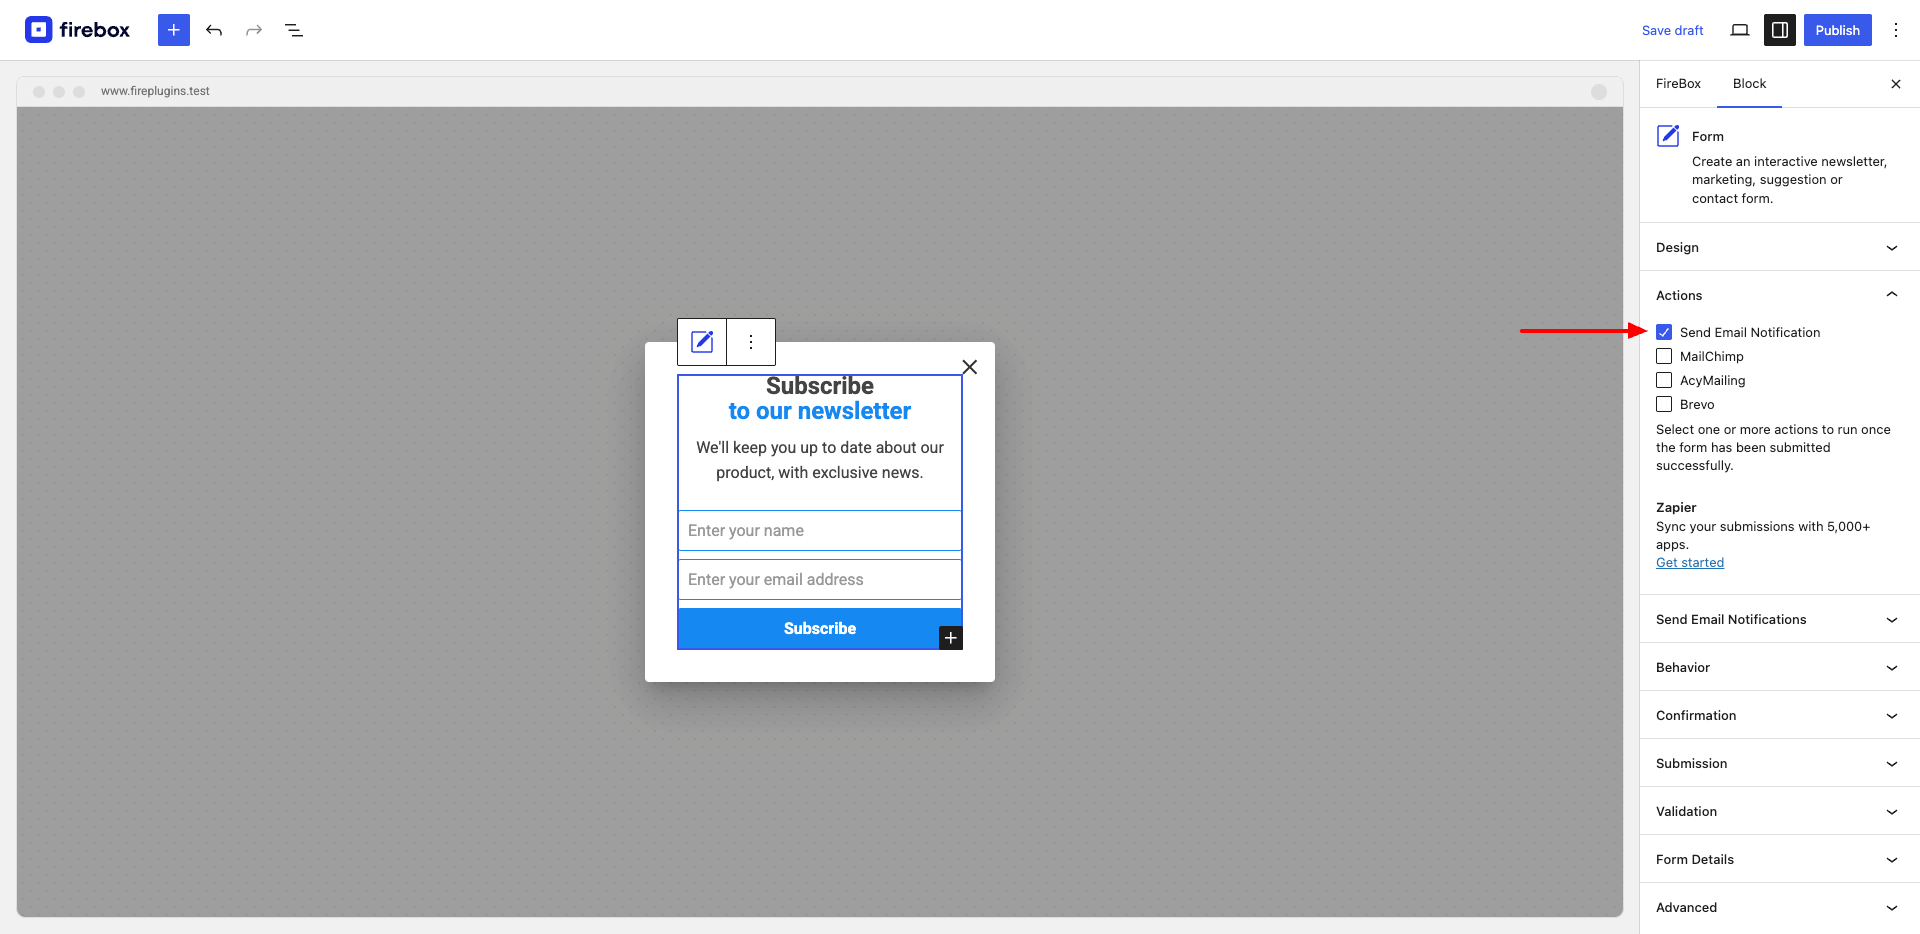
Step 2: Setup Auto-Responder to New Subscribers
To send an automatic email to the submitter or the Administrator, go to the form block settings at the right and go to the Actions Panel > enable "Send Email Notification".
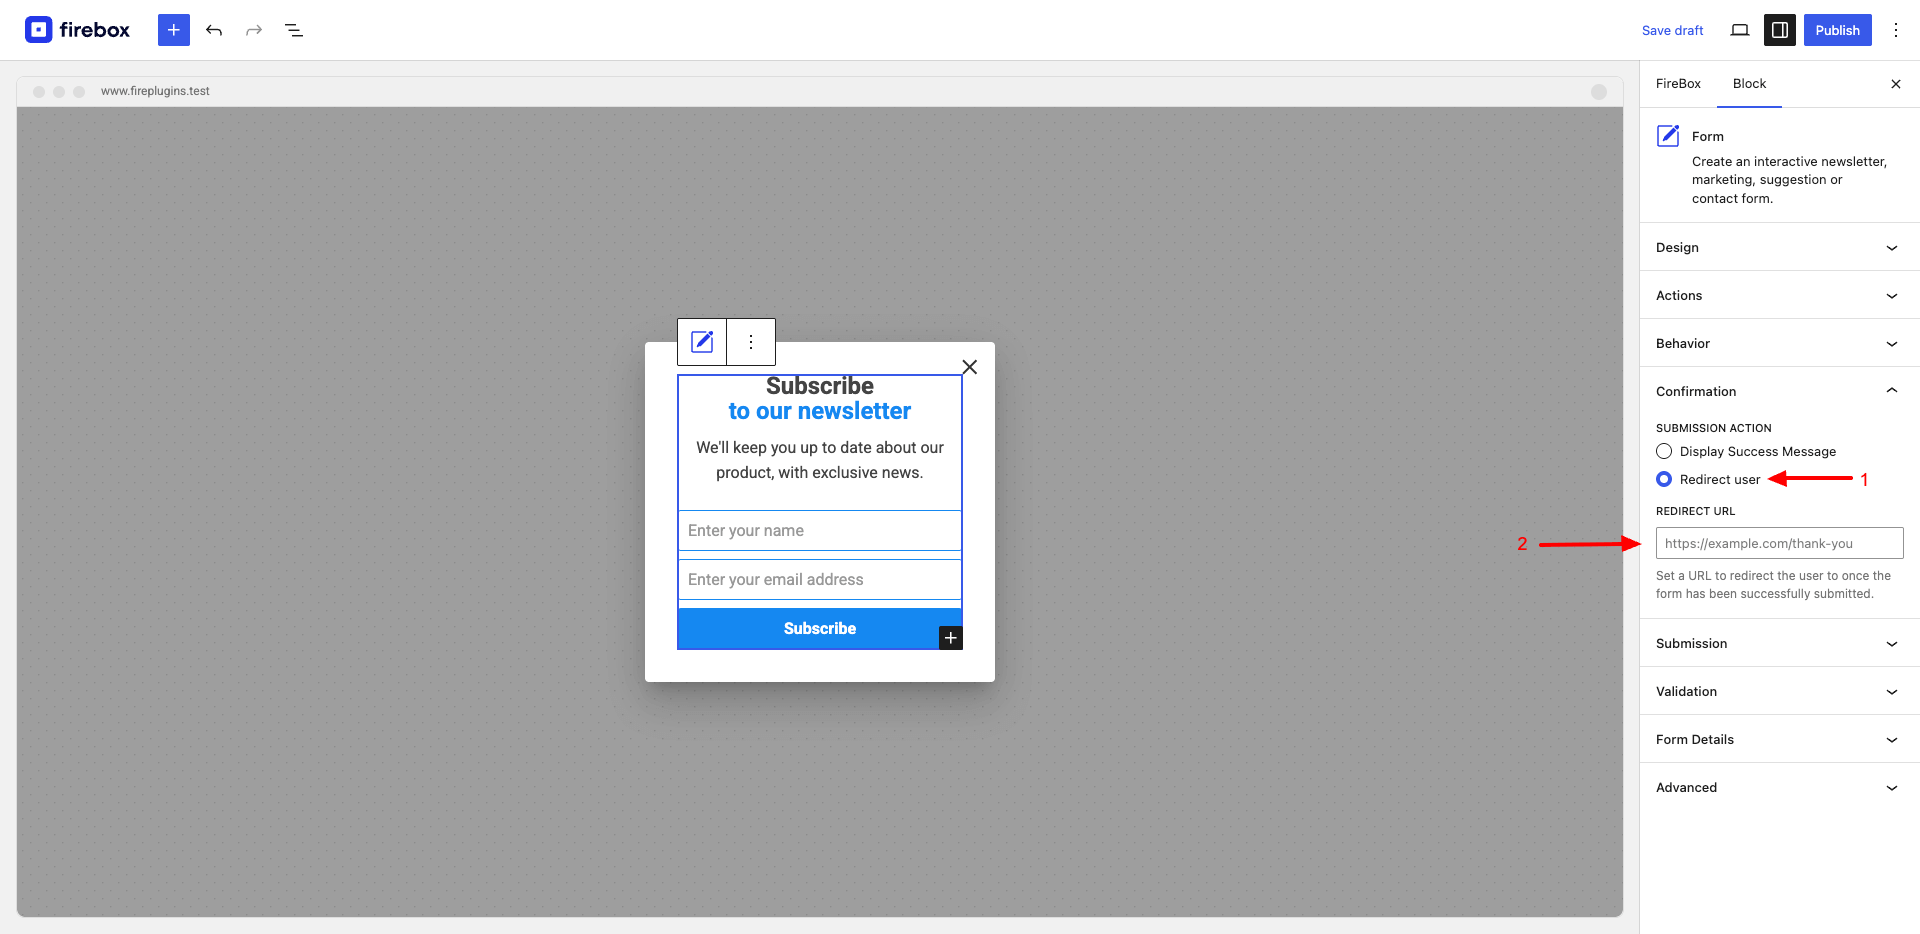
Step 3: Set the (Success) Thank-You Message
To set the “Success” message, click on the form to open up the block settings at the right and go to Confirmation Panel > Submission Action > Display Message.

Optional: You can also redirect the user to another page instead of displaying the success message in the form.
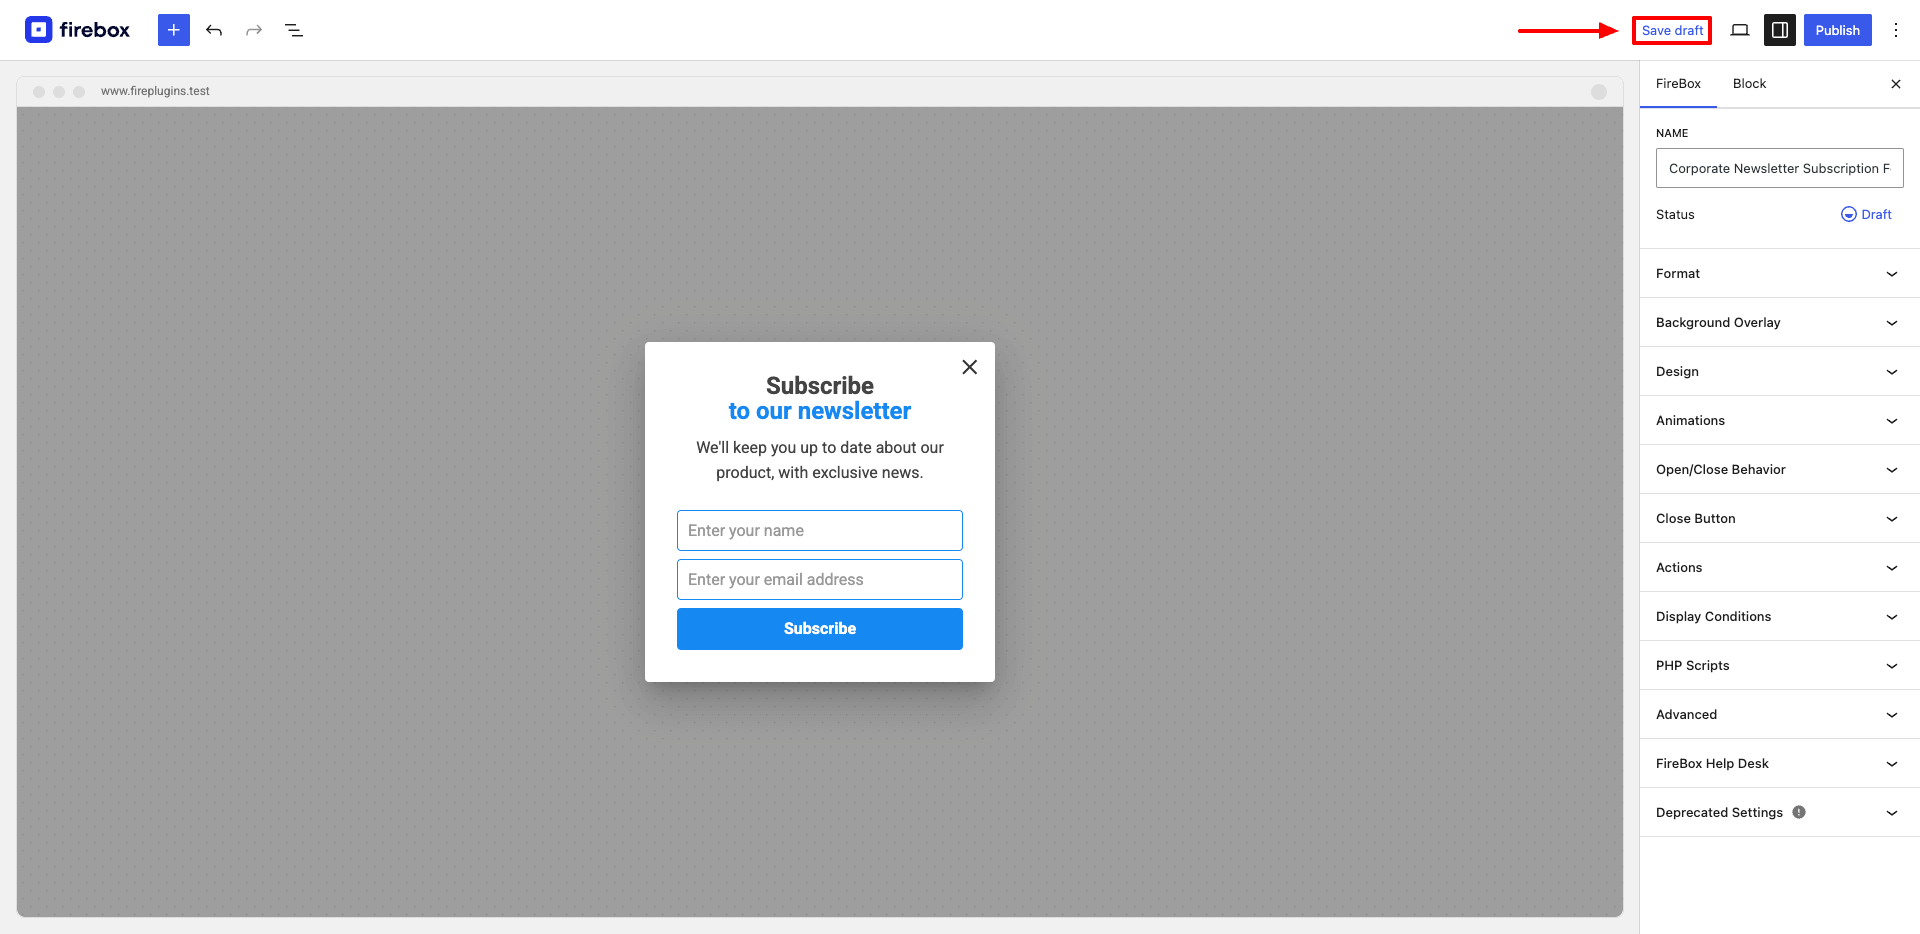
Note: For your form to appear on the forms list, we must first save your popup. Once you're through with all the modifications, click Save Draft at the top right corner of the page.
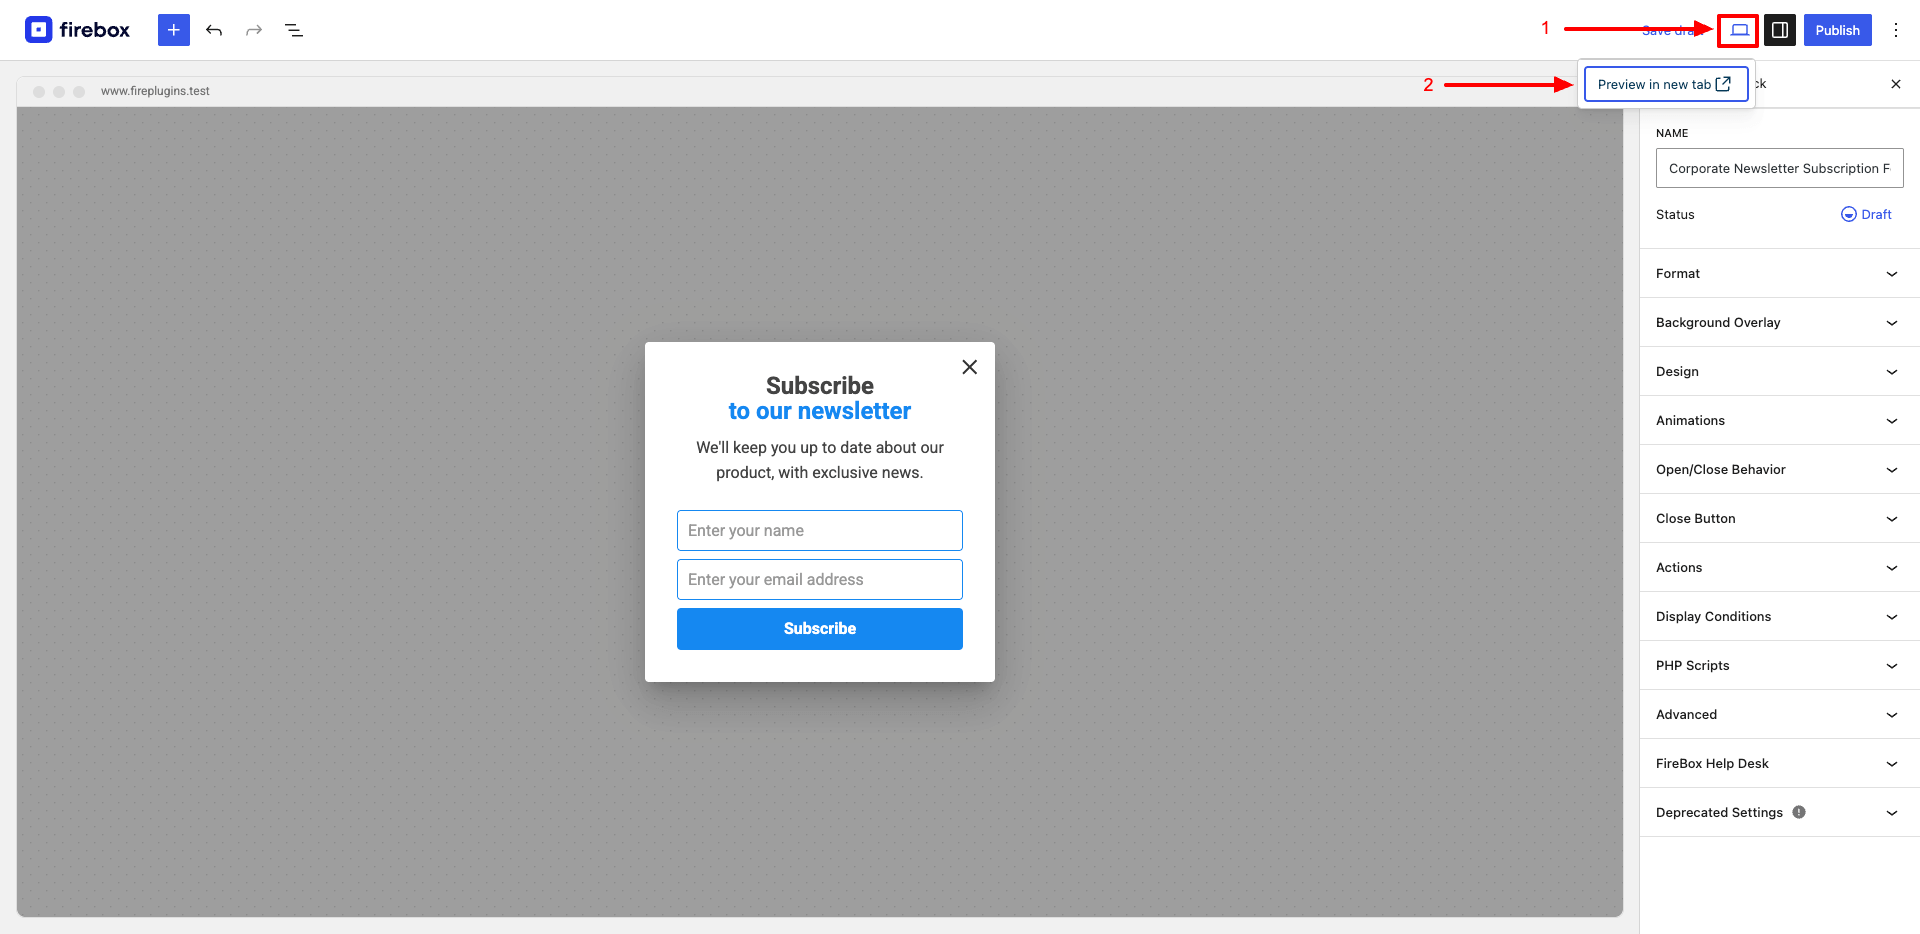
You can preview the popup to see how it will appear on the front end by clicking on the desktop (preview) button > Open in new tab:
Step 4: Connect to Your Email Marketing App
Once you're done setting up your form, the next thing to do is connect it to your email marketing app. By default, all emails will be stored in your site's database. But you can choose to connect the form to popular email marketing apps like MailChimp, and Brevo.
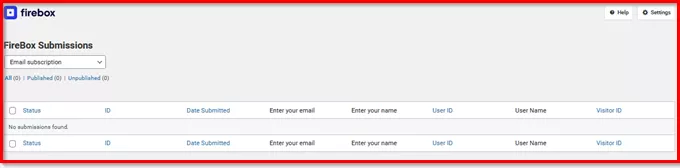
Step 5: Manage Submissions
Finally, you want to know details about submissions made through your opt-in form. To manage form submissions, go to FireBox → Submissions, and a list of existing submissions will appear.

You’ll be able to switch between multiple popups on your site to manage or export their submissions.
Start Generating More Leads With Email Opt-in Popups Today!
Generating more leads and boosting conversion requires a solid communication system with your potential and existing customers. By using email opt-in forms, you can collect details about your website's visitors with their consent. That way, you get to build your email list steadily and maintain communication with customers.
WordPress opt-in plugins make it easy to build your email opt-in forms. And based on our testing, we’ve recommended FireBox because of its intuitive features. With FireBox, you can access several customization options needed to create the right kind of email opt-in popup for your target audience.
In this article, we’ve shown you why you need email opt-in form popups. We've also guided you through the steps required to add a free email opt-in popup to your WordPress website using Firebox.
We hope this article offers all you need for the seamless creation of your opt-in popup.
If you have any comments or questions, kindly leave them in the comment section.
Get FireBox for Free
Enter your WordPress website URL to install instantly.
Trusted by 9,000+ users

0 Comments