


When people visit your website, their goal is to find information, products, or services. Once they find what they need, they exit your site and probably forget about it. But as a growth-minded business owner, you know that letting them go that way equals losing potential leads and conversions.
You need to keep your site's visitors hooked with something that will imprint a memory of your brand in their minds. This includes keeping them abreast of what's going on with your brand and your new products and services and providing them with helpful educational and informative content.
This is where WordPress Mailchimp subscribe popup forms come in. A MailChimp signup form is a surefire tool to grow your mailing list and keep in touch with your website’s visitors.
This article will explain why MailChimp is your go-to email marketing tool. We’ll also show you the benefits of adding a WordPress MailChimp popup to your site and how to create one using a WordPress popup plugin.
Why Build an Email List With Mailchimp?
The goal of building an email list is to have a structured platform that helps you reach out to your users and receive feedback. You must use quality email marketing tools to ensure this communication cycle is smooth.
Mailchimp is a leading all-in-one email marketing platform that caters to all your email contact needs with customers and other business stakeholders. With Mailchimp, you get to send about 10,000 emails to a maximum of 2,000 subscribers each month for free. It also offers subscription plans where you need to send more emails or reach more subscribers than the free plan can cater to.

In addition, Mailchimp provides simple automation solutions that are useful for expanding your online business. It also offers analytical tools that help you evaluate the effectiveness of your email marketing strategy. One of Mailchimp’s most impressive features is that it doesn't require any software download or installation because it is web-based. This means you can easily access Mailchimp on any web browser.
You can achieve more significant results with your email marketing when you embed Mailchimp in WordPress.
4 Benefits of Adding a WordPress MailChimp Popup to Your Site
Using Mailchimp signup popups has capabilities to grow your customer base and business. If you're still wondering what benefits WordPress Mailchimp popup offers, you must check out the four highlighted below.
1. Seamless user browsing experience
The best way to get maximum results with your signup form is to ensure visitors can contact you or subscribe to your website from any page. Moving to another page to locate the contact button can be distracting and limit the number of leads you get. But with a WordPress Mailchimp popup, you have nothing to worry about.
2. Grow and organize your mailing lists
Mailchimp helps you collect visitors' information and sends them to your Mailchimp account. With your Mailchimp account, you can easily analyze and sort out all the email addresses. That way, you can create different contact list segments and reach out to each segment with the relevant emails.
3. High conversion rates
Popups have very high conversion rates. Their average conversion rate is 11.09%, which is relatively higher than that for similar signup form display options. So, using a WordPress MailChimp popup on your website is a powerful step to skyrocketing your conversions.
4. Maintain contact with your website visitors
A growing email list gives you several opportunities to reach out to your website visitors. You can easily give them updates and irresistible offers when they subscribe to your website. This keeps them coming back to your website and consequently boosts your sales.
Using a WordPress MailChimp popup allows you to grow and organize your mailing lists, allow website visitors to enjoy their browsing experience, reach out to them and receive feedback, and ultimately grow your revenue through quality conversions.
Let's move on to talking about how you can add a WordPress MailChimp popup to your site.
How to Create a WordPress MailChimp Popup
If you want to create a functional MailChimp popup for your site, FireBox is your go-to WordPress MailChimp plugin. With FireBox’s multiple customizable templates, you can create MailChimp signup forms and build irresistible popups to your website's visitors.
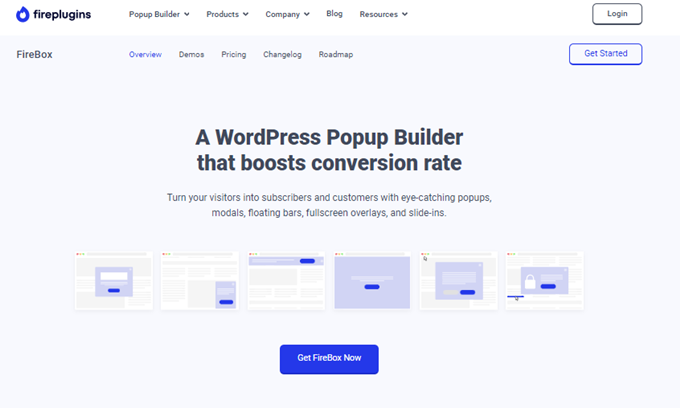
Even if you're a newbie, FireBox has you covered. That's because this feature-rich plugin lets you create stunning popups in minutes without any coding experience. FireBox has several features suited to giving you a satisfying popup-building experience. Let's take a look at some of them.
- An intuitive editor for hassle-free form creation and popup building
- Flexible popup customization options
- Multiple device compatibility
- Frequency regulation for the number of popups viewed by website visitors
- Analytics that help you know how popups are fairing about conversion rates
- Integration with other WordPress plugins and form builders like WP Forms, Contact Form 7, Ninja Forms, Forminator, etc.
- User-targeted popups
These and several other features are incorporated to make FireBox the leading WordPress popup builder. So, let's see how you can create a WordPress Mailchimp popup in FireBox.
Step 1: Install and Activate FireBox
On your WordPress dashboard, go to Plugins → Add New.
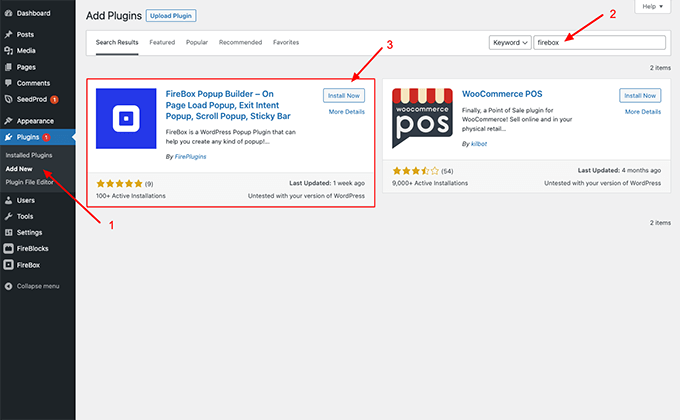
You'll see a plugin suggestion list and a search box on the top right-hand side of the page. Type in "FireBox," and the plugin will appear on this list. Click Install Now. When the installation is complete, click Activate.
FireBox should appear in your plugins list after activation.
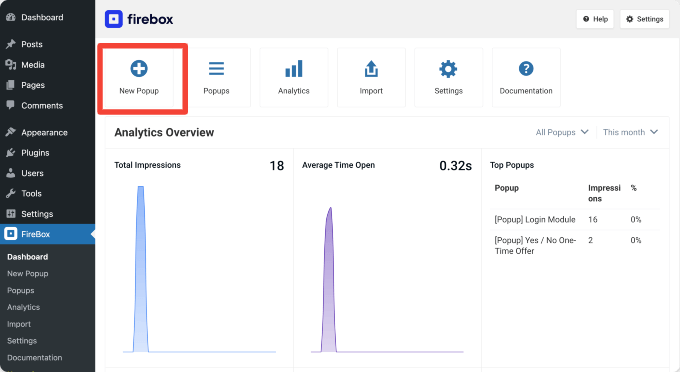
Step 2: Create a New FireBox Popup Form
To create a new FireBox popup form, go to the FireBox plugin and click New Popup.
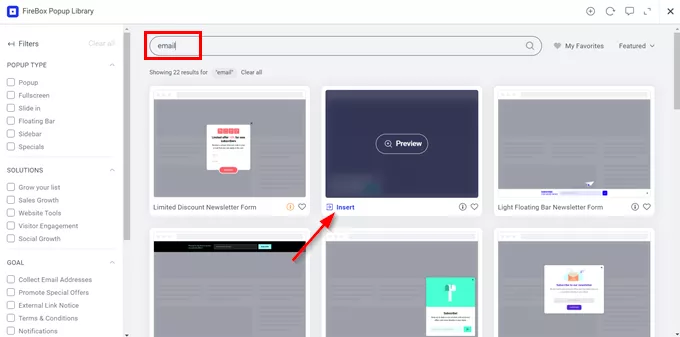
In the Popup Gallery that appears, search for "email." Select one of the available email opt-in templates and click Insert.
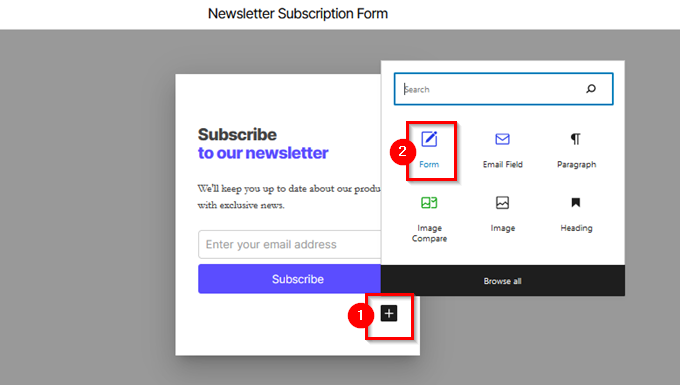
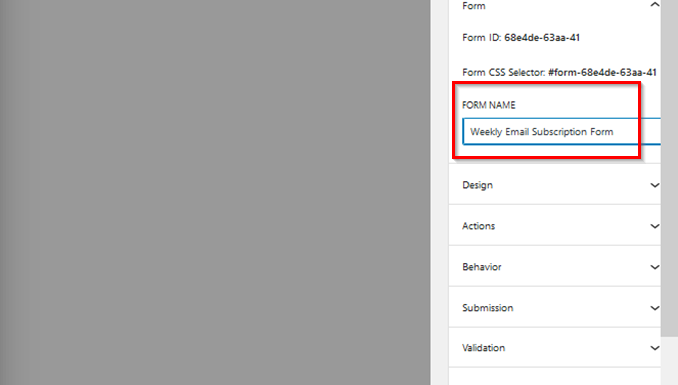
Next, we need to set a name for our form so it doesn't get mixed up with other forms. To do so, click on the Form Block.
You will find the Form Name option in the settings that show up at the right—type in your preferred form name.
Step 3: Customize the New Subscription Popup
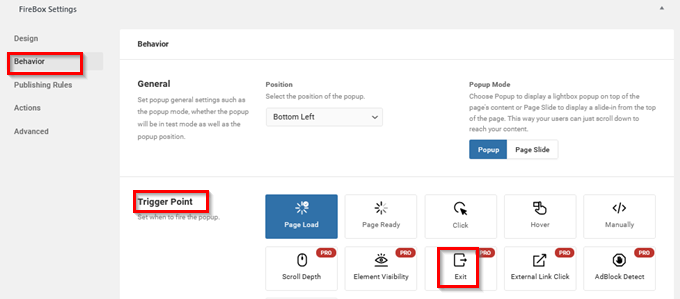
FireBox gives you several customization options for your subscription popup. For this example, we will create a popup that fires when the user is about to leave the page or, in other words, an exit popup. To do so, select the Exit trigger in the Behavior tab.
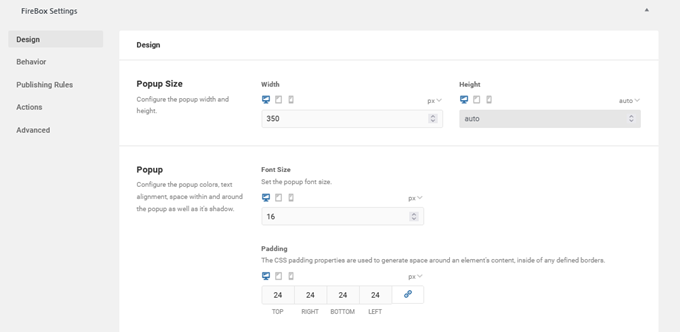
You can optionally customize the form by renaming the fields and labels and changing the popup's colors, padding, and size.
Step 4: Enable the FireBox Mailchimp Integration
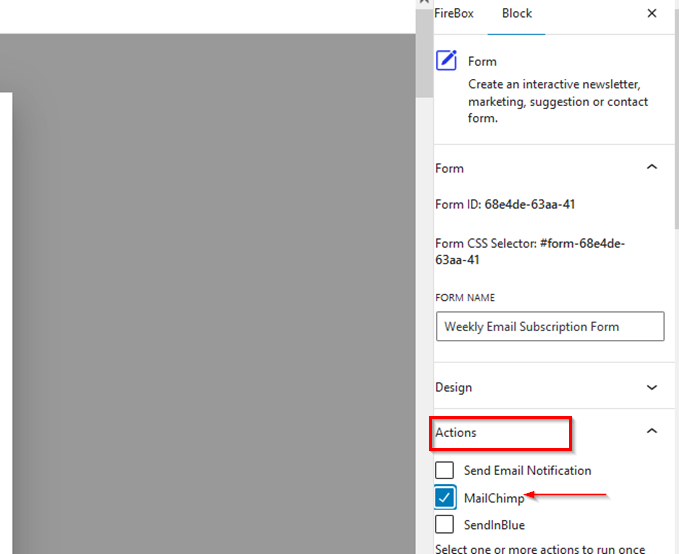
To integrate MailChimp with FireBox, go to the form block settings on the right side of the page. Locate the Actions panel and check Mailchimp.
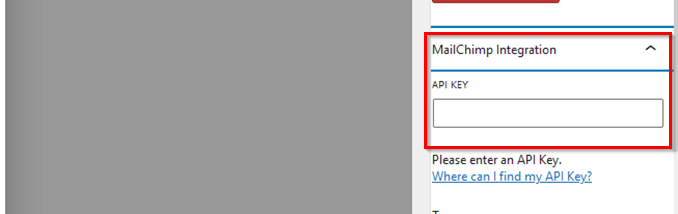
Once you do that, a new Mailchimp Integration panel will appear below the Actions panel. This is where you will integrate FireBox with Mailchimp. When you click on this new panel, it will display an API Key field where you will enter your Mailchimp API key.
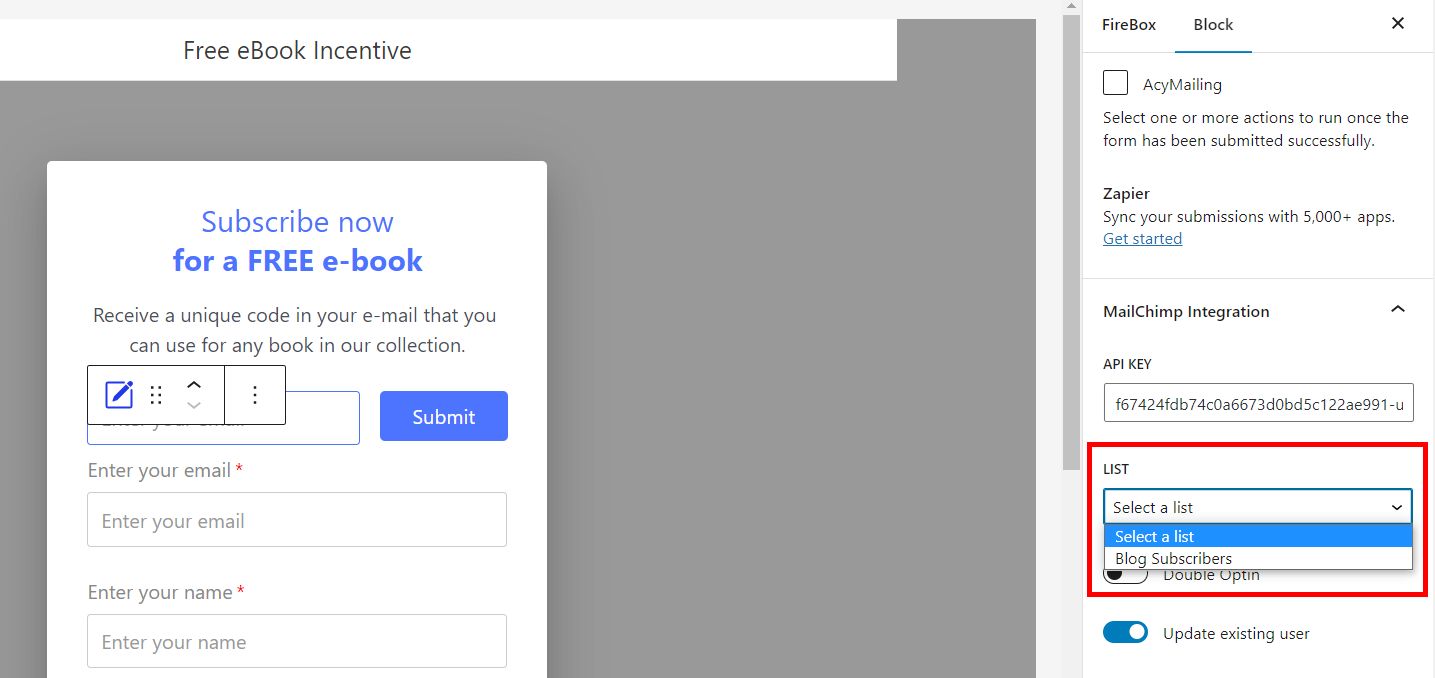
Follow this link to see how you can find your API key. Once you fill in the API key, FireBox will load your audience lists immediately. You can then choose which Mailchimp list to add your new form subscribers.
Other MailChimp integration settings like interest groups, double opt-in, and tags will also appear below.
Step 5: Set the (Success) Thank-You Message
Once the Mailchimp integration is complete, set your Thank-You message. To do this, open up the block settings at the right by clicking the form. Go to Submission → Submission Action → Display Message.

You can also redirect your site's visitors to another page instead of displaying a Thank-You message. All you need to do is insert the URL of the destination page in the field named "Redirect URL."
Grow Your Email List With a WordPress MailChimp Popup
Building a solid foundation for your email marketing strategy begins with collecting information from your site's visitors to grow your email list. Different email marketing platforms can help you achieve this, but MailChimp stands out because of its comprehensive features that allow you to collect and organize email contacts.
There are different ways to display your subscription forms to users, but embedding them in popups is the surefire way to get maximum results. You can create result-generating popups with our FireBox plugin and sync them with MailChimp.
We highly recommend FireBox because it offers several easy-to-use features and customization options that allow you to create and display attention-grabbing popups to your site's users.
In this article, we've shown you why you should build your email list with MailChimp. We also shared some benefits of adding a WordPress MailChimp Popup to your website and took you through the steps to creating a subscription form popup in FireBox and integrating it with MailChimp.
We believe what we’ve shared in this article is sufficient to get you started with creating your WordPress MailChimp popup right away.
Feel free to share your thoughts about how this article has helped you. You can also ask your questions and seek clarification in the comment section.

0 Comments