


How to connect FireBox with MailChimp

MailChimp
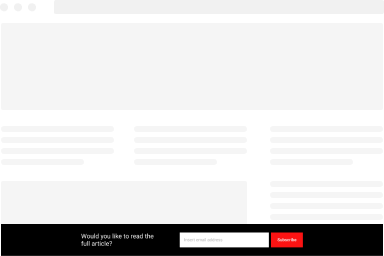
Would you like to grow your email marketing list with popups
that will level up your MailChimp marketing campaigns?
FireBox provides seamless integration with the MailChimp email marketing service. You can connect your MailChimp account with FireBox by following the outlined steps listed below.
- Integration Setup
- Where can I find my MailChimp API Key?
- Disable MailChimp Double-Optin
- Enable Update Existing User
- Email Field
- MailChimp Tags
- MailChimp MERGE Tags
- MailChimp Interest Groups
Integration Setup
To setup the integration and sync your submissions with MailChimp, click into your Form block, head over to Actions and check "MailChimp".
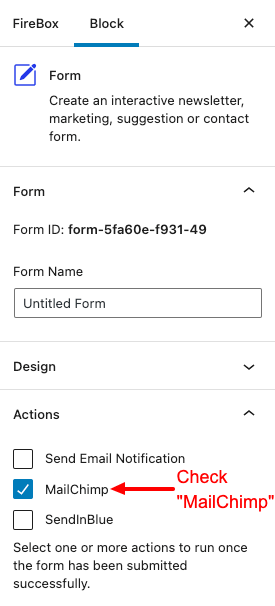
Once you have checked "MailChimp", a new panel should appear below "Actions", named "MailChimp Integration". This is where you setup your MailChimp Integration to allow your form to sync your submissions with MailChimp. Clicking the newly appeared "MailChimp" panel will display the API Key field that is required and you need to enter your MailChimp API Key.
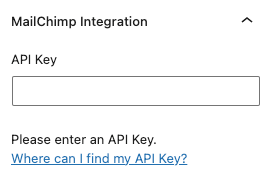
Where can I find my MailChimp API Key?
To find your MailChimp API Key, head over to MailChimp documentation by clicking here: Where to find my MailChimp API Key
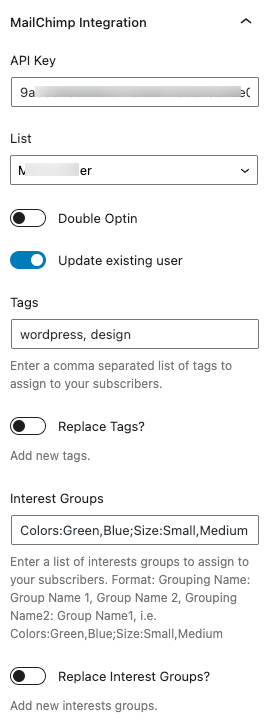
Once you have found your MailChimp API Key, enter it on the text field named "API Key" and it will validate it and show the rest of the settings, including your lists, double opt-in, tags, and interests groups.
Disable MailChimp Double-Optin
If you don't want to force your users to confirm their subscription to your list via an email sent by MailChimp, you can disable "Double Optin" setting.
Otherwise, enable it.
Enable Update Existing User
Often existing subscribers re-enter their data in your mailing list. For this reason, you can update their details in your MailChimp account by having "Update existing user" enabled. If you do not wish to allow users to update their information, you can disable it and a message will appear in the form notifying your users that they cannot re-submit the form.
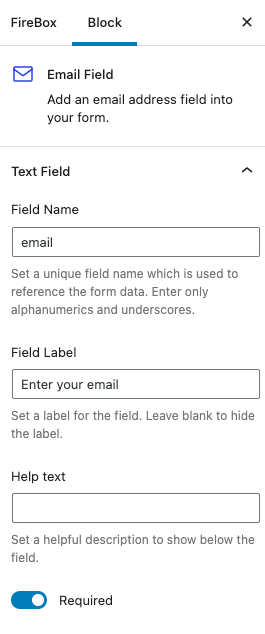
Email Field
In order for FireBox to function properly and subscribe the user to MailChimp, the form requires an Email field. This email field must have Field Name set to "email". Furthermore, this email field must exist in your form at all times so your users can enter their email address, subscribe to your mailing list and ensure form functions properly.
MailChimp Tags
MailChimp allows you to associate a subscriber with tags. These are labels that help you organize your subscribers. To add a tag into your subscribers, go into the "MailChimp" panel > Tags field and enter your desired tags.
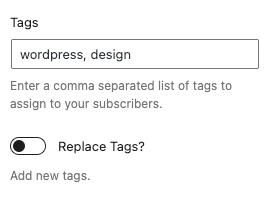
The entered tags must be a list of comma separated tags, i.e. wordpress, design, contact, etc...
Furthermore, you can define whether to add these tags to your users or replace their existing tags with the entered tags.
To do so, simply toggle "Replace Tags?" setting.
MailChimp MERGE Tags
MailChimp allows you to store even more information into your subsrcibers by utilizing MailChimp's MERGE Tags.
To configure MailChimp's MERGE Tags, log into your MailChimp Dashboard > Click on "Audience" > Manage Audience > Settings > Click on Settings > Audience fields and *|MERGE|* tags.
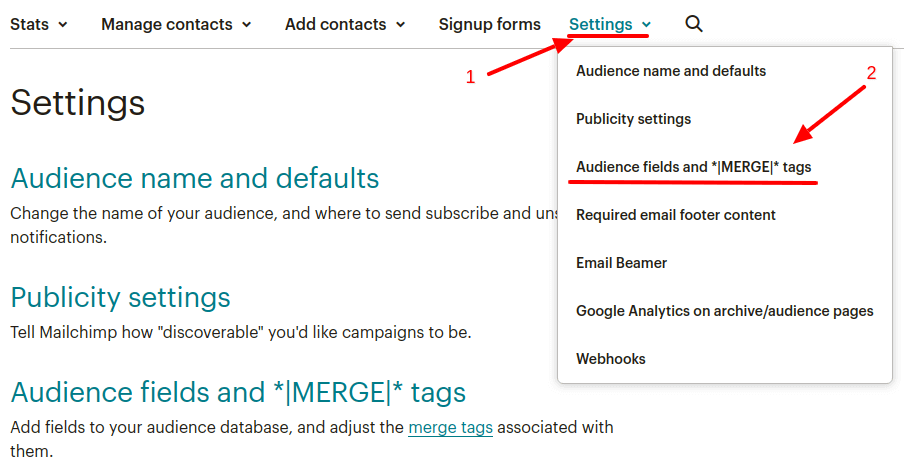
Once you have clicked on the MERGE tags menu item, you will be redirected to the page where you can setup your MailChimp MERGE tags. The configuration screen should be as the one seen below where you can set your extra fields and collect the data you desire.
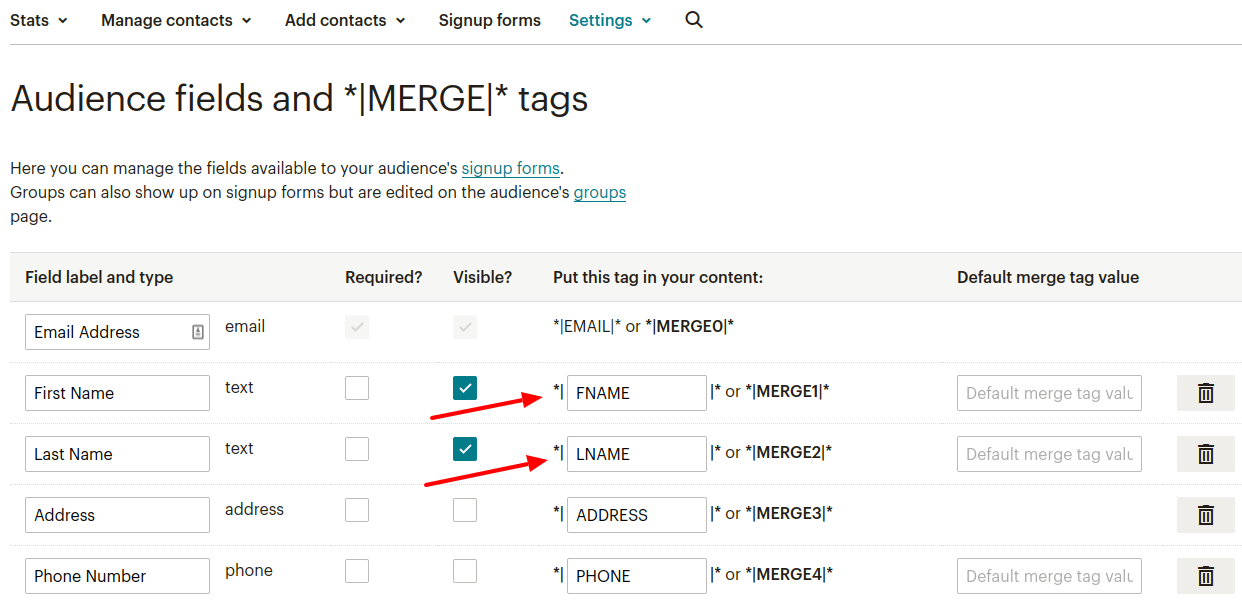
As an example, in the below screenshot, we setup a few fields including two to capture the subscriber's first and last names. Both have a MERGE tag named FNAME and LNAME for first name and lastname respectively.
After you have configured your MERGE tags, you can customize your form to capture information regarding these MERGE tags and send them to MailChimp.
Your FireBox Form fields must have as Field Name the MERGE tag name, i.e. FNAME, LNAME, ADDRESS and PHONE as per the above screenshot.
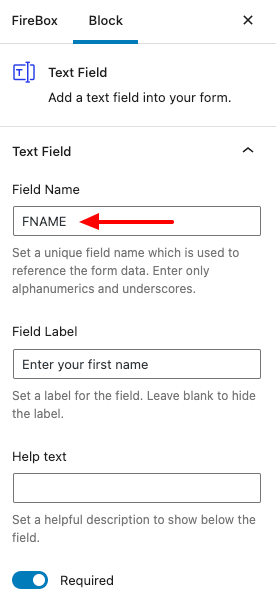
Capturing the First Name
To capture the first name, create a text field and set FIeld Name to FNAME.
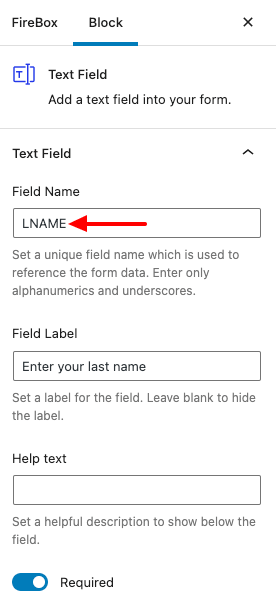
Capturing the Last Name
To capture the last name, create a text field and set FIeld Name to LNAME.
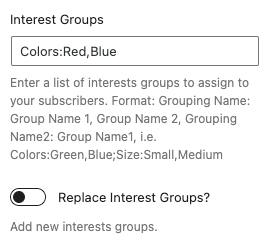
MailChimp Interest Groups
Apart from tags, MERGE tags, MailChimp also provides Interest Groups for your MailChimp Audience, which you can also configure and setup in your MailChimp settings and assign your subscribers into your desired Interest Groups.
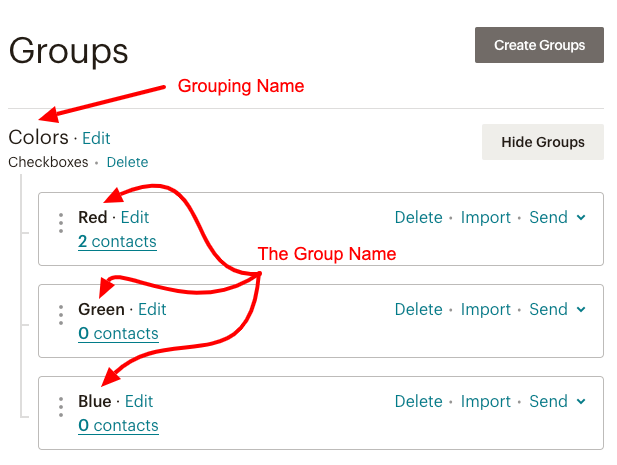
To setup MailChimp Interest Groups, go into your MailChimp Audience > Manage Contacts > Groups and click Create Groups.
As an example, we take the screenshow below where we have created an Interest Group named "Colors" which contains the values "Red", "Green", and "Blue".
In order to assign your subscribers to the Red and Blue Color Interest group, you'd need to go into your "MailChimp Integration" panel > Interest Groups and use the following format:
Grouping Name 1:Group Name1, Group Name2, Group Name3;Grouping Name 2:Group Name1, Group Name2
So in our example, we should enter the following:
Colors:Red,Blue