


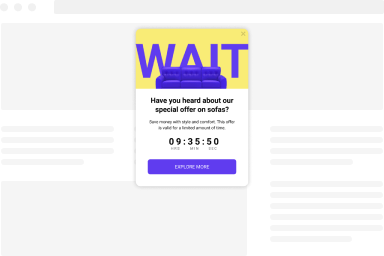
Do you want to display the terms and conditions of your site in a popup?
In this day and age, where people are concerned about personal data and copyright issues, having clear terms and conditions is a must for any online business.

In this article, we will show you how to get the terms and conditions popup up and running without too much hassle. We are also going to cover the many benefits of having a terms and condition popup on your site along with what should one include on such a page.
What Are Terms & Conditions And Why Do You Need It
Terms and conditions, also known as TOS, are a set of conditions that visitors of your site must agree on to keep browsing your site and using your services.
For instance, you might be tracking the movement of your site visitors to determine the best location for putting up ads. In the TOS, you will need to declare that you are tracking your visitors, and visitors to your site will need to be knowledgeable of that.
There are two major benefits of adding a TOS to a WordPress website. Those are:
1. From the website owner's perspective, it's a great way to protect an online business, especially if it involves user-submitted content like forums, product reviews, and video sites. The TOS allows you to explain who owns what and that the website owner has the right to ban abusive accounts, among other things.
2. From the visitor's perspective, the presence of a TOS is a sign of legitimacy which helps build trust. The WordPress terms and conditions popup has information on what personal data is being collected, how these data are stored, and used by the website, etc. Website visitors who disagree with the terms and conditions reserve the right to decline them.
These are the basic benefits of having a terms and conditions popup on your WordPress website.
All said and done; it’s not legally required to have a TOS on your site. But all online businesses should certainly have one to protect themselves from legal disputes.
Are Terms and Conditions Binding Under Law?
Yes, terms and conditions can be legally enforced. During legal disputes with your customers and site visitors, you can rely on it for protection.
That said, while drafting the terms and conditions, a few rules must be kept in mind. Those are:
- The TOS has to be fair to both the site owners as well as the sites and the customers
- It has to be clear and without ambiguity for both parties
- It has to be law-abiding as it should not promote illegal activities
- And lastly, both parties should agree to the TOS to make it enforceable
Please note that failure to follow these directives could render your site’s terms and conditions defunct.
What to Include in a Terms & Conditions Page
The content of your terms and conditions would depend on your business and website type.
That said, these are some common clauses that most online businesses should cover: An introduction, effective date, governing law or jurisdiction, rule of conduct, limiting liability, warranty disclaimer, and user restriction.
You may also include links to your contact and privacy policy pages along with all these clauses.
Let’s take a quick look at what the clauses mean:
Introduction: A summary of what the TOS is about.
Effective date: The date from which the TOS becomes effective.
Governing law or jurisdiction: This should mention which country or state law governs the agreement. Typically it's the country or state where your business is registered.
Rules of conduct: It sets rules on who can access your site (e.g., age group) and for what purpose. You can also explain what happens when rules of conduct are not followed.
Warranty Disclaimer: Here, you can declare the things your site is not responsible for, like server downtime, product inaccurately described, etc.
Limiting liability: This will help you limit what customers and site visitors can hold you liable for. For instance, you might restrict liability for virus infection, theft, and damages from third parties.
User restriction: Clarify what your site visitors and customers can and can't do. This would include restricting things like threatening other site users, abusive comments, and other violent behaviors.
As you can see, there is a lot to cover. At this point, creating terms and conditions for the WordPress site seems like a daunting challenge. Luckily, a free plugin offers ready-to-use templates to get a TOS popup up and running in no time—more on that in the next section.
How to Add Terms & Conditions as a Popup on Your WordPress Site
The easiest way to create terms and conditions is by using a popup plugin that comes equipped with TOS templates. You can install the plugin, select a TOS template, and make custom changes per your needs, and you will have terms and conditions on your WordPress website.
While plenty of popup plugins exist, few offer ready-made TOS templates. Moreover, a lot of popup plugins are difficult to operate.
We created the FireBox Popup Plugin keeping ease of use in mind. The plugin is free and offers beautiful terms and conditions popup templates to choose from.
That said, only one of the terms and conditions templates is available under the free license. You need to get a premium license to access the rest of the templates.
This section will show you how to use FireBox to create a TOS using the free template.
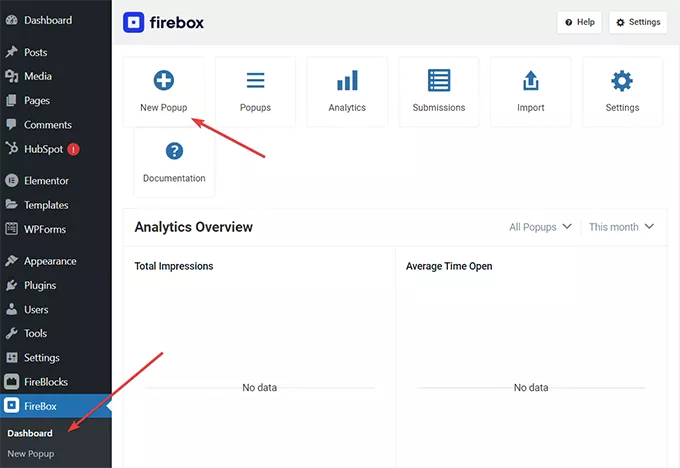
Step 1: Install and activate the plugin, and you should see a FireBox option appear on the right-hand menu. Go to FireBox > Dashboard > New Popup, and the FireBox Popup Library will appear.
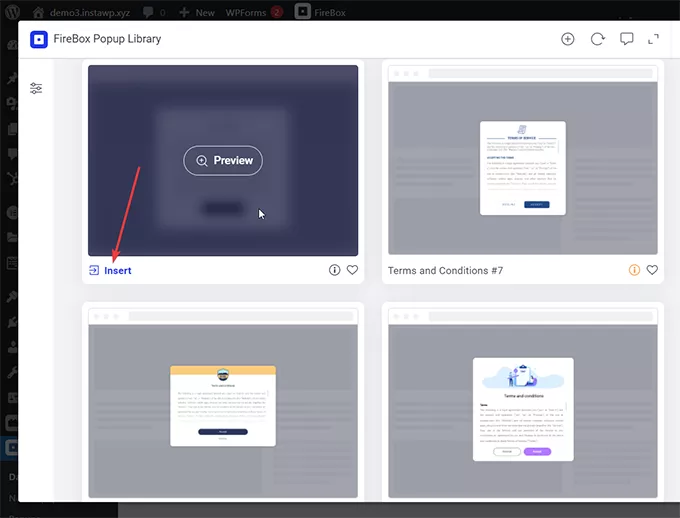
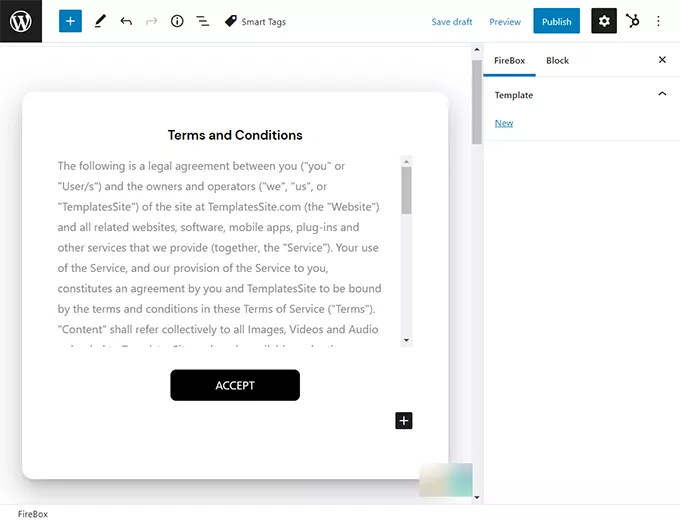
The library is full of prebuilt popup templates. Write “terms” in the Search box to find the terms and conditions template.
Go over to the “Terms and Conditions #8” template, hover your cursor over the template, and it will reveal an Insert button. Click on it.
You will need to purchase a license to use any of the other templates.
Step 2: You can customize the terms and conditions popup on the next page. You can modify the content of the popup, i.e., text, image, and button, just like you would in a typical WordPress post on the Gutenberg editor.
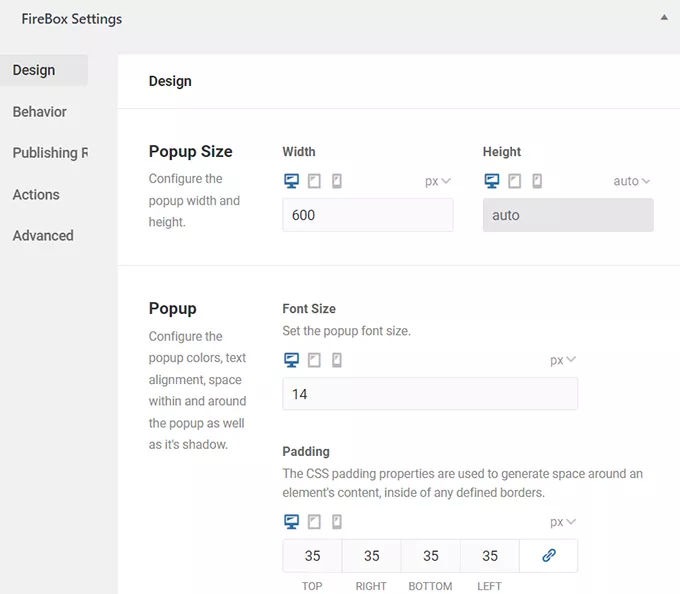
You can also use FireBox’s’ native options to customize the popup. Just scroll down to the FireBox Settings and go to Design. You will find various customization options under Design.
When the popup is ready, hit the Publish button.
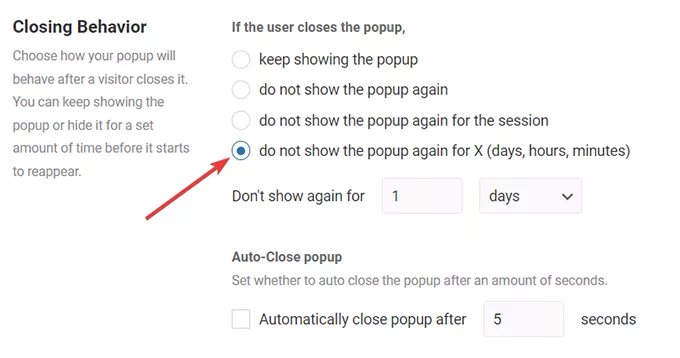
Step 3: Now that the popup is published on your site, visitors who accept the TOS will be taken to the website. And they will not see the popup again until the agreed period expires.
To set an expiry period, scroll down to the end of the editor and go to Firebox Settings > Behavior > Closing Behavior, select do not show the popup again for X (days, hours, minutes), and enter the number of days before the popup starts appearing again.
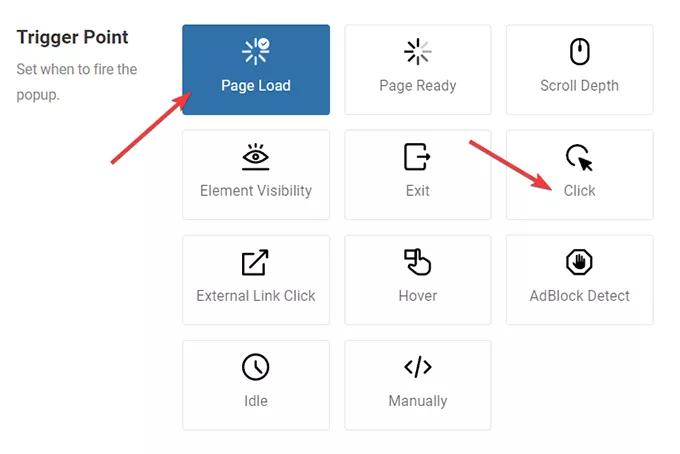
Step 4: Next go to Trigger Point and decide when the popup should appear. Ideally, you should show the popup as soon as the page loads or when visitors click on your page.
Step 5: You would want to ensure that visitors can access your site only when they agree to the terms and conditions. Here’s how you will achieve this:
- Remove the close button from the popup
- Set the accept button to close the popup when the button is selected
- Add a decline button and redirect users to a custom page when the button is selected
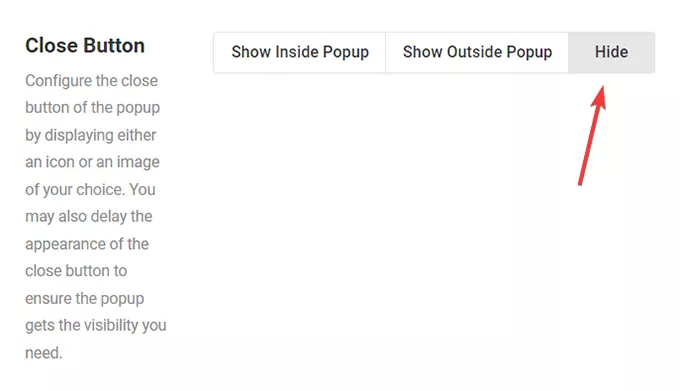
The close button on FireBox’s TOS template is disabled by default. To ensure that the close button is disabled on your popup, go to Design > Close Button. If you see that the Hide option is selected, that means the close button is disabled.
Next, create a Decline button on the popup with the help of FireBox’s button block.

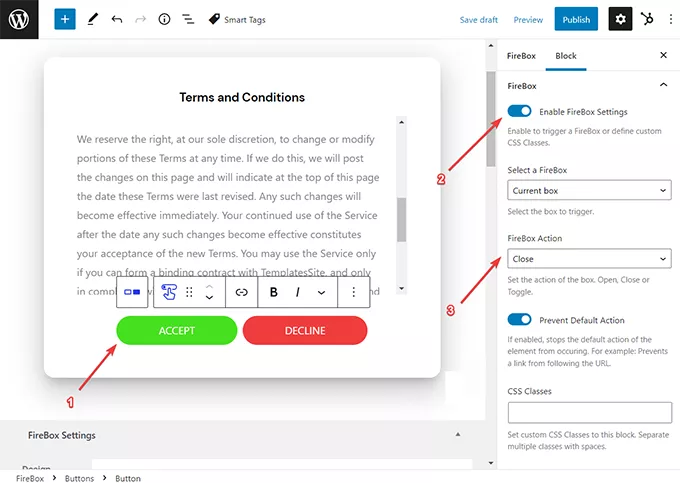
Once you have both the Accept and Decline buttons ready, the next step is to set the action of the Accept button as Close. This means the popup closes when someone clicks the Accept button, and the visitor can access the site.
Select the Accept button, go to Blocks > FireBox, and ensure the FireBox Settings are enabled. Next, under FireBox Action, select Close.
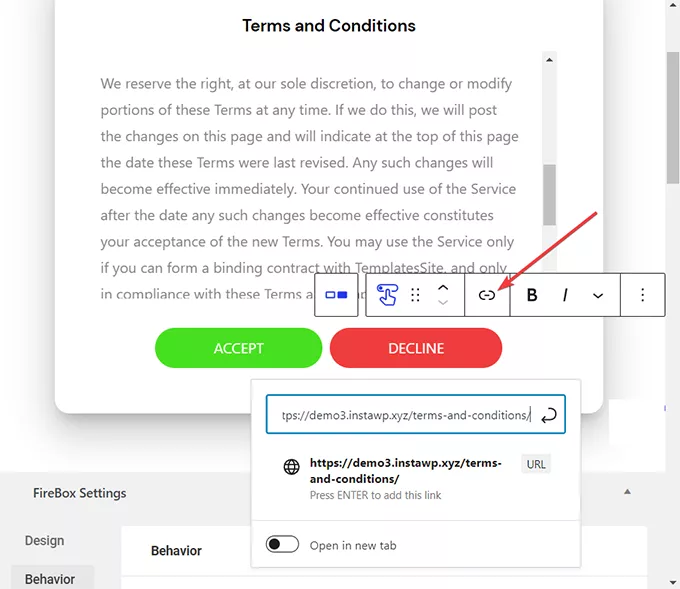
Now, to ensure that visitors who decline your terms and conditions can’t access your site, you need to select the Decline button and insert the URL of the page where you want to send the visitor.
On our demo site, we published the TOS on a separate page and added the link of the page to the Decline button. On the top TOS page, we clarified that one MUST accept the terms and conditions to access the site.
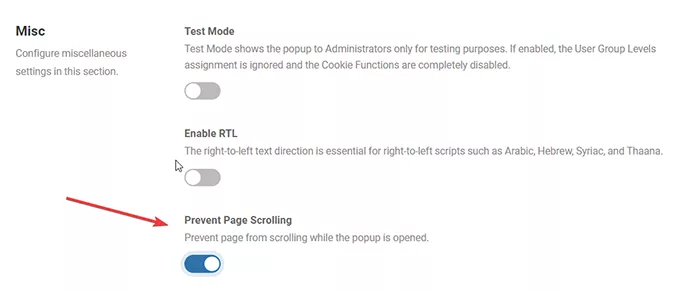
Step 6: You may want to disable scroll when the popup is open to prevent complete access to your site. Go to Advanced and select Prevent Page Scrolling.
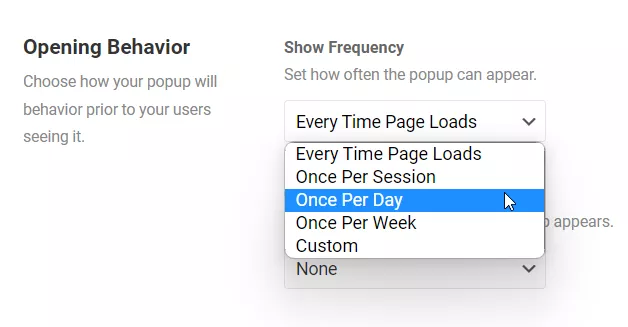
Step 7: The last thing you would want to set is how often the popup will appear to your site's visitors. Go to Behavior > Show Frequency, and select Once Per Day from the dropdown.
This will ensure that the popup appears once a day for visitors who declined the terms and conditions. Visitors who agree to your terms and conditions will not be shown the popup until the agreed period expires.
That was the final step in this tutorial. Make sure to hit the Publish button to save all the modifications you just made.
IMPORTANT: FireBox can also be used to create terms and service and privacy policy popups. We don't have pre-built templates at this point, but you can easily generate terms and service and privacy policies using these sites:
When the templates are ready, create a popup, insert the templates, and publish the page.
Conclusion
Displaying terms and conditions is mandatory for all online businesses. While you can create a page and link it in your site footer and checkout pages, having popups is the most effective way to ensure visitors read and agree to the TOS.
Moreover, if you use a popup plugin like FireBox, you can use one of the TOS templates to post terms and conditions on your site without any hassle.
FireBox is more than just a WordPress terms and conditions plugin. It's a complete popup solution. Using FireBox, you can create eye-catching popups, floating bars, fullscreen overlays, slide-ins, etc., and convert your visitors into subscribers and customers.
FireBox supports WooCommerce, so you can easily use the plugin on your store to create terms and conditions popups.
Try the FireBox plugin now.

0 Comments