


Looking for tips and tricks on how to operate the WordPress Gutenberg block editor?
Using Gutenberg can feel overwhelming in the beginning because it’s so different from the previous Classic editor. The new Gutenberg editor offers a ton of features that involves a learning curve and can add to the feeling of overwhelm.

Don’t worry, by the end of this article, you will feel equipped enough to start working with Gutenberg. Of course, you need to use the new block editor a couple of times before you get the hang of it. And while you are at it, you can return to this article for help.
Without much ado, let’s dive into the tutorial.
A Brief Introduction to the Gutenberg Block Editor
WordPress Gutenberg was launched back in 2018 with the goal of offering a better content editing experience to users.
Launching Gutenberg is part of a bigger plan. WordPress is creating a collection of tools that will allow users to build an entire website using blocks. Building Gutenberg was a step in that direction.
The most significant difference between Gutenberg and the previous Classic editor is the former's block approach to creating content.
If you have used any page builder like Divi or Elementor, you must have come across modules or blocks. They help you create complex layouts on your posts and pages.
So although it’s overwhelming to use in the beginning, Gutenberg is super convenient. And before you learn how to use it, let’s have a quick overview of the layout of the editor so that you know how to navigate it.
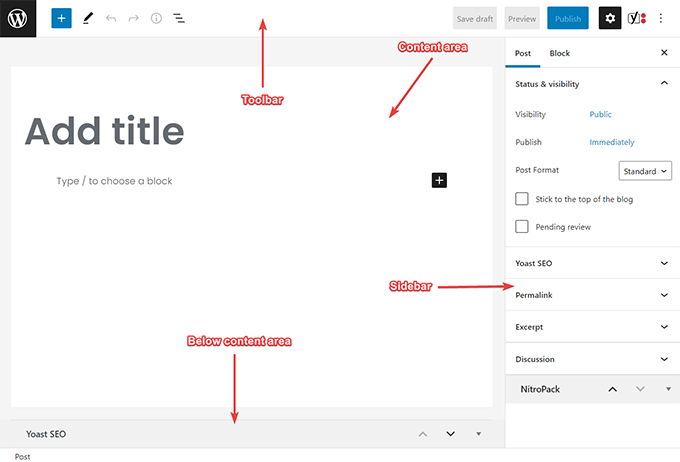
The Gutenberg editor can be divided into 4 sections: content, sidebar, topbar, and below the content area.
Content
The space on the top of the page is for the title. The body of the page is where the content goes in. Content or media can be inserted using blocks and blocks can be added by using the plus button (+).
Sidebar
On the sidebar, there are two options - post and block. You can navigate between the two tabs with ease.
The post tab allows you to configure the post settings like the date of publication, permalink structure, feature image, category, tags, etc.
The block tab allows you to configure your chosen blocks. Say, for instance, you are using the image block to insert images into your post. The Block tab will allow you to set the alt tag, change the dimension and add CSS class to the images.
Toolbar
Using the top toolbar you can insert blocks into the content area, undo or redo your activities, save your draft, preview or publish your article, and convert the visual editor to the code editor, among other things.
Below Content Area
In the area below the content, you can see the plugins that you have installed on your site. Of course, not all plugins appear in this area; only the ones needed to optimize the post or page. For instance, SEO plugins like Yoast and Rank Math help make your posts and pages search engine friendly, appear in this area.
That’s the Gutenberg editor in a nutshell. Now, let’s look at some tips and tricks you can apply while using the editor.
10 Gutenberg Tips & Tricks to Speed Up Workflow
The tips and tricks listed below will help you find some footing as you start using the Gutenberg editor. Let’s jump right into it.
1. Use Keyboard Shortcuts
Shortcuts are meant to speed up your workflow and there are a ton of shortcuts that you can use on Gutenberg.
For starters, use “/” (forward slash) to summon blocks. You will be using this shortcut more than any other.
Some of the shortcuts that we regularly use are:
- Remove the selected blocks - Shift+Alt+Z
- Convert the selected text into a link - Ctrl+K
- Remove a link - Ctrl+Shift+K
- Insert H1 - #+Enter
- Create a number list - 1.
- Create a bullet point list - *
You can get the complete list of shortcuts on your Gutenberg editor.
Just open the editor and select the three dots on the top right-hand corner of the screen and choose the Keywords shortcut option. An easier way of accessing this option is by typing Shift+Alt+H.

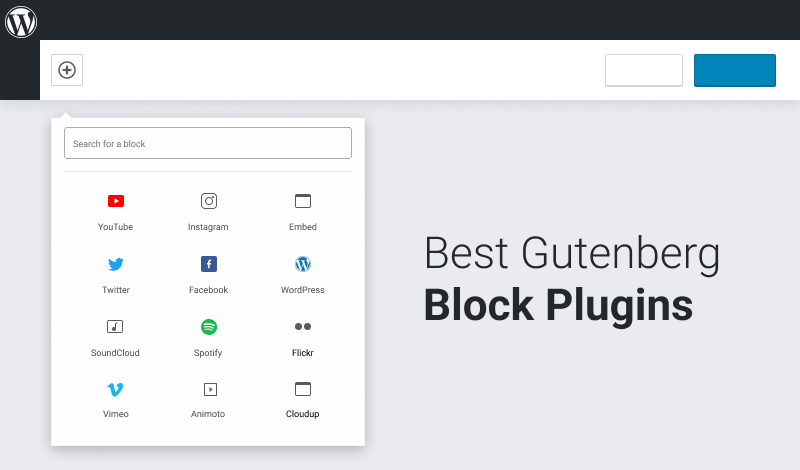
2. Utilize Free Gutenberg Block Plugins
As we said earlier, Gutenberg allows you to use blocks to create visually compelling posts and pages.
WordPress offers default blocks like a paragraph, quote, heading, image, gallery, audio, file, spacer, shortcode, etc.
Some website owners may require more blocks. For instance, if you were running a review site, you may need a star rating block. Websites selling their products and services will require an FAQ and countdown blocks to notify your visitors about an upcoming sale.
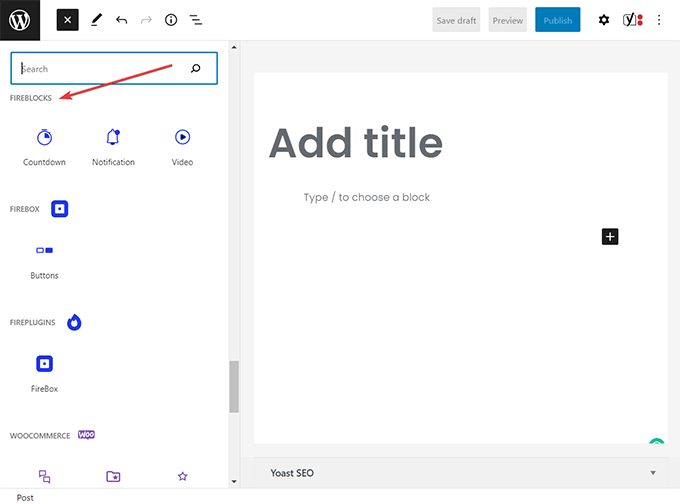
We at FirePlugins created a free block plugin called FireBlocks that offers you a library of highly customizable blocks using which you can design better posts and landing pages.
The plugin ensures that the new blocks do not bog your site down and more advanced features are being added on a regular basis. Give FireBlocks a try.
3. Create Reusable Blocks
If you have used visual editors like Divi and Elementor, you would know that they allow you to save your designs as templates for future use. Now you can do just that with Gutenberg.
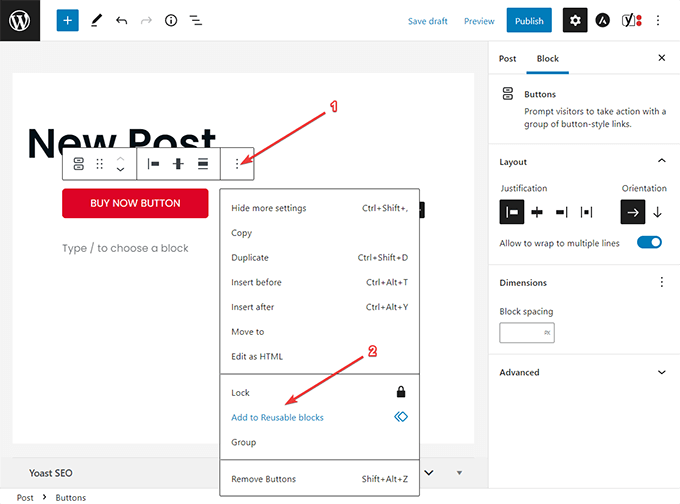
All you need to do is select the block and click on the three dots to summon options. Then select the Add to Reusable Blocks option to save the design as a template.
This particular feature is super handy when creating landing pages.
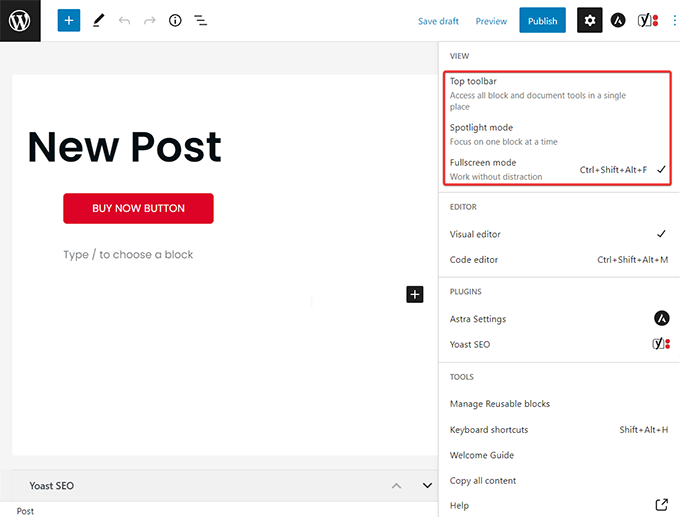
4. Try Different Writing Modes
The Gutenberg editor allows you to use 3 different writing modes: top toolbar, spotlight mode, and fullscreen mode. Each mode serves a different purpose.
The top toolbar sets the toolbar on the top of the screen instead of having it hover over every block you are editing.
The spotlight allows you to focus by highlighting the block you are working on. All other blocks are greyed out.
And the fullscreen mode is the default mode of the editor. When you open the editor, you are seeing the full screen. Disabling the fullscreen mode will enable the WordPress menu to appear on the left side of your dashboard.
To access the visual modes, you need to three dots on the top right-hand corner of the screen and select the visual mode of your choice.
5. Hide Sidebar
As we said in the previous section, the fullscreen mode allows you to access your editor without the distraction of the WordPress menu. But you can take it a step further. Removing the sidebar for the ultimate distraction-free work experience.
Just click on the gear icon that appears on the top toolbar, right beside the Publish button.
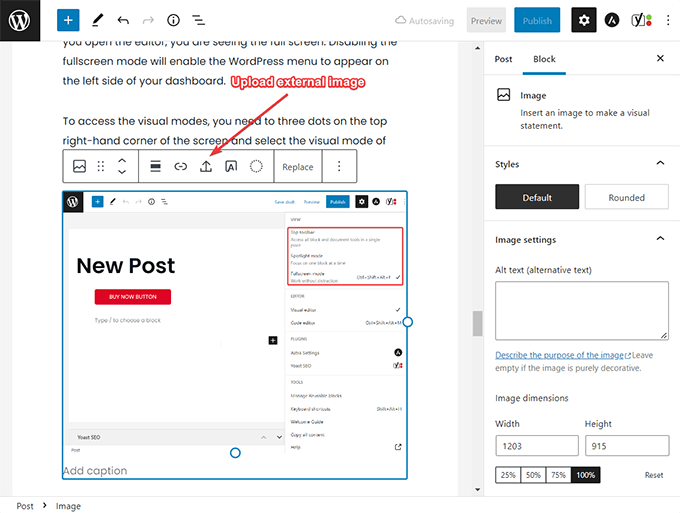
6. Copy & Paste Content From Anywhere
Copying and pasting in the Classic editor was a frustrating experience.
When you copy text from Google Docs or Microsoft Word, some HTML code were also copied into the editor. This led to the pages becoming unnecessarily heavy. And it was also impossible to copy-paste images from the doc into the editor.
The Gutenberg editor has resolved these issues.
You can copy-paste content including media files into the editor without worrying about extra HTML code. After copy-pasting an image, just make sure you upload the image to your website by clicking on the Upload External Image icon on the block’s toolbar.
7. Add Images via Drag and Drop
Gutenberg has made it easier to add images to your posts and pages.
There’s no need to go through the whole upload procedure as you did with the Classic editor. Just drag image files from your desktop or the internet and drop them into your editor.
You don’t even need to summon the image block. Just drag and drop, it’s that simple.
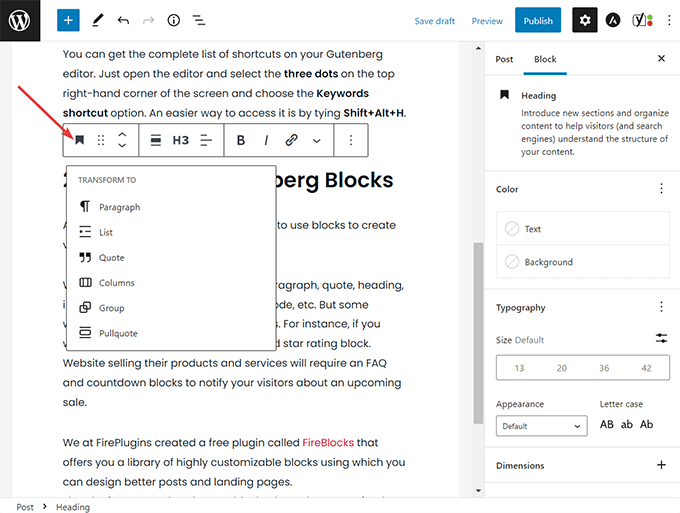
8. Convert a Block Into Another Block
There will be times when you would want to change from one block to another. For instance, you may want to convert a paragraph into a bullet list or a heading into a paragraph.
To convert a block into another, you need to select the block and then click on the first option that appears in the block toolbar. It will reveal a drop-down menu containing blocks that you can transform the selected block into.
That said, there are certain limitations involved when it comes to converting blocks. For instance, you can’t convert an image block into a paragraph block and vice versa. An image block can be converted into a gallery, column, file, etc but not a paragraph or heading.
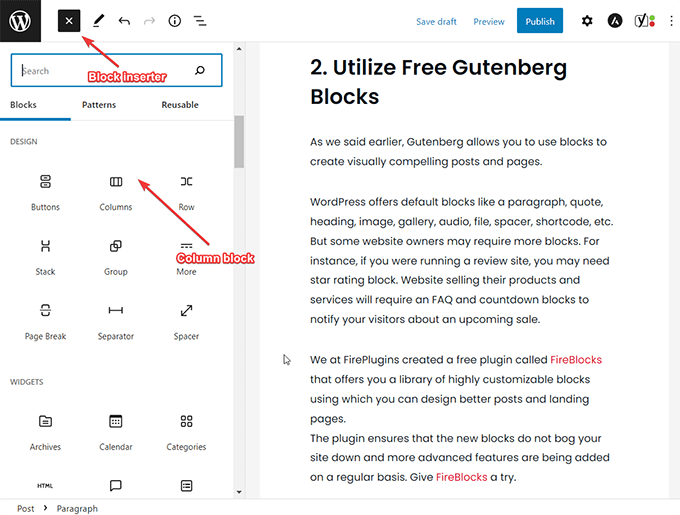
9. Create Columns Using Column Block
If you want to create complex layouts in Gutenberg use the column block. It will insert vertical columns which you can populate with text, headings, videos, or anything you like.
Gutenberg offers 5 different types of columns that you can insert into your posts by clicking on the block inserter found on the top toolbar of your screen.
10. Rearrange Blocks Using Drag And Drop
You no longer have to resort to copy-pasting text and media to move your content around on the editor.
Gutenberg has a drag-and-drop feature using which you can rearrange your blocks as per your needs.
Select the block you want to relocate. In the block toolbar, you should see six dots. Set your cursor over the dots, hold and drag to start moving the block.
If drag and drop is not your cup of tea then you can use the arrows that appear right beside the six dots. Using the arrow pointing upwards you can move the block up and the arrow pointing downwards will help move the block down.
Conclusion
The Gutenberg editor is an incredibly useful tool.
It may be difficult to use the editor in the beginning because it’s very different from the previous Classic editor. The tips and tricks listed in this article should get you up to speed with the editor.
Once you are comfortable using it, you may want to further extend the editor’s capability by installing block plugins like FireBlocks on your website.
That’s it for this one folks!
If you have any questions about how to use the Gutenberg editor, let us know in the comment section below.
Get FireBox for Free
Enter your WordPress website URL to install instantly.
Trusted by 9,000+ users
0 Comments