


Looking for ways to restrict content on your WordPress website?
Back in the day, the idea of restricting content was only limited to private online diaries and confidential documents. But today, gated content is used to protect one’s work and to sell digital products like courses, AMAs, software, etc.

The best way to restrict content on a WordPress website is to install and activate a plugin to regulate access to your site.
In this article, we are going to look at some of the best WordPress restrict content plugins and how to use them to hide content on your WordPress website.
3 Best WordPress Content Restriction Plugins
There are plenty of content restriction plugins available out there. The following plugins are the most popular ones:
Let’s dive into each plugin and take a look at what they are offering.
Note: Besides using a plugin, another popular way to restrict content is to convert your site into a membership site. As you can imagine, a membership site offers way more features than a content restriction plugin ever could. So if you want to convert your site into a membership site, this guide will help you. That said, many of you are probably looking for simpler solutions like a content restriction plugin instead of a full-fledged membership plugin. In that case, proceed with this article.
1. FireBox
FireBox is the best WordPress content restriction plugin out there. It offers a ton of useful features like smart triggers, a powerful WordPress popup builder, mobile responsiveness, a prebuilt popup library, specific targetting, and integration with Google Analytics, among other things.
Pre-built popups include all the essential popup types like yes/no, sidebar, fullscreen, content lock, floating bar, welcome mat, and slide-in. The content lock popup helps you restrict content on your WordPress site using popups.
FireBox has a free version and you can use it to create content restriction popups. It also has a premium version that offers access to advanced features, regular updates, and support from the developers.
2. Restrict Content
With the Restrict Content plugin, you can hide your content using shortcodes. You can also set up automated emails for people who sign up to access the restricted content.
The plugin offers a ton of other features like the ability to create and manage an unlimited number of subscription plans, unlimited number of discount rates, integration with popular payment gateways, detailed performance reports, etc.
The free version of the plugin allows content restriction but to access the rest of the features you need the pro version which starts at $99 per year for a single site.
3. Ultimate Member
Ultimate Member also allows you to restrict WordPress content using shortcodes. Some of the most impressive features of this plugin include content drips, multiple gated content tiers, redirecting users, drag and drop form builder, front-end user profiles, registration, user login, and custom form fields, among others things.
Ultimate Member is a free plugin but there is a pro version that offers access to advanced features like WooCommerce integration, social logins, etc.
These are the 3 best WordPress content restriction plugins. Up next, learn how to use one of these plugins to restrict content on your site.
How to Restrict Content on WordPress Website
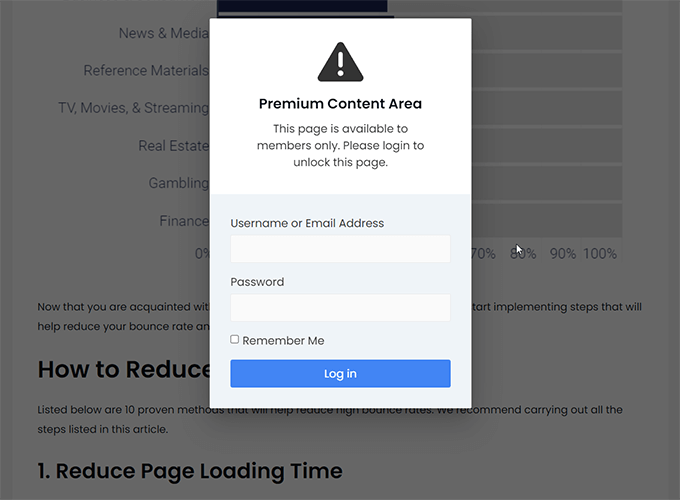
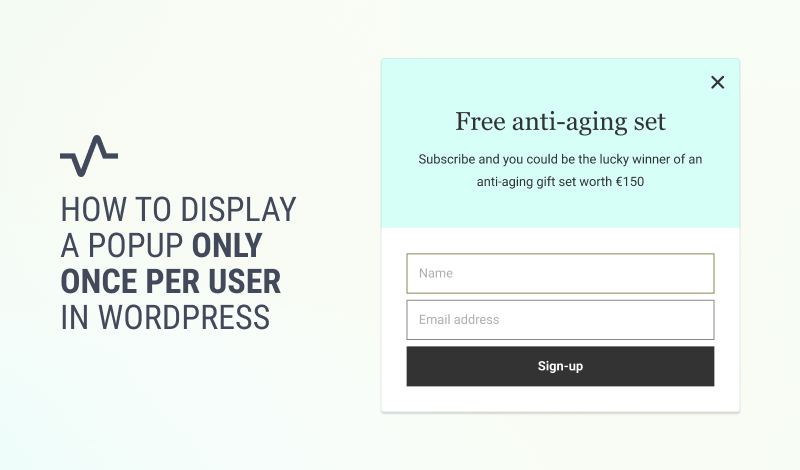
We are going to use FireBox to demonstrate how to restrict content on your WordPress website. By the end, you will have a content restrict popup on your website like the one below -
Using the plugin is super easy. All you need to do is select a pre-built template and tweak it to your liking. We will show you how to go about doing that. But first, take a backup of your entire WordPress website.
Installing new plugins is known to break websites. A backup is your safety net. If your website breaks, you can use the backup to restore your site back to normal. So take a backup of your WordPress website.
Now, let’s get started with the tutorial.
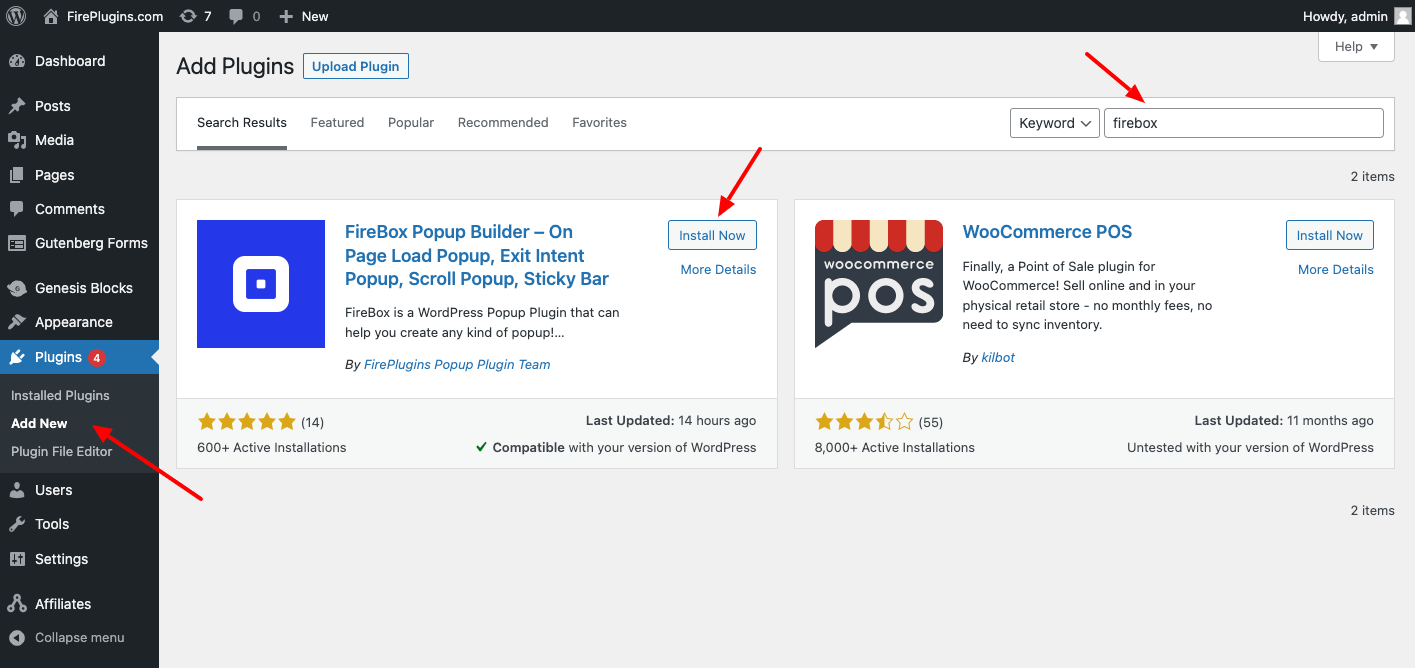
Step 1: Install and activate FireBox on your WordPress website.
To install FireBox, navigate to Plugins → Add New in your WordPress dashboard and search for FireBox. Next, click the Install Now button and wait for the plugin to be installed. Once the plugin is installed, you can click the Activate button.
If you face trouble installing the plugin, consult the How to Install FireBox documentation page.
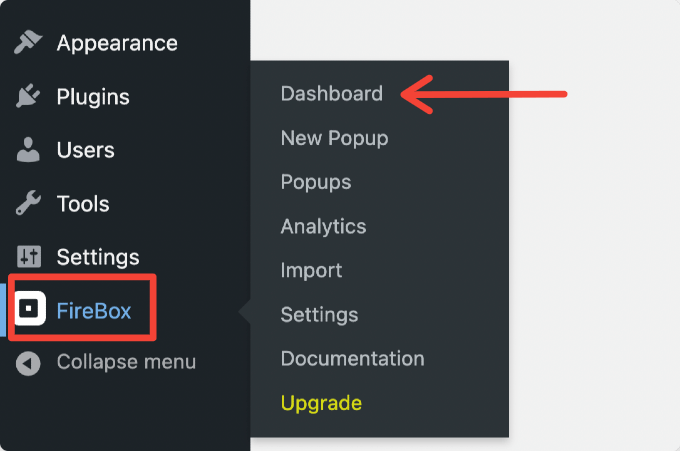
Step 2: A FireBox option will be added to your dashboard menu. Head over to that menu and select the Dashboard option.
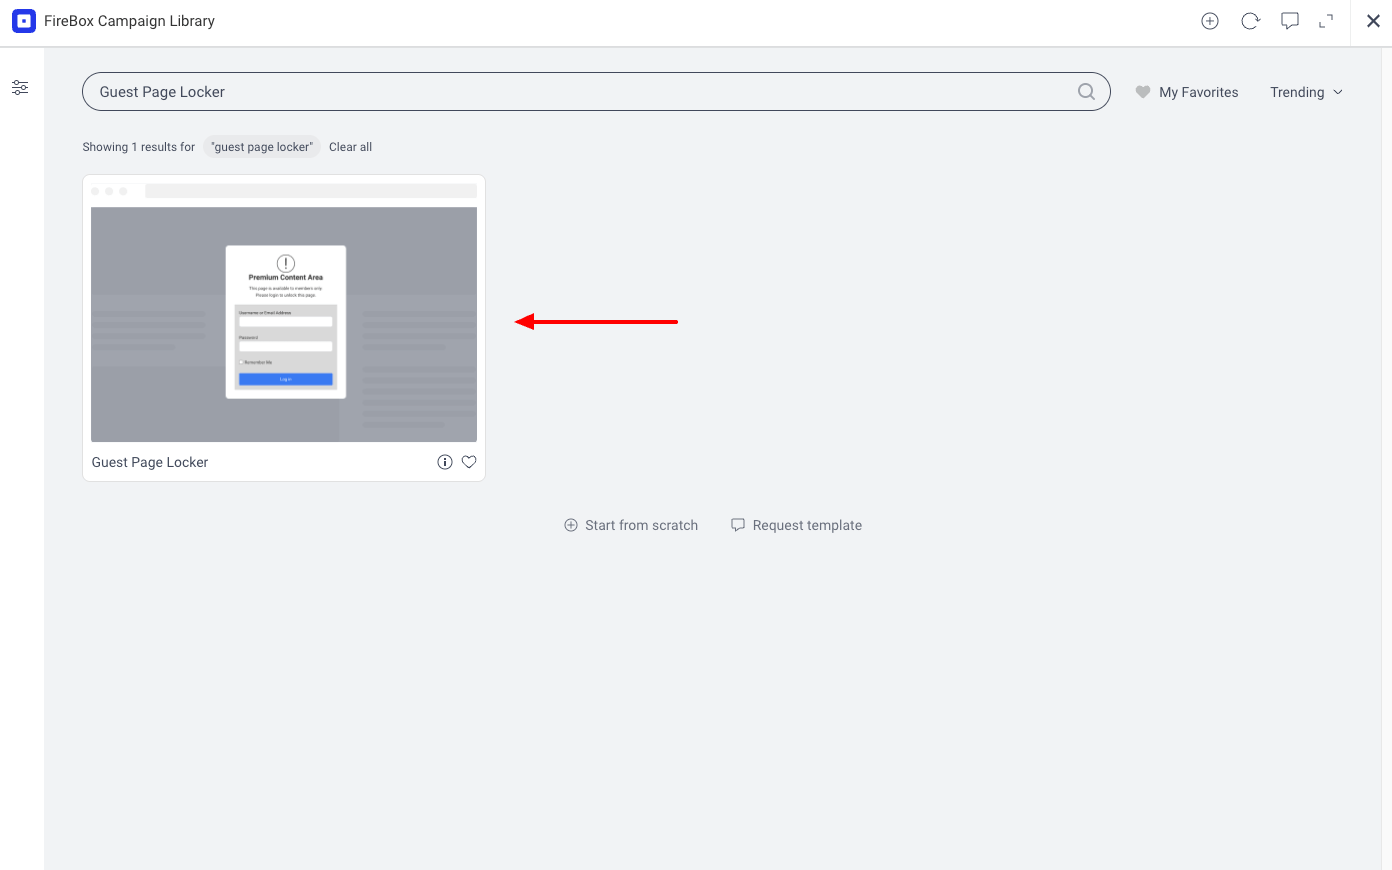
Step 3: In the next screen, select New Campaign, and the FireBox Popup Library will open.
The library contains a ton of pre-built popup templates. Look for the Guest Page Locker template.
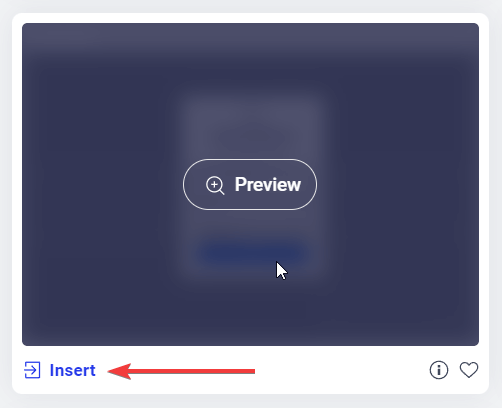
When you find it, hover your cursor over the Guest Page Locker template and you will be shown two options - Preview and Insert.
If you wish to preview the popup, then select that option, or select Insert to enable a content restriction popup on your WordPress site.
Step 4: As soon as you select Insert, you will be taken to a page where you can tweak the popup campaign according to your needs.
First off, you may want to change the text and add more blocks to the campaign.

Next, you can customize the popup via the panels available on the right-hand side, such as the Format, Design, Open/Close Behavior, Display Conditions, Actions, Advanced, and more!
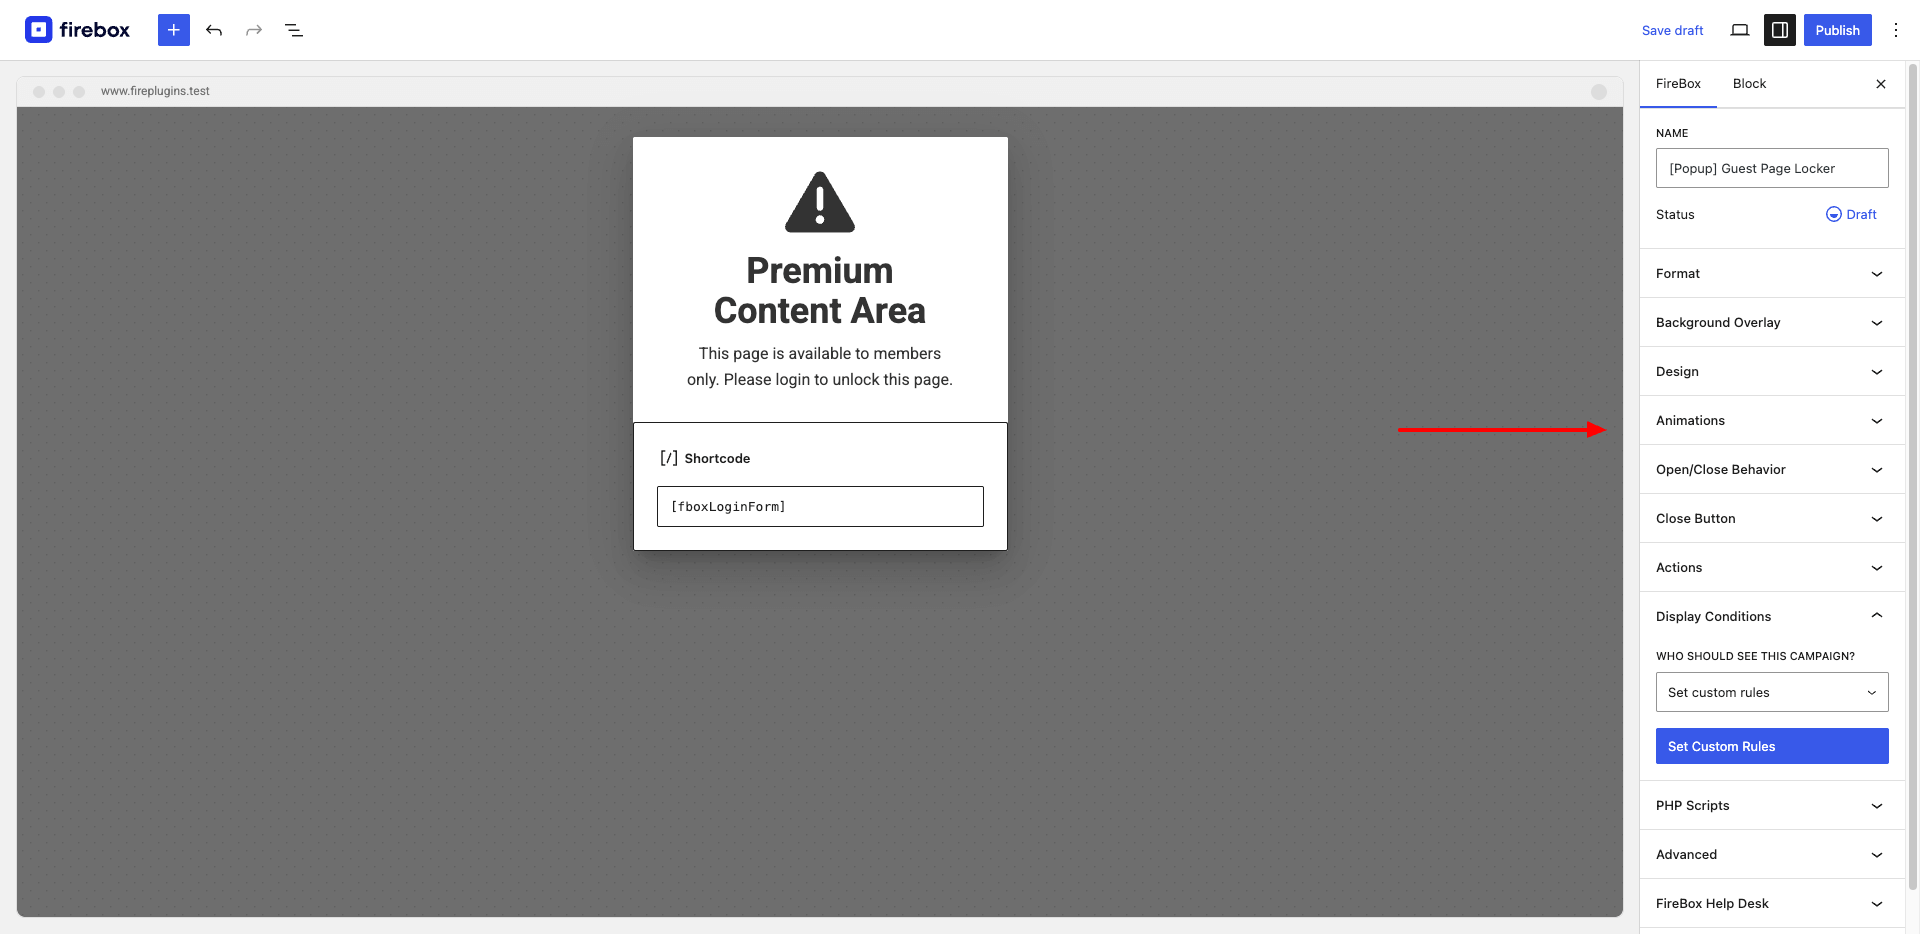
These options will help you customize the pop-up as per your needs. Let’s take a quick look at how you can use these options to restrict content on your WordPress site.
Customize your Restrict Content Popup Campaign
Use the Format Panel to select the campaign format, trigger, and position.

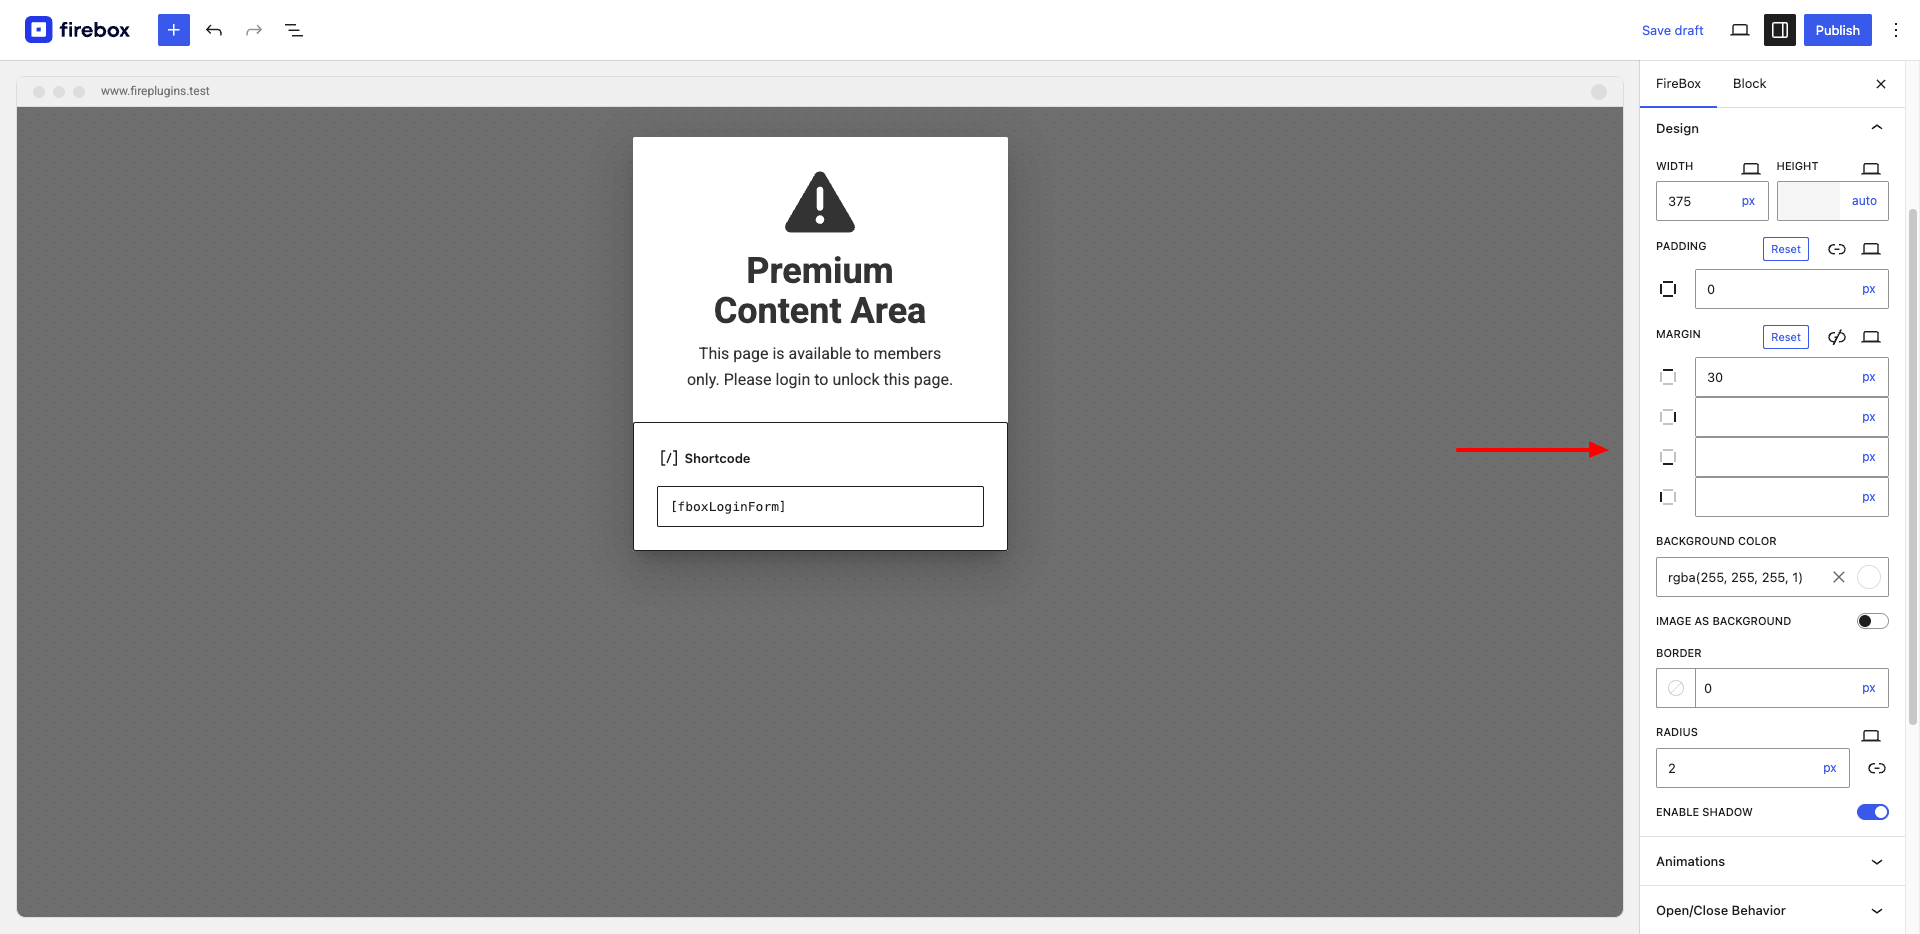
Use the Design Panel to configure the width, height, colors, spacing, border, and other appearance options of your content restriction popup.
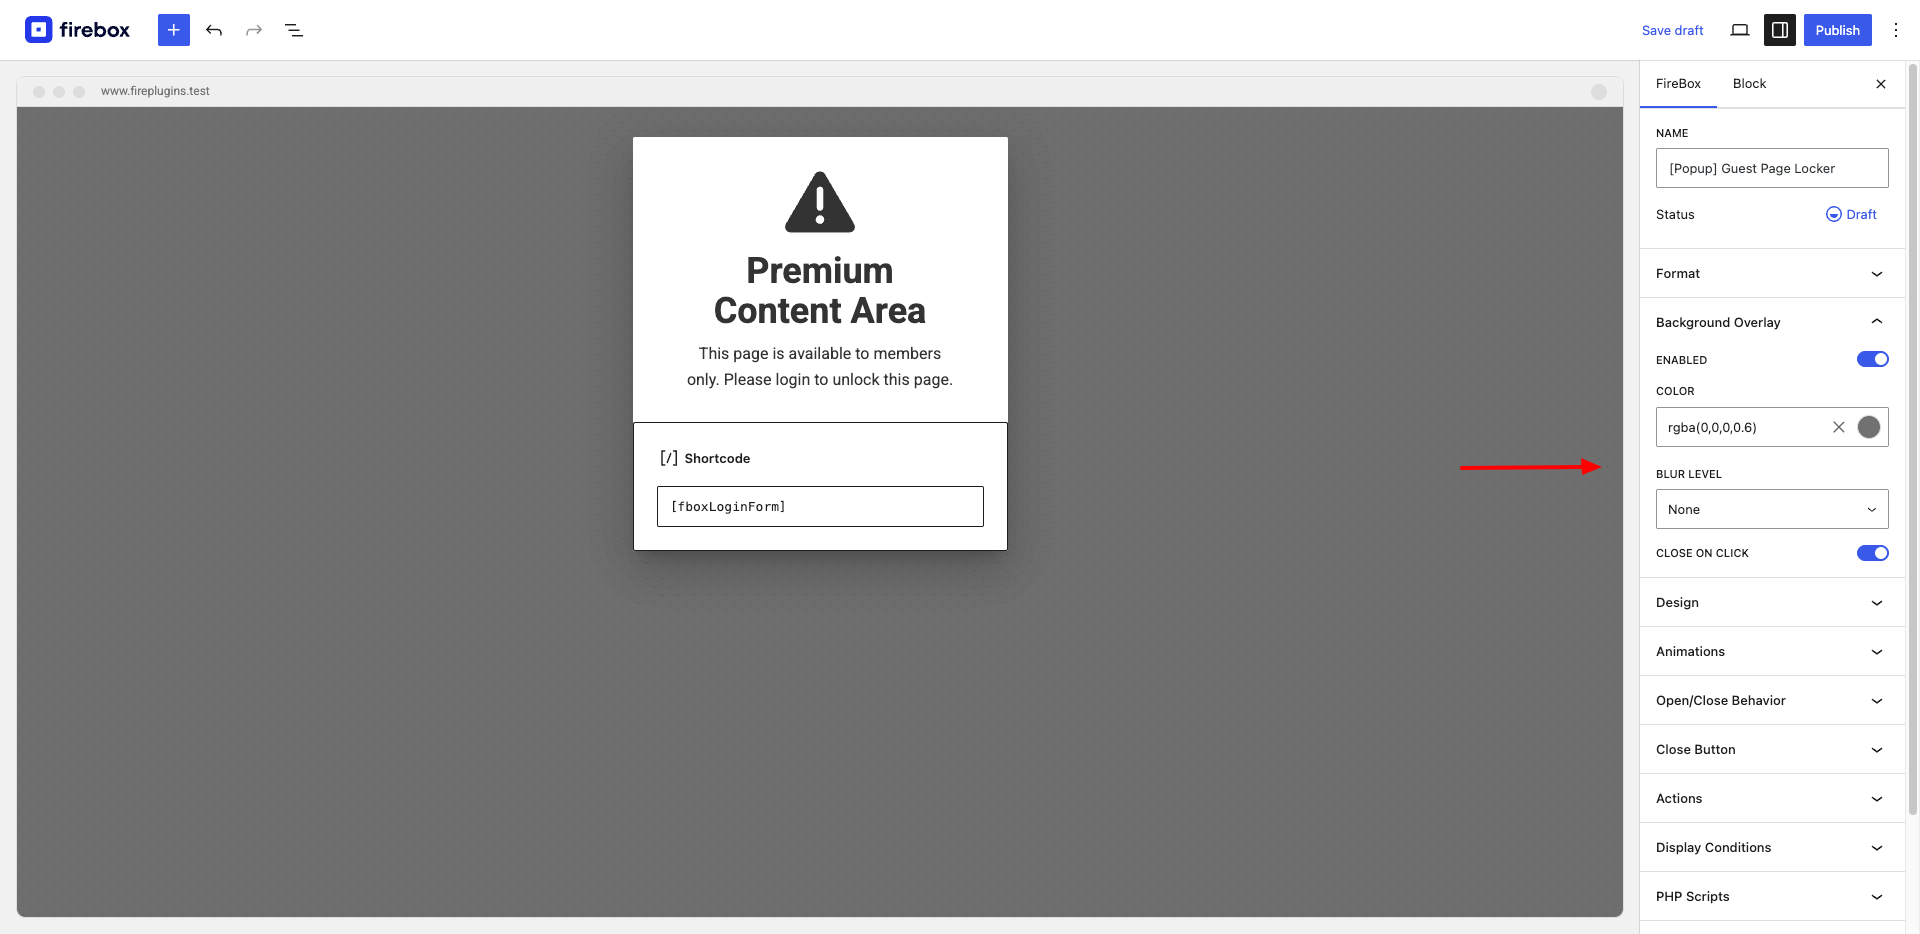
One of the most important sections is the Background Overlay Panel. It let's you choose to hide or blur the content in the background of the popup. This is an essential step and it will prevent visitors from peeking into restricted content.
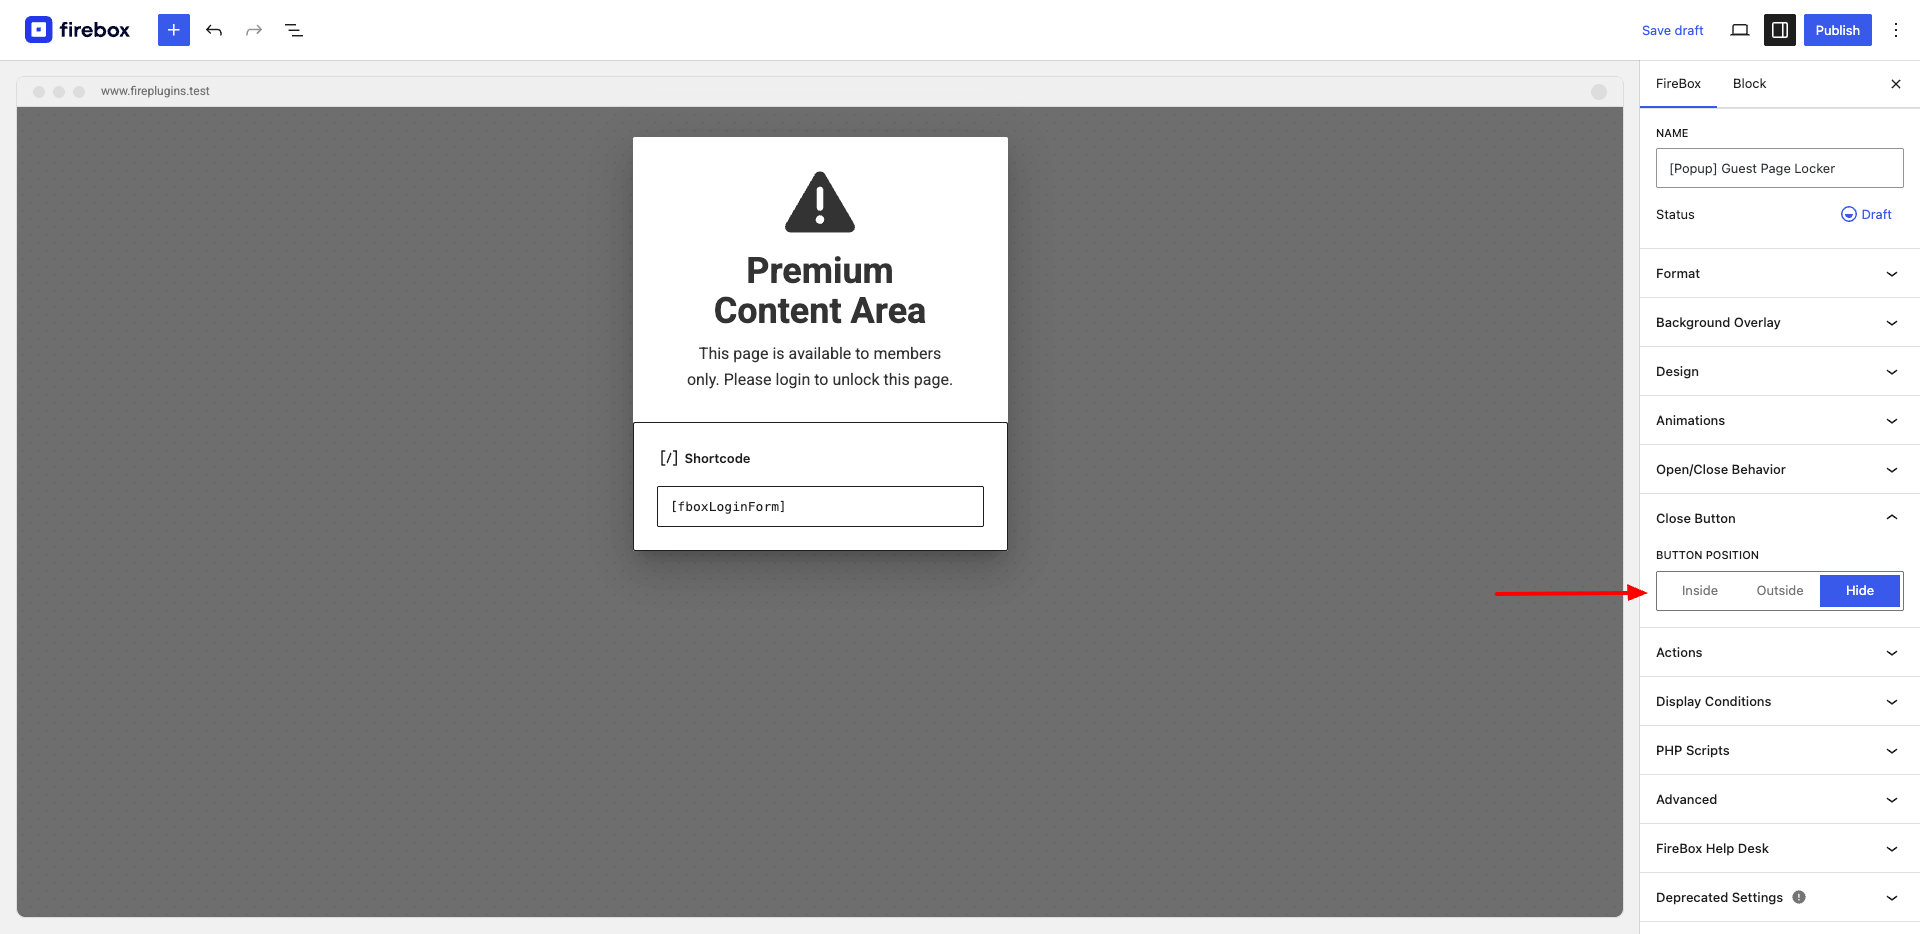
Another important section is the Close Button Panel. It allows you to configure how and when the close button will appear on the popup. You will notice that by default the close button is disabled. We recommend keeping it disabled so that visitors will have to either sign up or log in to your site to access the restricted content.
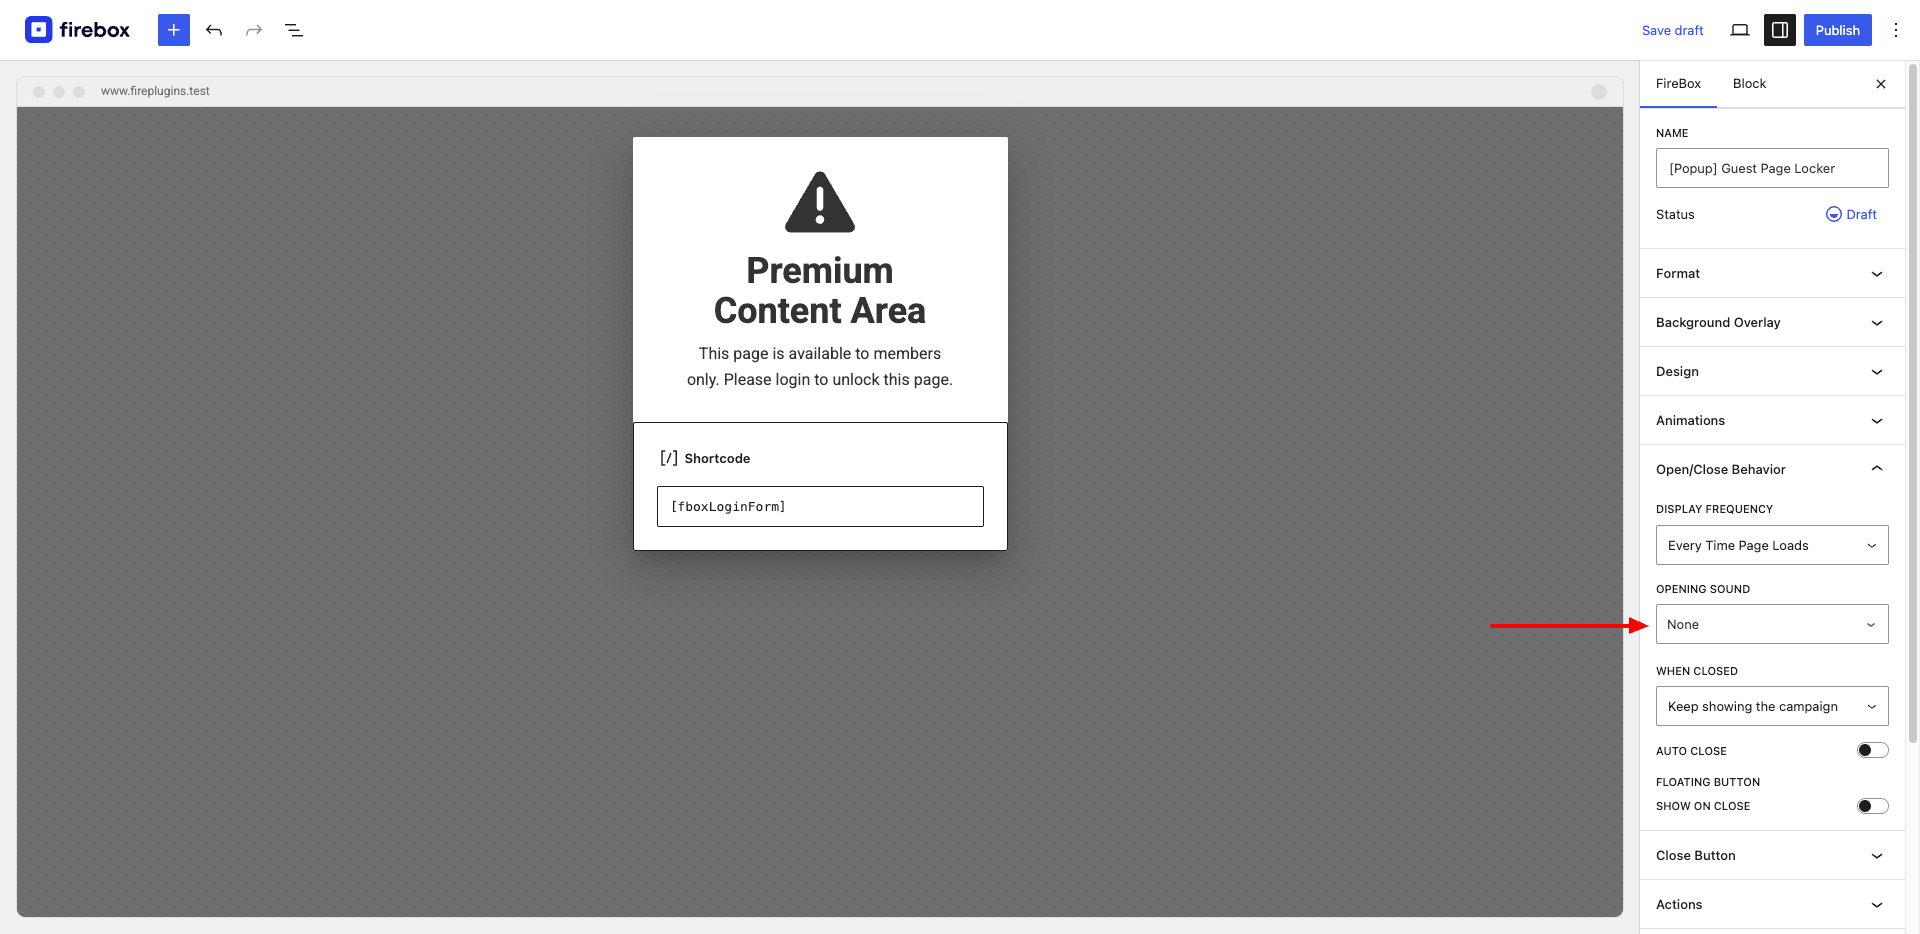
Open/Close Behavior: It allows you set whether to play an opening sound, as well as whether your popup should re-appear after it has been seen or closed, and more!
Display Conditions: Using Display Conditions, you can target specific visitors based on their geolocation, the device they are using like mobile, tablet, or desktop, and the number of pages they are viewing. You can also trigger popups based on your server's date and time, and target specific posts, pages, and categories, among other things.
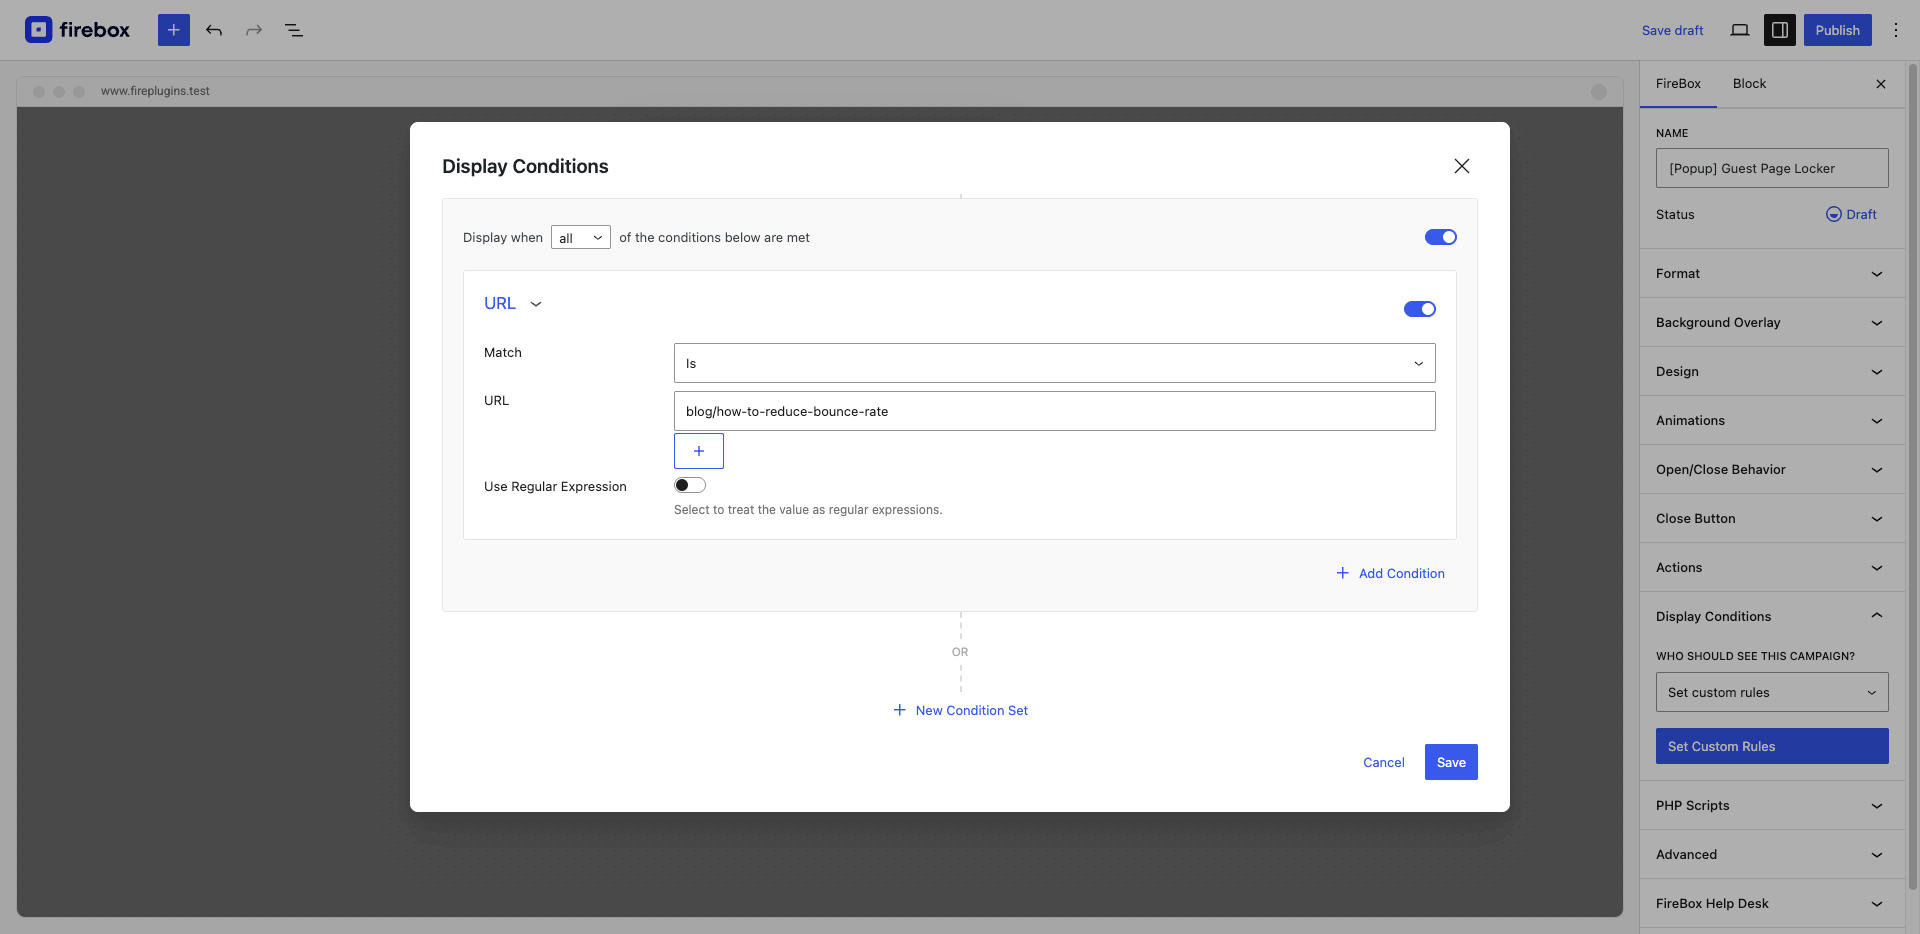
By default, the content restriction popups appear on the entire website. But you can use Display Conditions to ensure that the popups appear only on specific pages. All you need to do is go to Display Conditions Panel > select "Set custom rules", click on the "Set custom rules" button, select theURL Condition, and then enter the URLs to determine where the popup will appear.
It's worth noting that the Guest Page Locker is built to prevent only guests from accessing the content of a website. This means users who are already logged into the site won't see the popup and can access the restricted content. But if you wish to, you can restrict certain logged-in users from accessing the content
In Display Conditions, another helpful condition would be to use the User Group and/or User. The former lets you select to which user groups to display the campaign and the latter to which users to display it.
User Groups Condition

User Condition

Step 5: After you have tweaked the popups according to your needs, hit the Publish button.
The popup will now be live on the page that you specified. Anyone who tries to access the restricted content will be shown the popup and will be asked to log in. Here’s how the popup appears on our demo site:
As you can see FireBox popups are highly customizable but all these options can be a bit overwhelming for a beginner. This is why we recommend taking your time setting up the content restriction popup. And if you need further assistance, take a look at these help docs.
Conclusion
Restricting content on your WordPress website is a great way to keep things private or encourage people to sign up on your site.
Luckily, there are plenty of plugins that'll help you implement WordPress restrict content. We recommend using FireBox because it’s a complete popup solution for your WordPress site. It’s also very easy to operate and has a responsive support team who’ll go above and beyond to help you out.
Give FireBox a try!
Get FireBox for Free
Enter your WordPress website URL to install instantly.
Trusted by 9,000+ users
Hello, we are considering using Firebox services.
I have specific needs:
in the list of post(such as home page, category page, tag page). Suppose I have 10 posts/pages, I want to Blur any 5 post in those 10 posts. Can you share the solution, or code to help blur 5 posts?
Hello, you will need to use CSS to apply the blur filter this. You can read more here: https://developer.mozilla.org/en-US/docs/Web/CSS/backdrop-filter
I want to blur some posts similar to this page
https://explodingtopics.com