


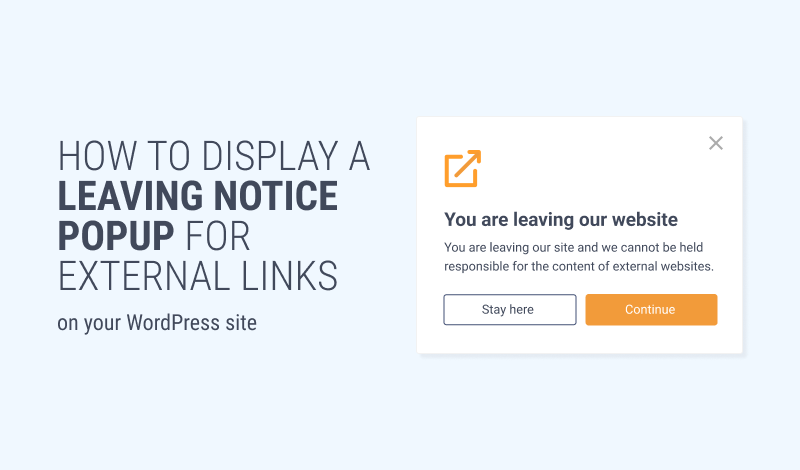
Do you want to warn visitors when they are leaving your site? Displaying a popup with a leaving notice is a great way to let your visitors know they are leaving your site while giving them a chance to stay back.
Adding a leaving warning popup to your site is easy if you know what tool to use. In this article, we will show you how to add a leaving notice popup using a plugin called FireBox.

But first, let’s discuss a few basic questions you may have, like which websites need a leaving notice popup, what are the benefits of using one, and how a leaving notice popup works.
Let’s get started.
Benefits of Adding Leaving Notice on External Links
By displaying an external link warning message on your external links, you are likely to experience the following benefits:
- Informing visitors when they are leaving your site is a decent thing to do. It leaves a good impression on your visitors and could be a stepping stone for building trust.
- A leaving warning makes it clear that the visitor is going to an external site which means your website is not responsible for the content the visitor is exposed to.
- The leaving notice allows visitors to stay on your site, which may help reduce bounce rates.
- On some websites leaving for an external link could mean being logged out of one’s account. Confirmation leaving notices on such sites can prevent unintended visitor behavior and improve the site navigation experience.
These are the benefits of displaying a leaving notice popup on your WordPress website. The next section will discuss whether all websites need a leave notice.
Why Do You Need a Leaving Notice For External Links
Typically websites like government organizations, investment firms, banks, and eCommerce sites are required to warn users when they are leaving the site.
This is because many websites will log you out of your account when you leave the site due to security concerns. Upon returning to the site, visitors may have to log in to access their account.
Another reason visitors are informed when they are leaving a site is not to be surprised when they end up somewhere else.
If that’s the case, then most websites can add an external link disclaimer popup for external links. But unlike government organizations, investment firms, banks, and eCommerce sites, leaving notice is not mandatory for most websites.
How Does a Leaving Notice Popup Work
Before we show you how to add a leaving notice popup to your WordPress website, let’s take a quick look at how such popups work.
A website leaving notice popup consists of a warning along with two buttons. The warning lets visitors know they are leaving the site, and the two buttons offer the choice to leave or stay back on the site.
Like any other popup, the leaving notice popup too has a trigger or cue for when to appear. These popups appear when a visitor clicks on an external link found anywhere on the site.
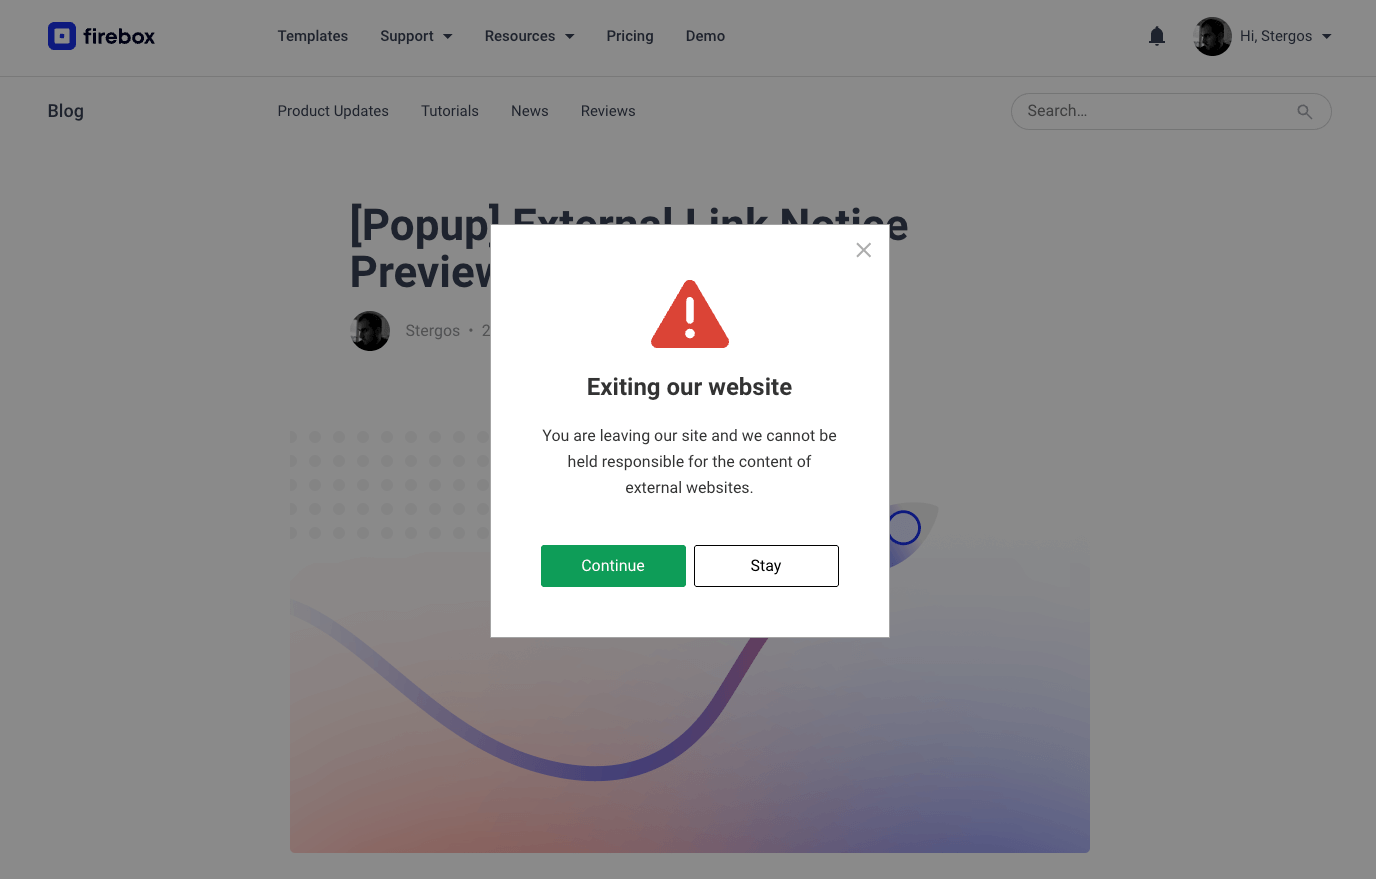
Here’s a leaving notice popup that appears when someone clicks on an external link on our demo site:
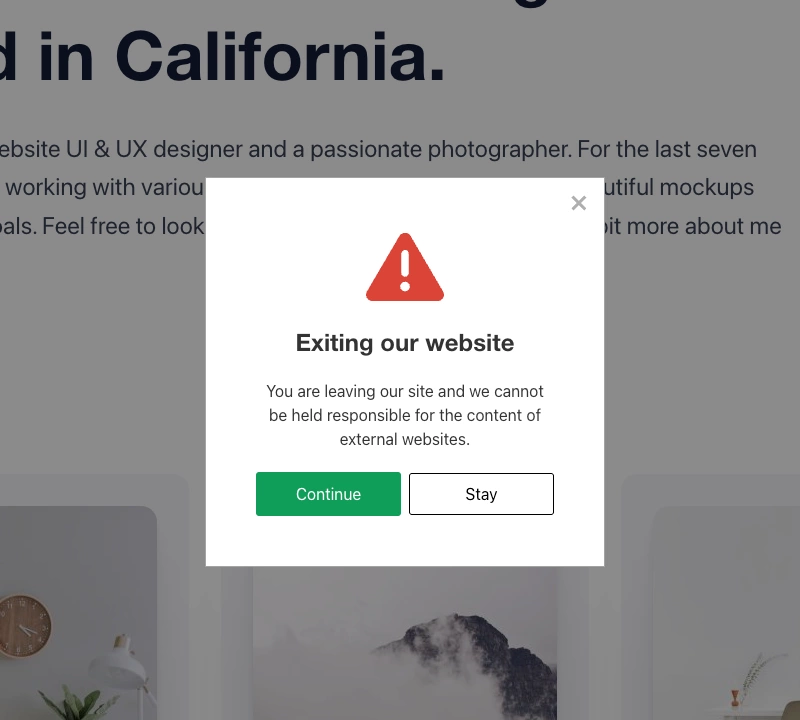
As you can see, visitors can click on “Continue” and leave the site to go to an external site, or they can click on “Stay” to stay back on the site. They can also select the cross sign to remain on the site.
The next section will show you how to create a similar popup on your WordPress website.
Create a Leaving Notice Popup For External Links
To create a leaving notice popup, you will need to take the following steps:
- Install and activate FireBox Pro
- Select a Leaving Notice Template
- Check trigger point
Let’s dive deeper into each step and learn how to implement them on your WordPress site.
That said, before you begin, take a backup of your website. The steps you take in this tutorial are not super risky, but something as commonplace as installing a new plugin has previously broken many websites. A backup is a safety net for when things go wrong. Therefore take a backup before proceeding with the steps below.
1. Install FireBox Pro
When it comes to WordPress popups, FireBox is the ultimate solution. This popup plugin serves as both a form builder and a popup builder, making it the ideal choice. The best part is that you don't require coding skills to utilize its functionalities.
First, you must install FireBox Pro on your WordPress site if you don't already have it.

If you don't know how to install it, see our documentation on installing FireBox Pro for help.
You can easily upgrade from Lite to Pro if you already use the FireBox Lite version. However, after installing or upgrading to Pro, you need to activate your license to ensure you receive automatic plugin updates.
2. Create a Popup Displaying Leaving Notice
After activating the plugin on your site, it’s time to create a popup.
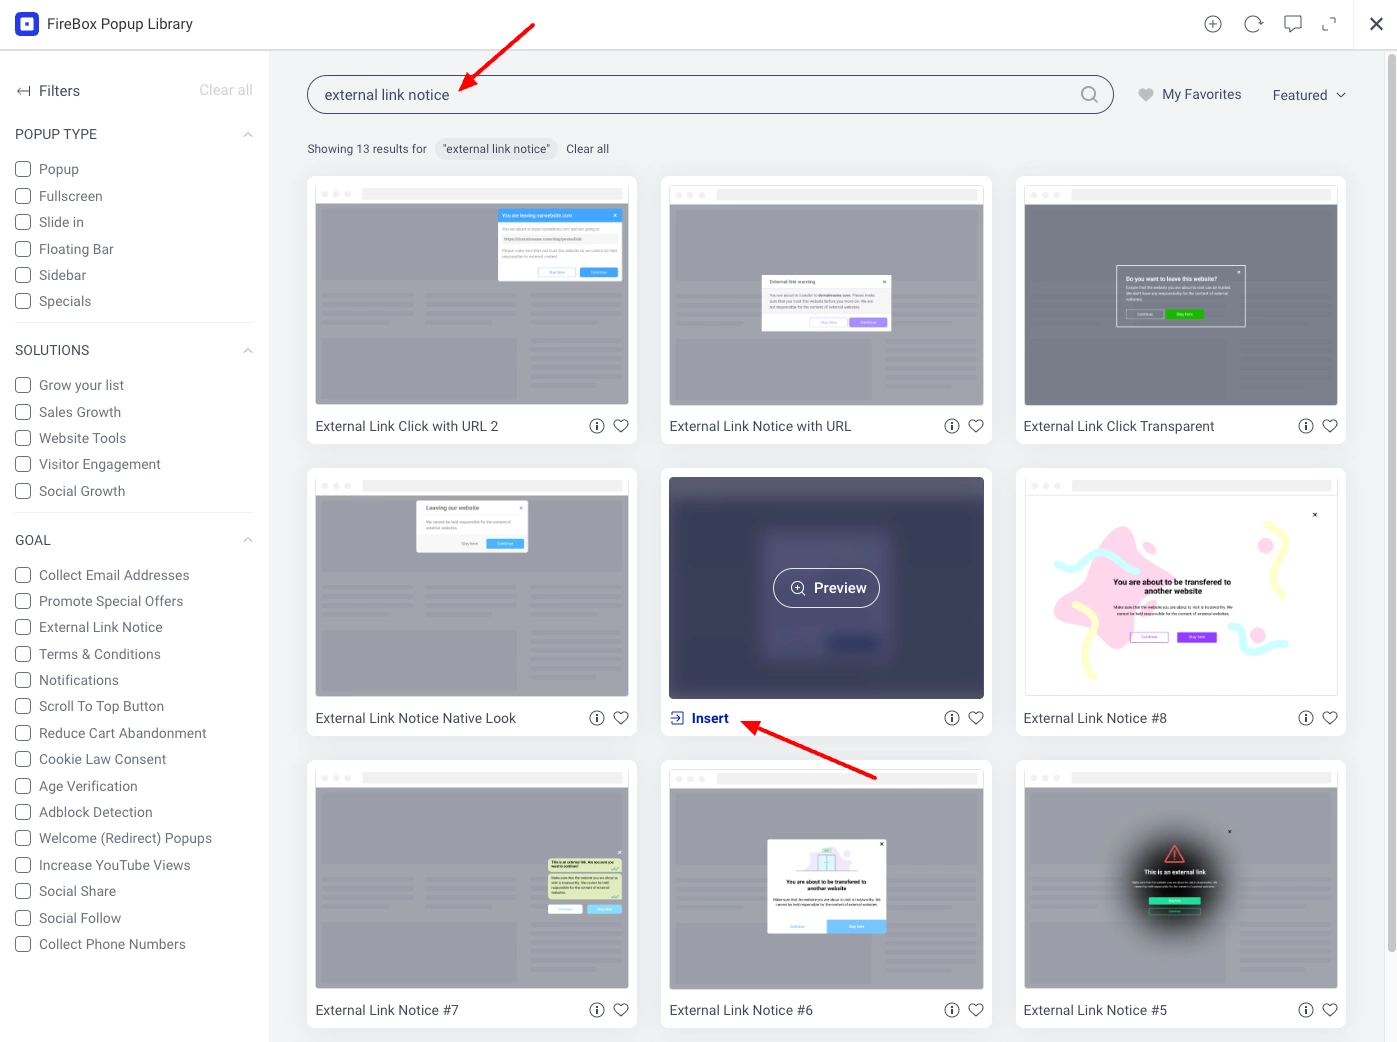
On your WordPress dashboard, go to FireBox > Dashboard > New Campaign. A pop-up library will open with a search bar on the right.
In the search bar, write “external link notice” and all the external link warning message popups will appear.
Select the popup, and it will reveal an Insert button. Click on it, and it will take you to the popup editor.
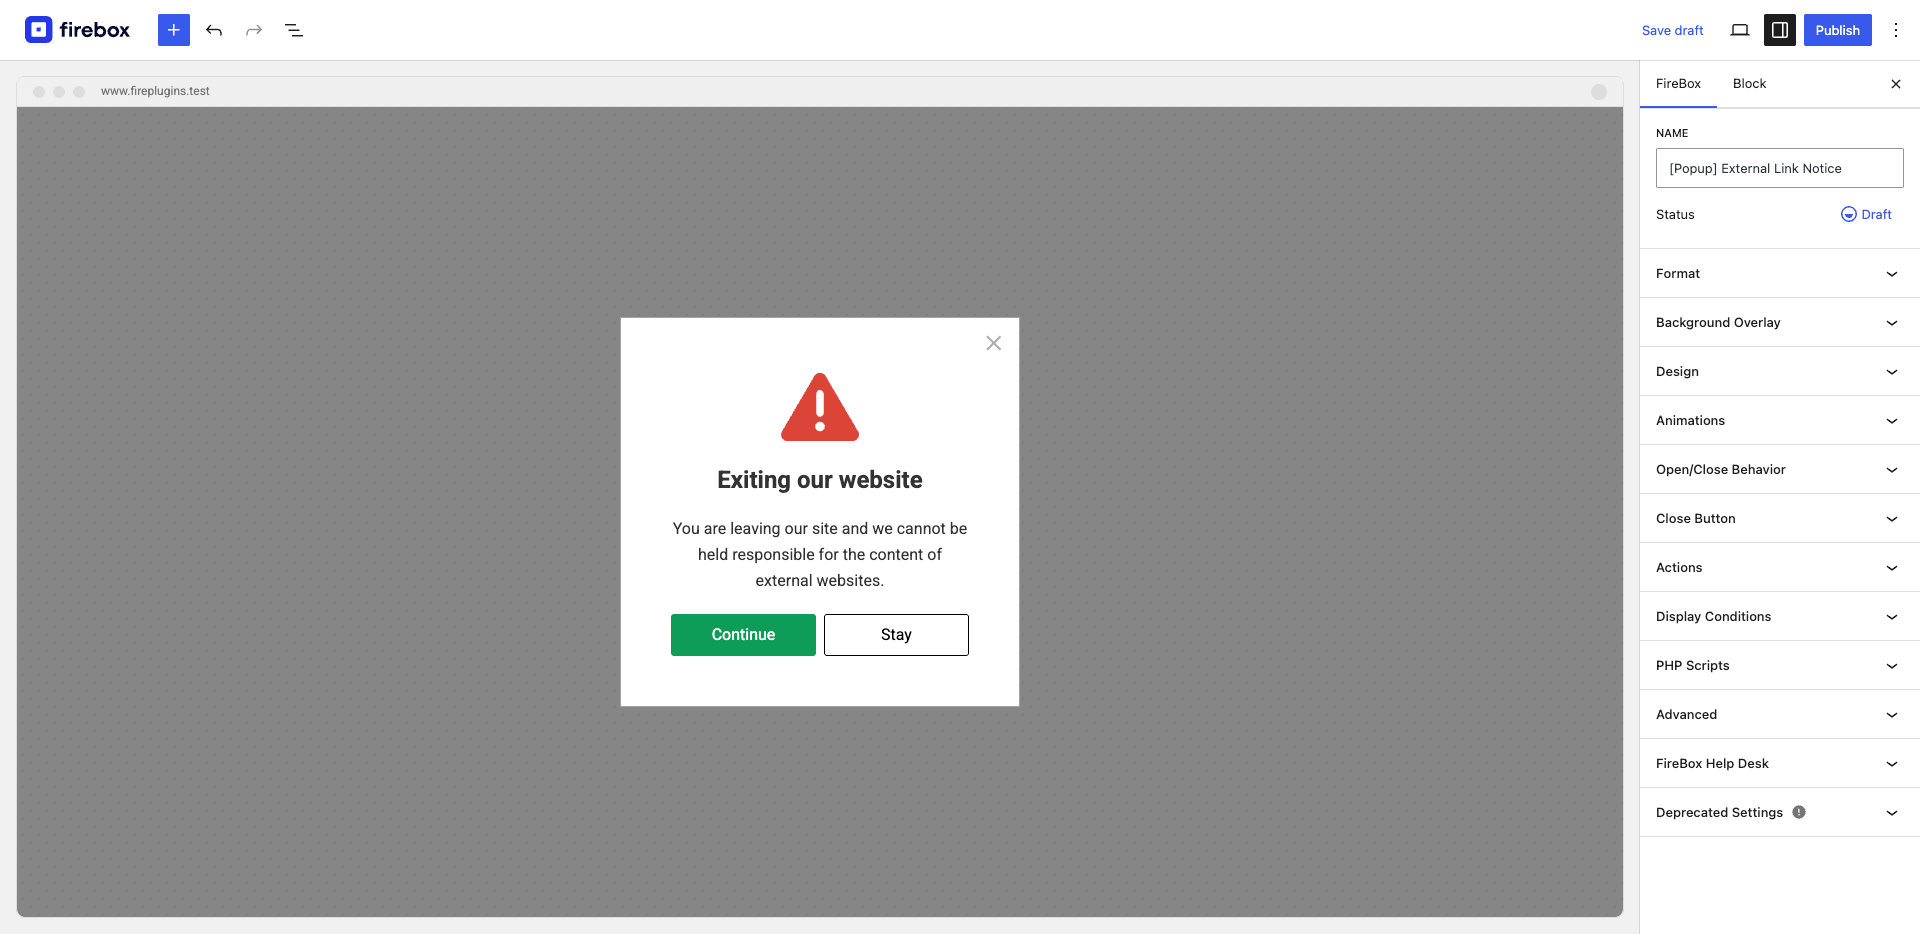
The popup itself can be used out of the box, but if you want to modify the text or the buttons, go ahead and use the popup editor. It works just like the Gutenberg editor.
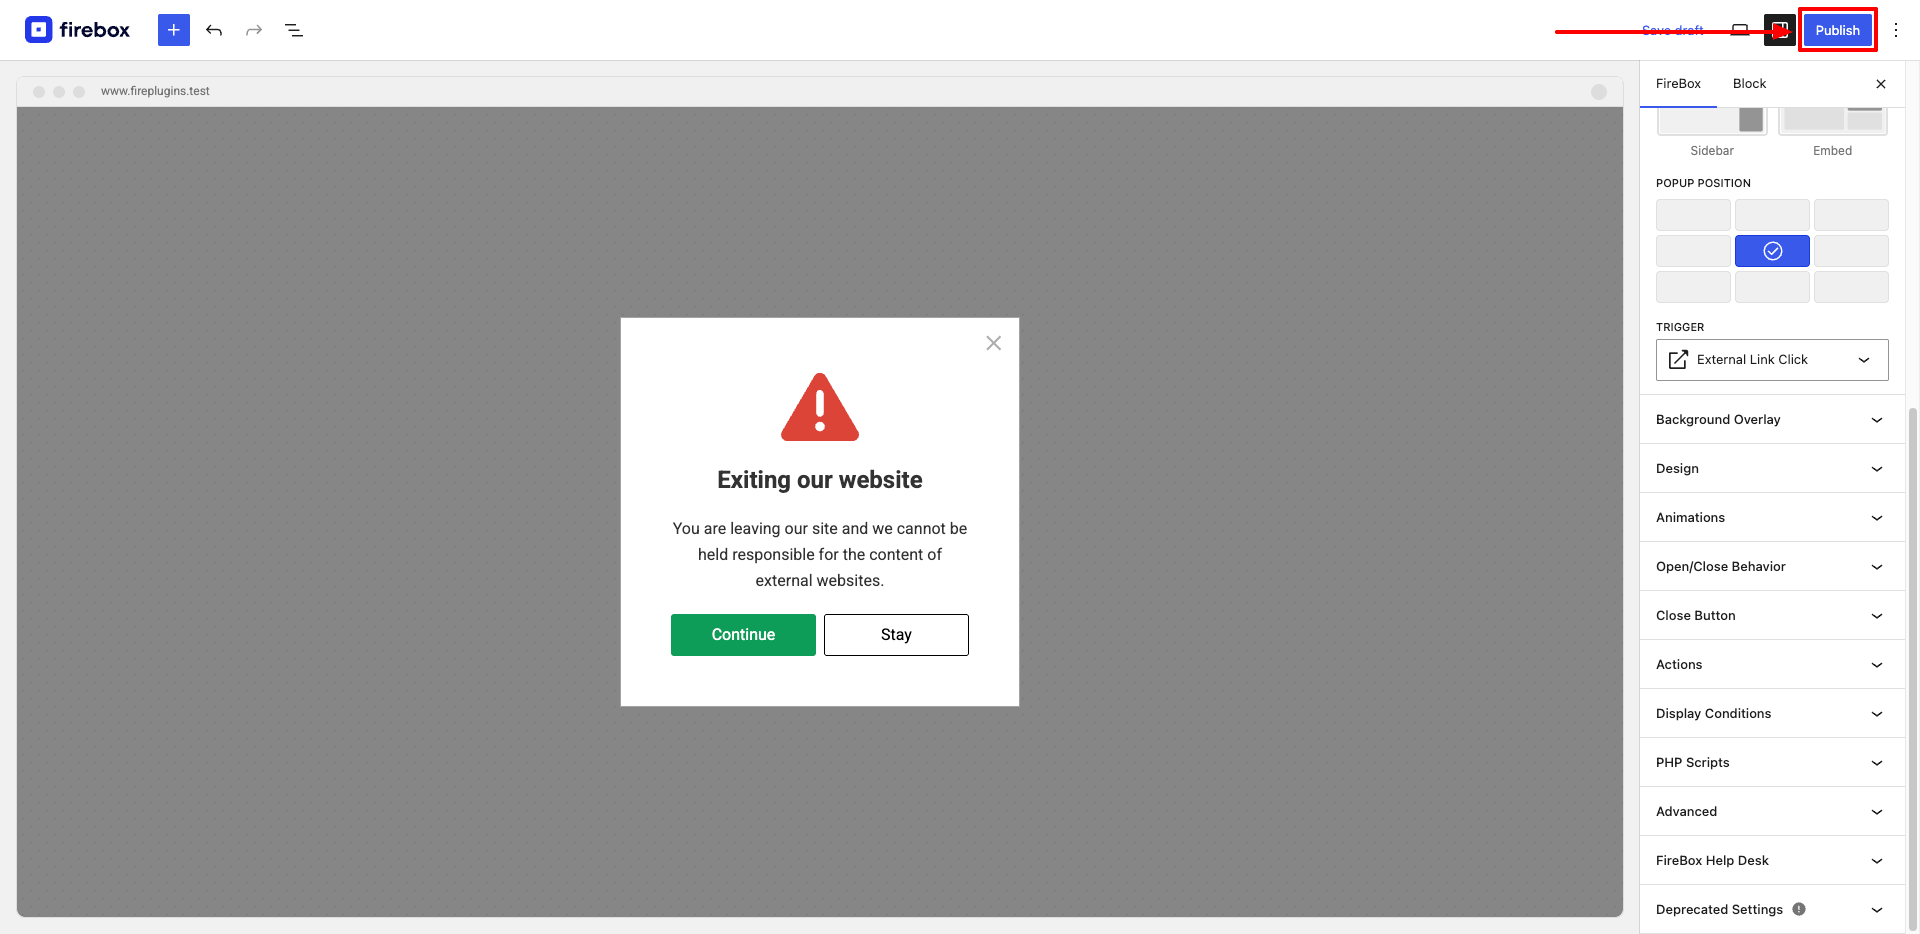
3. Check Trigger Point
Now that the popup is published, you would want to make sure that the popup appears only when the reader clicks on an external link.
The external link popup template automatically sets the trigger point, but we recommend checking it.
Then, hit the Publish button at the top of the page.
By the end, you should have a leaving notice popup that looks like this:
As you can see, creating a popup using the FireBox plugin is not very difficult, and it’s not too time-consuming. That said, if you need any assistance, these documents will help you.
Conclusion
Displaying an external link popup ensures that your visitors are warned about leaving the site and can choose to stay back on it.
Creating a popup is made easy by plugins like FireBox as it has prebuilt, leaving notice templates to choose from. The templates are good to go out of the box, but you can modify them according to your needs.
Besides, FireBox is a complete popup solution which means there are tons of other types of popups that you can implement on your site just as easily.
You can position them anywhere on your site, detect visitor behavior and show relevant popup messages, and use the built-in analytics to find out how the popups are performing, among other things.
Give FireBox a spin!
Get FireBox for Free
Enter your WordPress website URL to install instantly.
Trusted by 9,000+ users


0 Comments