
Creating an effective WooCommerce popup doesn’t have to be annoying. When you create a WooCommerce popup that appears at the right moment and offers real value, it boosts conversions, helps recover abandoned carts, and grows your email list, without frustrating your visitors.
In this guide, I'll walk you through how to create a popup that actually works. First, we'll look at what makes a good popup strategy. Then, we'll explore the most effective popup types for eCommerce. Finally, I'll take you step by step through building your first WooCommerce popup using the right tools.

Let's turn your popup into something your visitors appreciate and your store benefits from.
Why Your WooCommerce Store Needs Strategic Popups
If you haven’t yet created a WooCommerce popup, you're missing out on one of the most powerful conversion tools for your store. A well-implemented popup strategy can help guide a visitor toward becoming a customer, which is at the heart of effective conversion optimization. Here’s why:
- Dramatically Grow Your Email List: Social media is fleeting and ad costs are rising, but your email list is an asset you own forever. A welcome popup offering a 10% discount in exchange for an email is a classic for a reason: it works. You build a direct line to your customers for promotions, newsletters, and announcements.
- Boost Sales and Increase Average Order Value (AOV): Popups are conversion machines. You can offer a discount to a new visitor to secure that crucial first sale, promote a dynamic free shipping bar ("You're only $15 away from free shipping!"), or use them for strategic upsells. For instance, when a user adds a camera to their cart, a popup can offer a discounted memory card. To further increase your average order value (AOV), consider implementing strategies such as offering tiered discounts for bulk purchases, presenting relevant upsells and cross-sells, and using exit-intent offers.
- Reduce Cart Abandonment: Did you know that nearly 70% of all online shopping carts are abandoned? An exit-intent popup, which appears only when a user is about to leave your cart page, is your digital safety net. It's your last chance to save the sale with a special offer or reminder to help reduce cart abandonment in your online store. You can further enhance these efforts by learning how to create a WooCommerce abandoned cart popup that actually converts hesitant shoppers.
- Make Important Announcements: Need to announce a flash sale, inform customers about shipping delays, or launch a new product line? A simple, non-intrusive notification bar popup at the top of the page is the perfect way to communicate time-sensitive information to every visitor.
Creating Your First WooCommerce Popup
For this guide, we'll help you create the most essential WooCommerce popup for any new store: The Welcome Discount Popup, designed to engage new visitors after they’ve had a chance to explore. If you'd prefer exploring a wider range of popup tools, our overview of WooCommerce sales popup plugins is your next stop.
Before you can begin the tutorial, you must install a reliable plugin on your site. When it comes to popups, or forms, FireBox is the best WordPress popup plugin. It’s a powerful popup maker for WordPress based on the Gutenberg Block Editor. With a user-friendly interface, FireBox allows you to easily create and customize various popups, including lightboxes, sticky bars, sidebars, fullscreen popups, slide-ins, floating buttons, and more.

FireBox offers precise control over when the forms appear, giving you access to creating personalized and targeted forms with display conditions based on Device, Referrer, Page, URL, Cookie, Geolocation, Datetime, and even conditions for WooCommerce.
Step 1: Download FireBox Lite
The very first step is to download FireBox Lite and install it on your WordPress site by following the steps listed below.
Step 2: Install FireBox Lite
After downloading the FireBox Free installation zip file, upload it to your site.
- Head to your WordPress dashboard and click on Plugins > Add New.
- Choose the zip file you have just downloaded. Click on install.
- Once the plugin is installed, click the Activate Plugin button to activate the plugin on your site.
If you need any help with the installation process, see the documentation on installing FireBox for help. Looking to go Pro? Don't worry, if you're already using FireBox Lite, you can easily upgrade from Lite to Pro. However, after upgrading to Pro, you must also activate your license to ensure you receive automatic plugin updates.
Step 3: Create and Design Your Popup
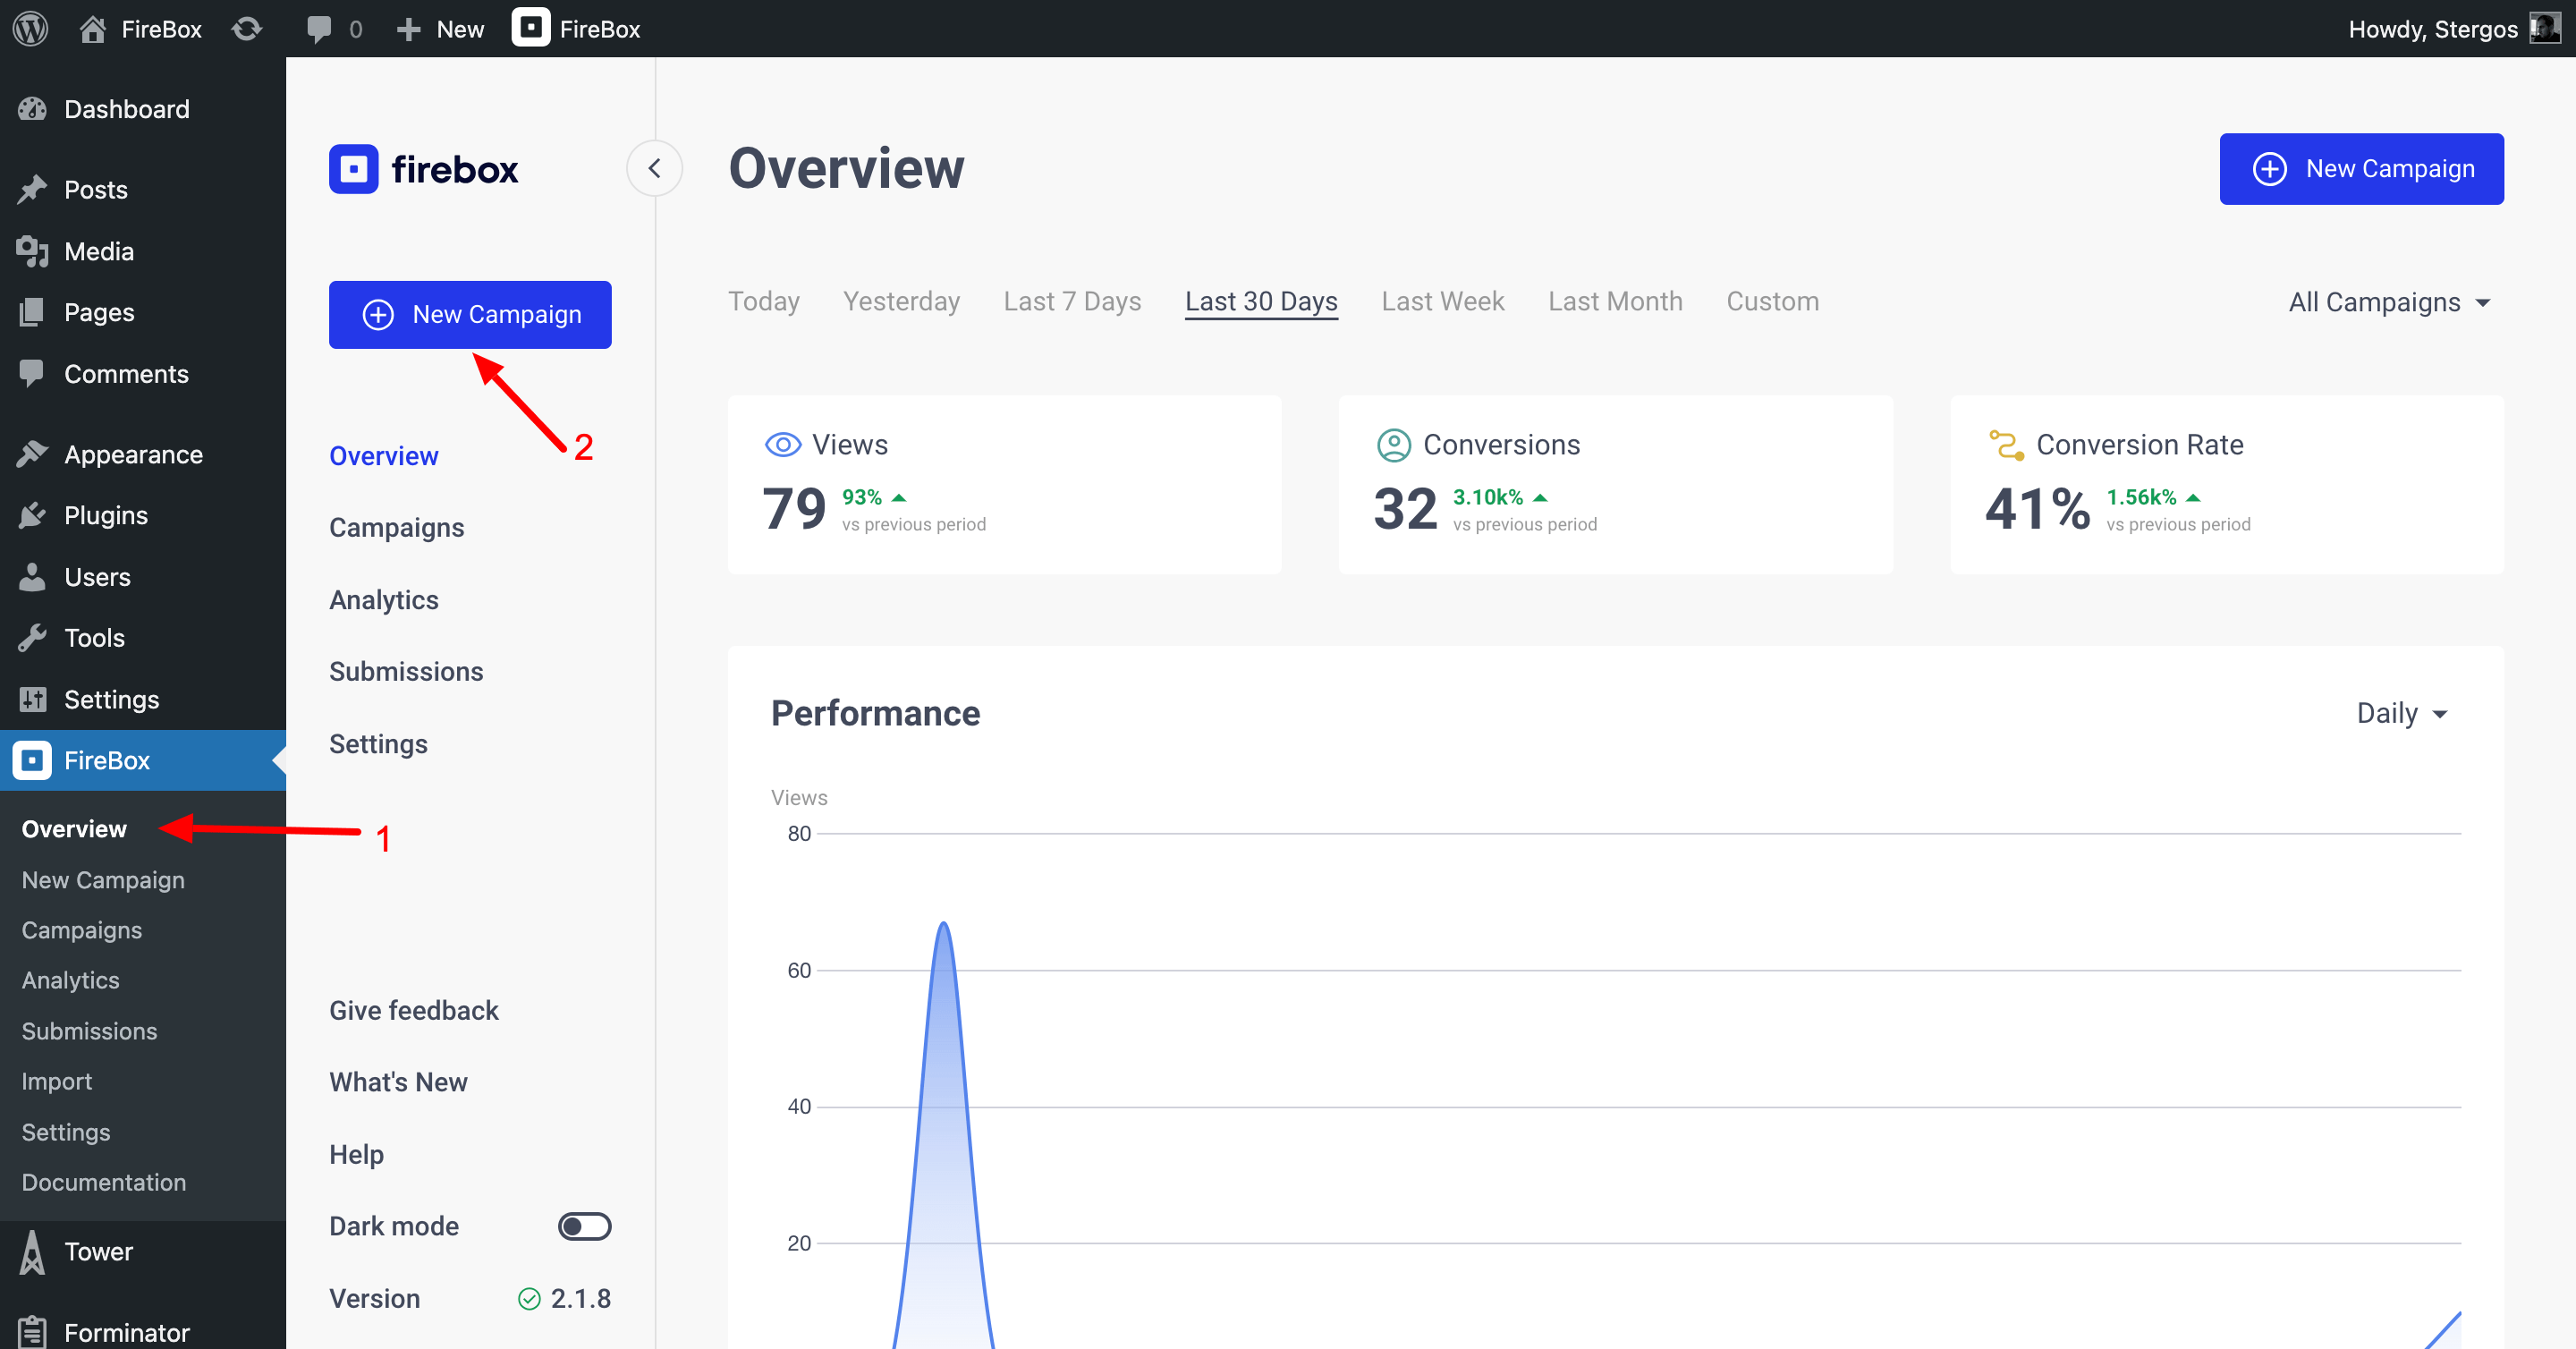
To create your WooCommerce popup, navigate to FireBox > Overview and click "Create Campaign".
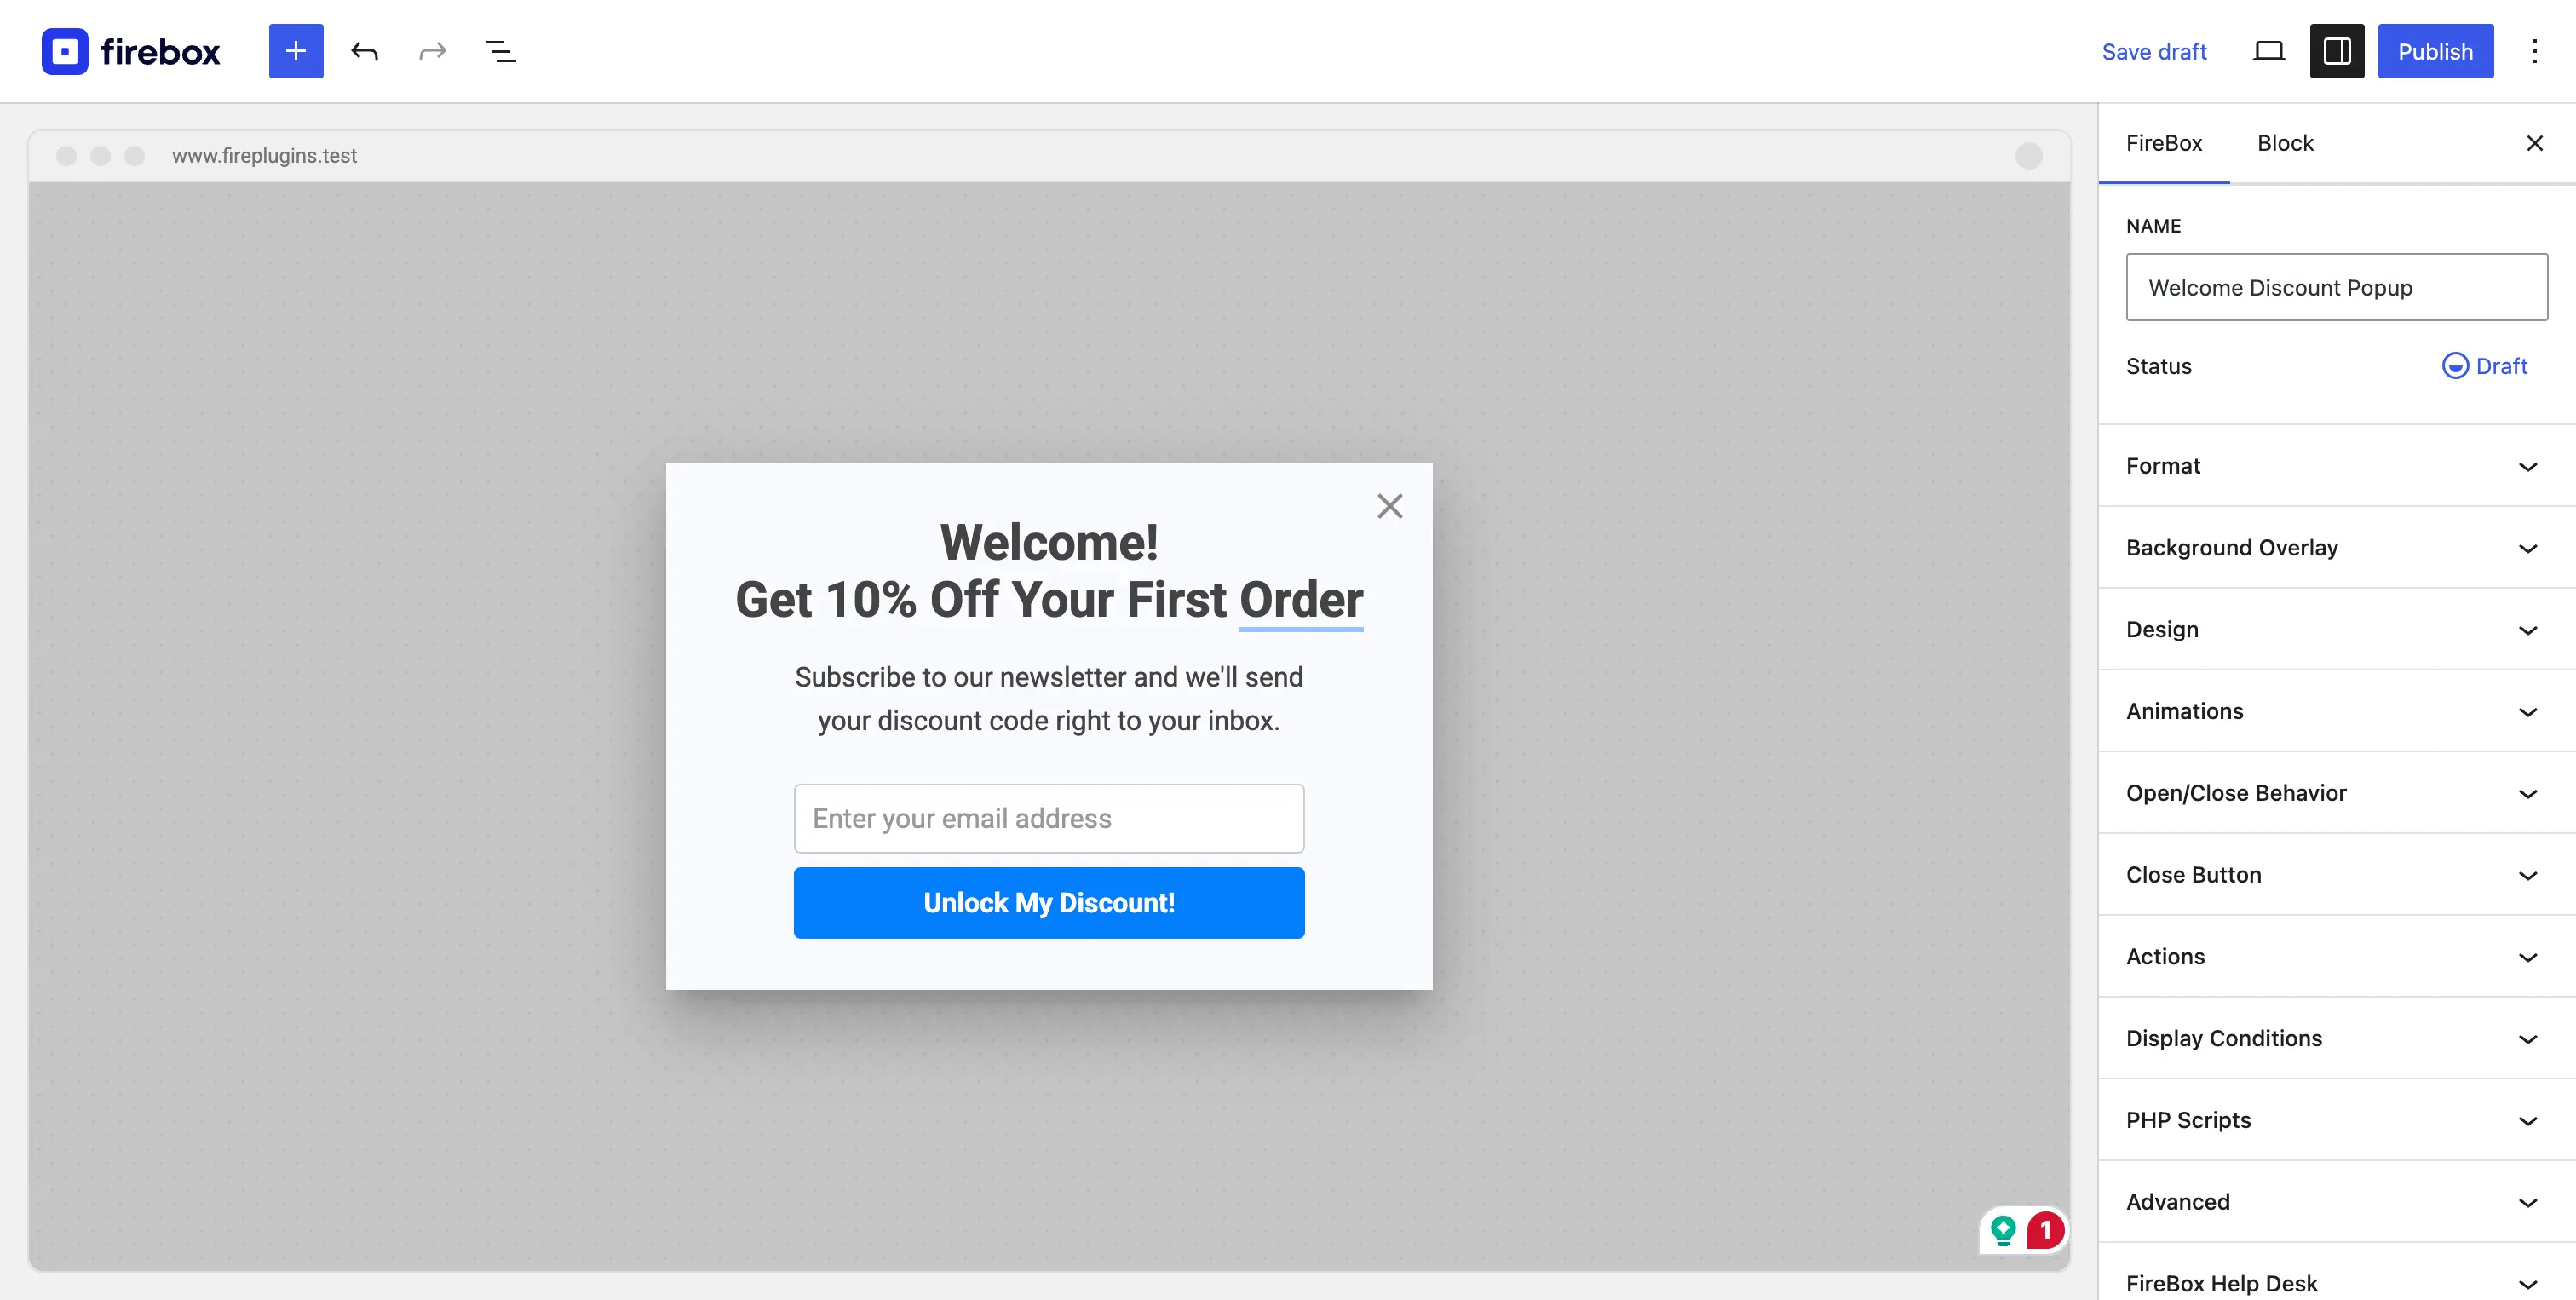
- Name it "Welcome Discount Popup" (this is for your reference only).
- Let's build our welcome popup campaign.
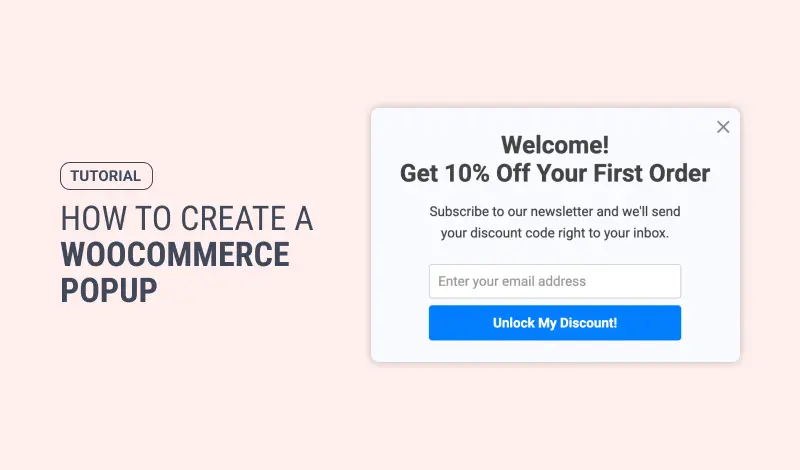
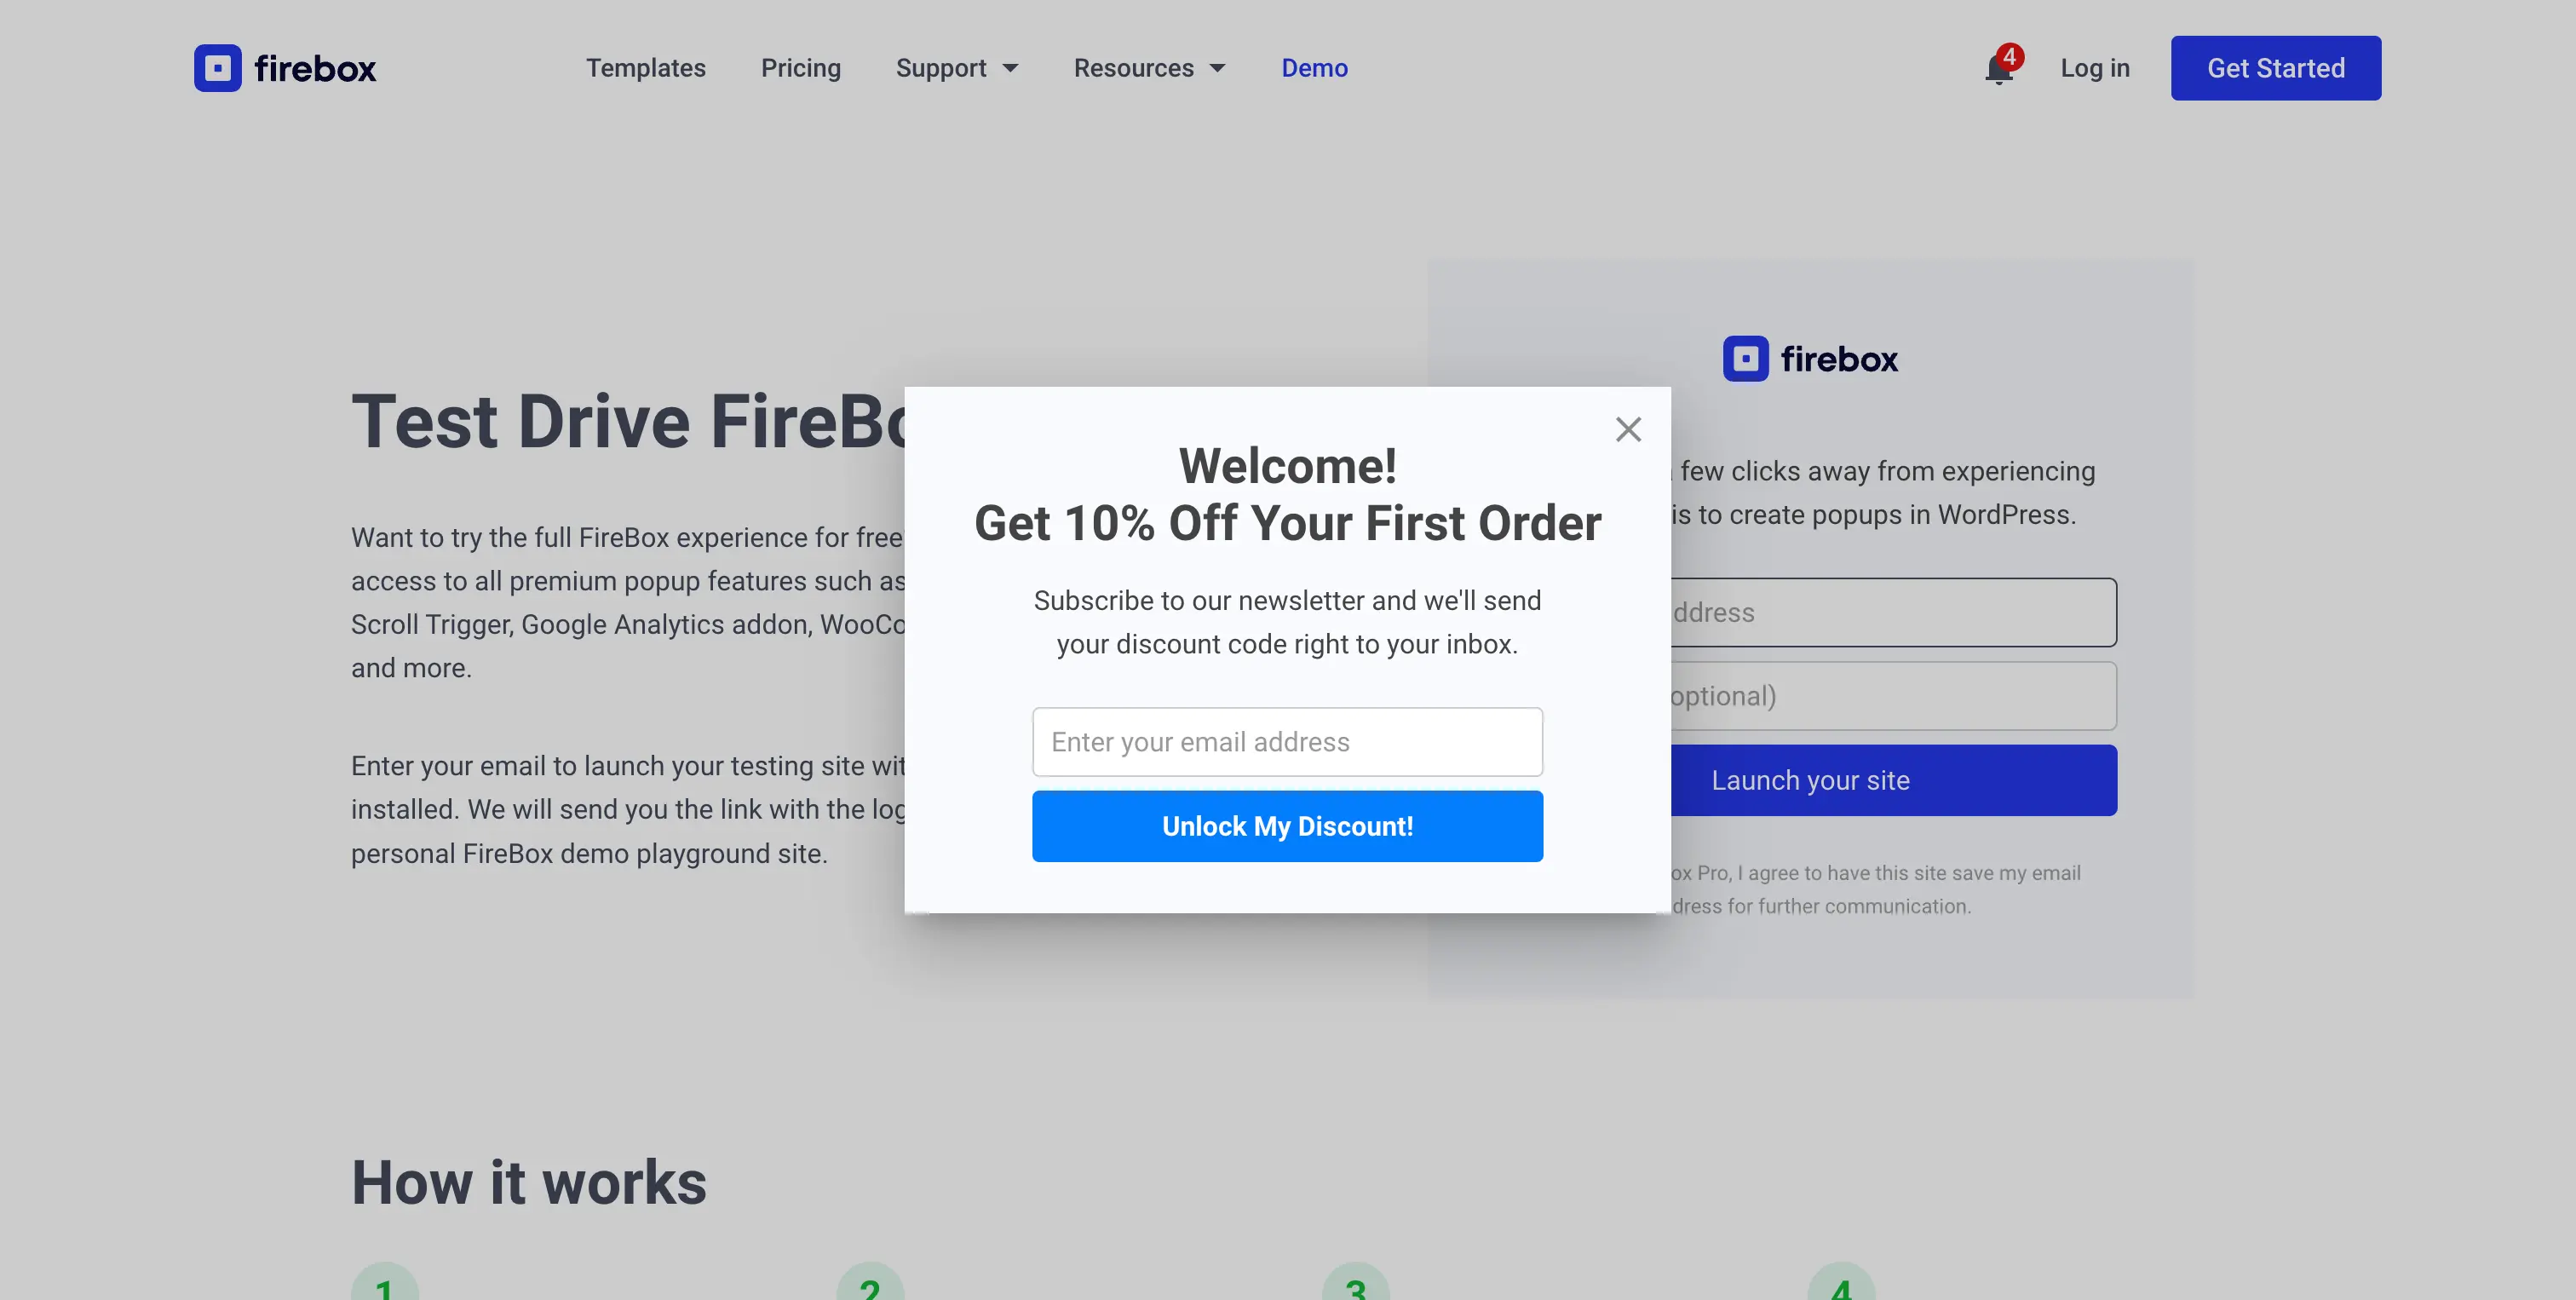
- Headline: Click the default heading. In the content panel on the left, change the text to something that clearly states the value. Example: "Welcome! Get 10% Off Your First Order".
- Body Copy: Click the text block below. Explain how to get the offer. Example: "Subscribe to our newsletter and we'll send your discount code right to your inbox."
- Call-to-Action (CTA) Button: Click the button. Change the Button Text to something exciting. Example: "Unlock My Discount!".
Under the Design Panel, you can adjust colors and fonts to make your WooCommerce popup perfectly match your brand's look and feel.
Once your WooCommerce popup looks perfect, move to step 4 to control how it triggers.
Step 4: Set the Trigger
The trigger determines when the created WooCommerce popup appears on your WordPress site. An unexpected popup can catch you off guard!. A slight delay feels more natural and respectful.
- On the right-hand side of the campaign editor, click on the Format panel.
- Locate the Trigger setting, and select "Page Load".
- Set the "Delay" to 5 seconds.
This helps your visitors get settled before you show them your offer.

Step 5: Configure Display Conditions for Precision Targeting
This is the most critical step. This is what makes a popup smart. We will show the WooCommerce popup only to new, non-logged-in visitors and only on the main shop page.
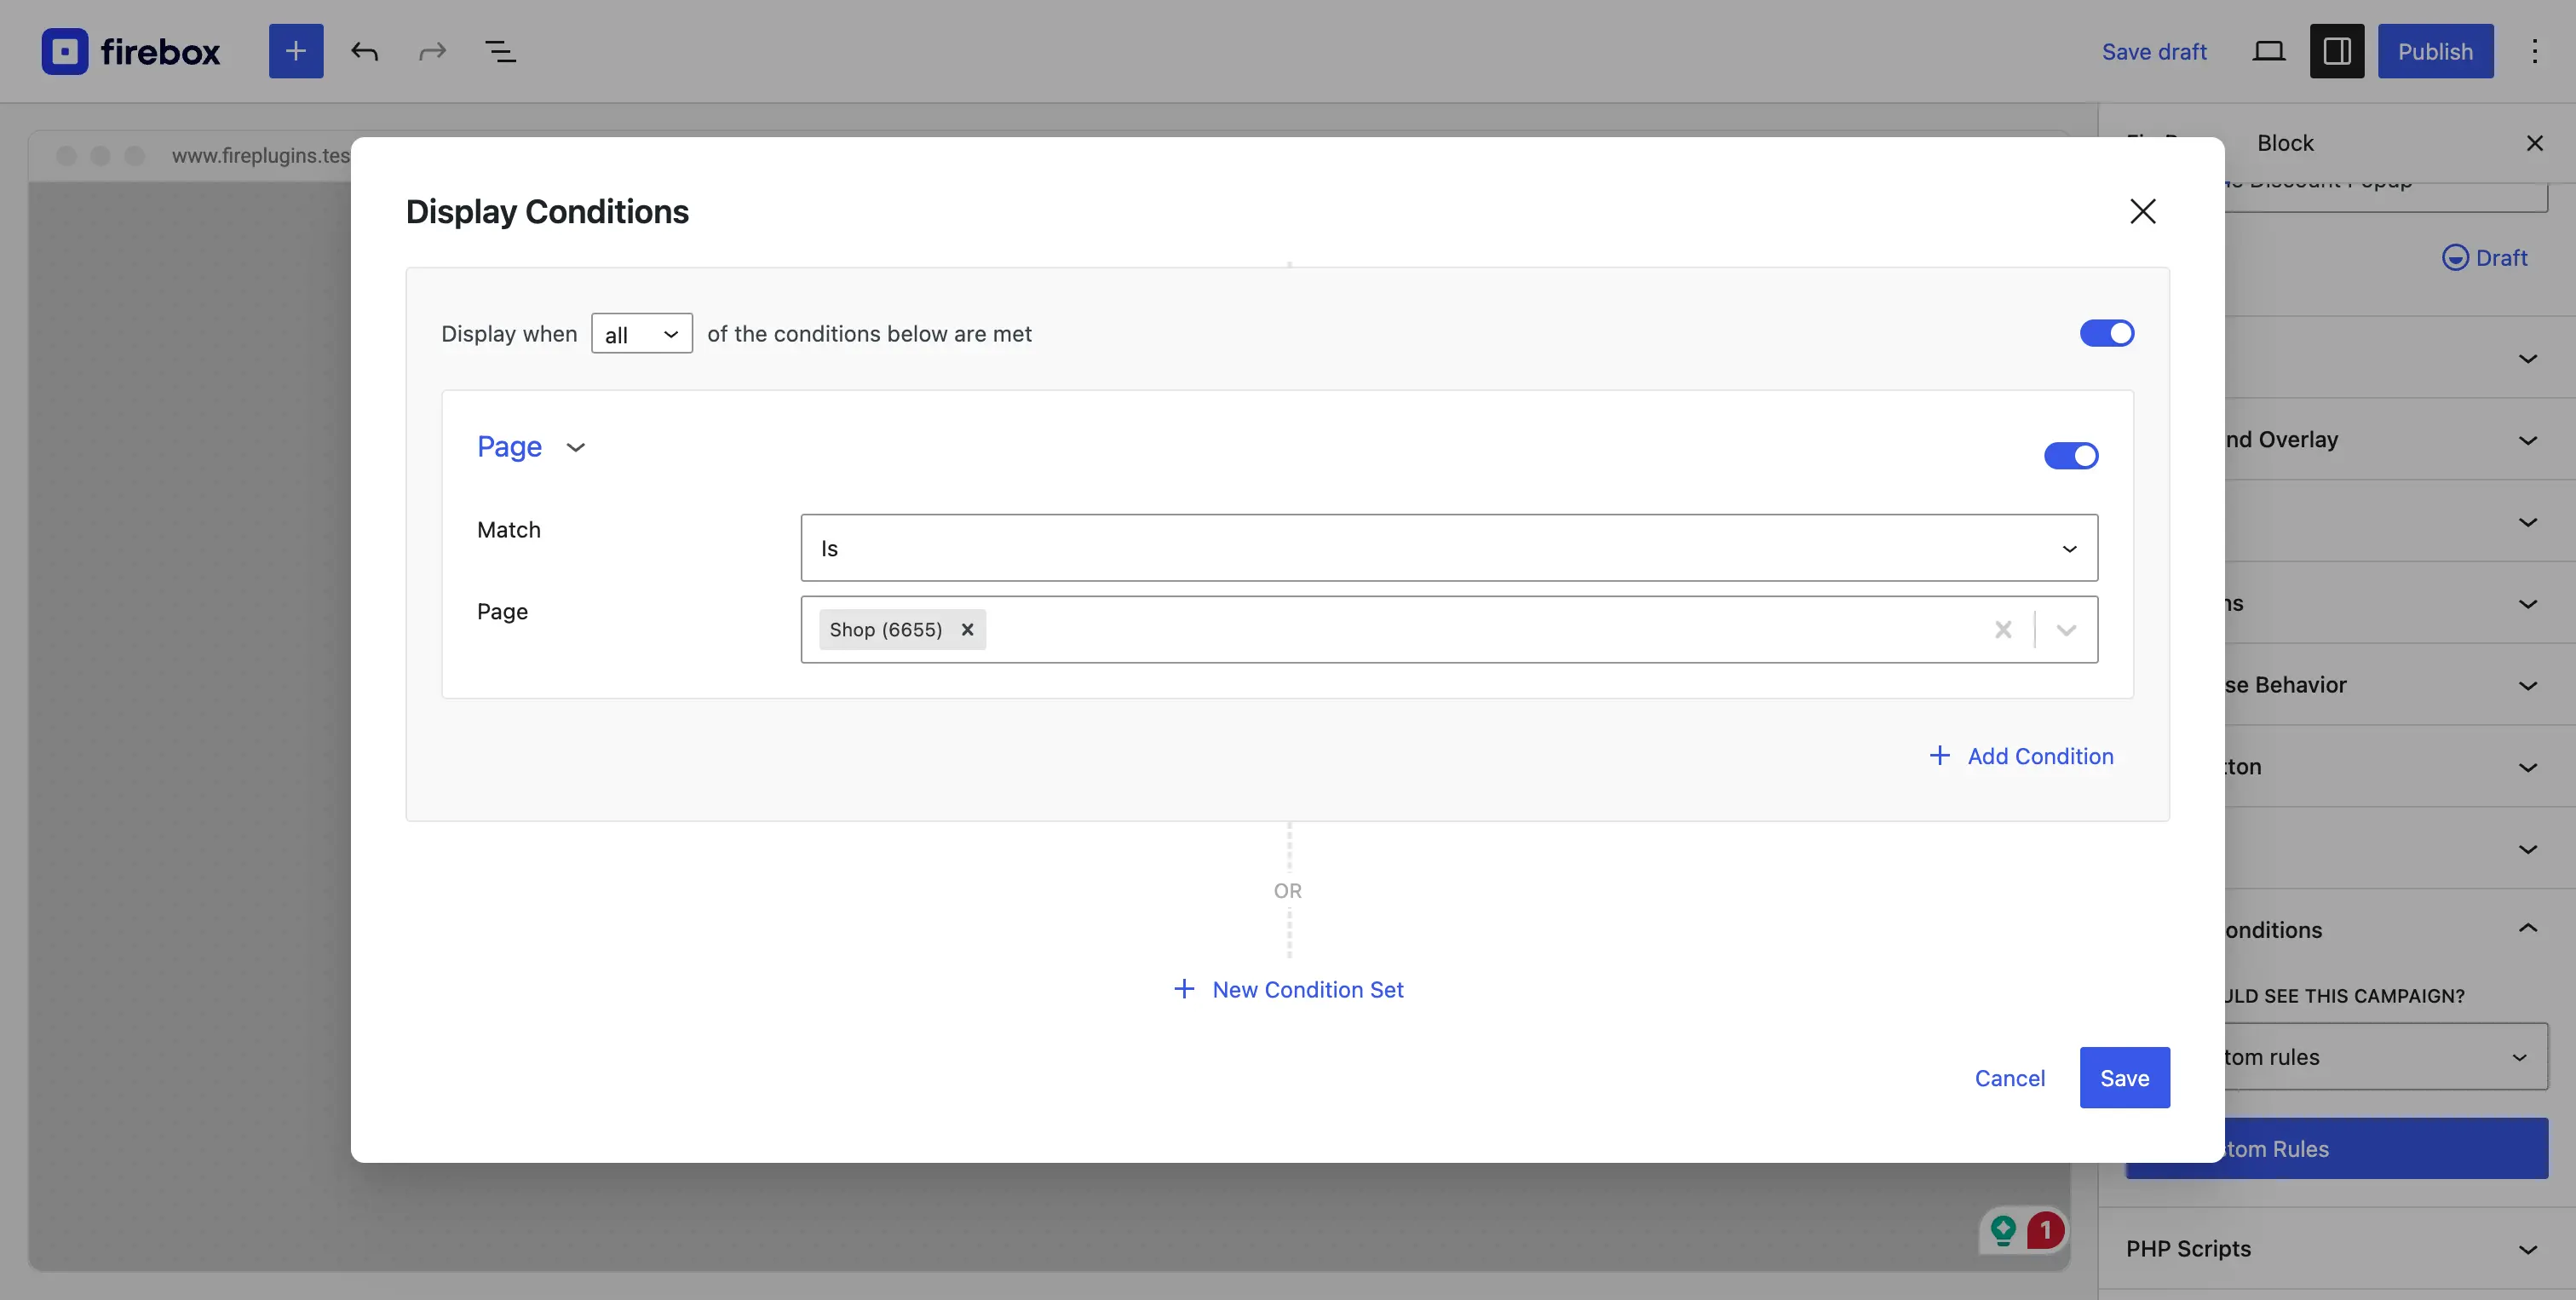
- Open the "Display Conditions" panel.
- Select "Set custom rules" and click on the "Set custom rules" button.
- Select the Page Condition and select your shop page.
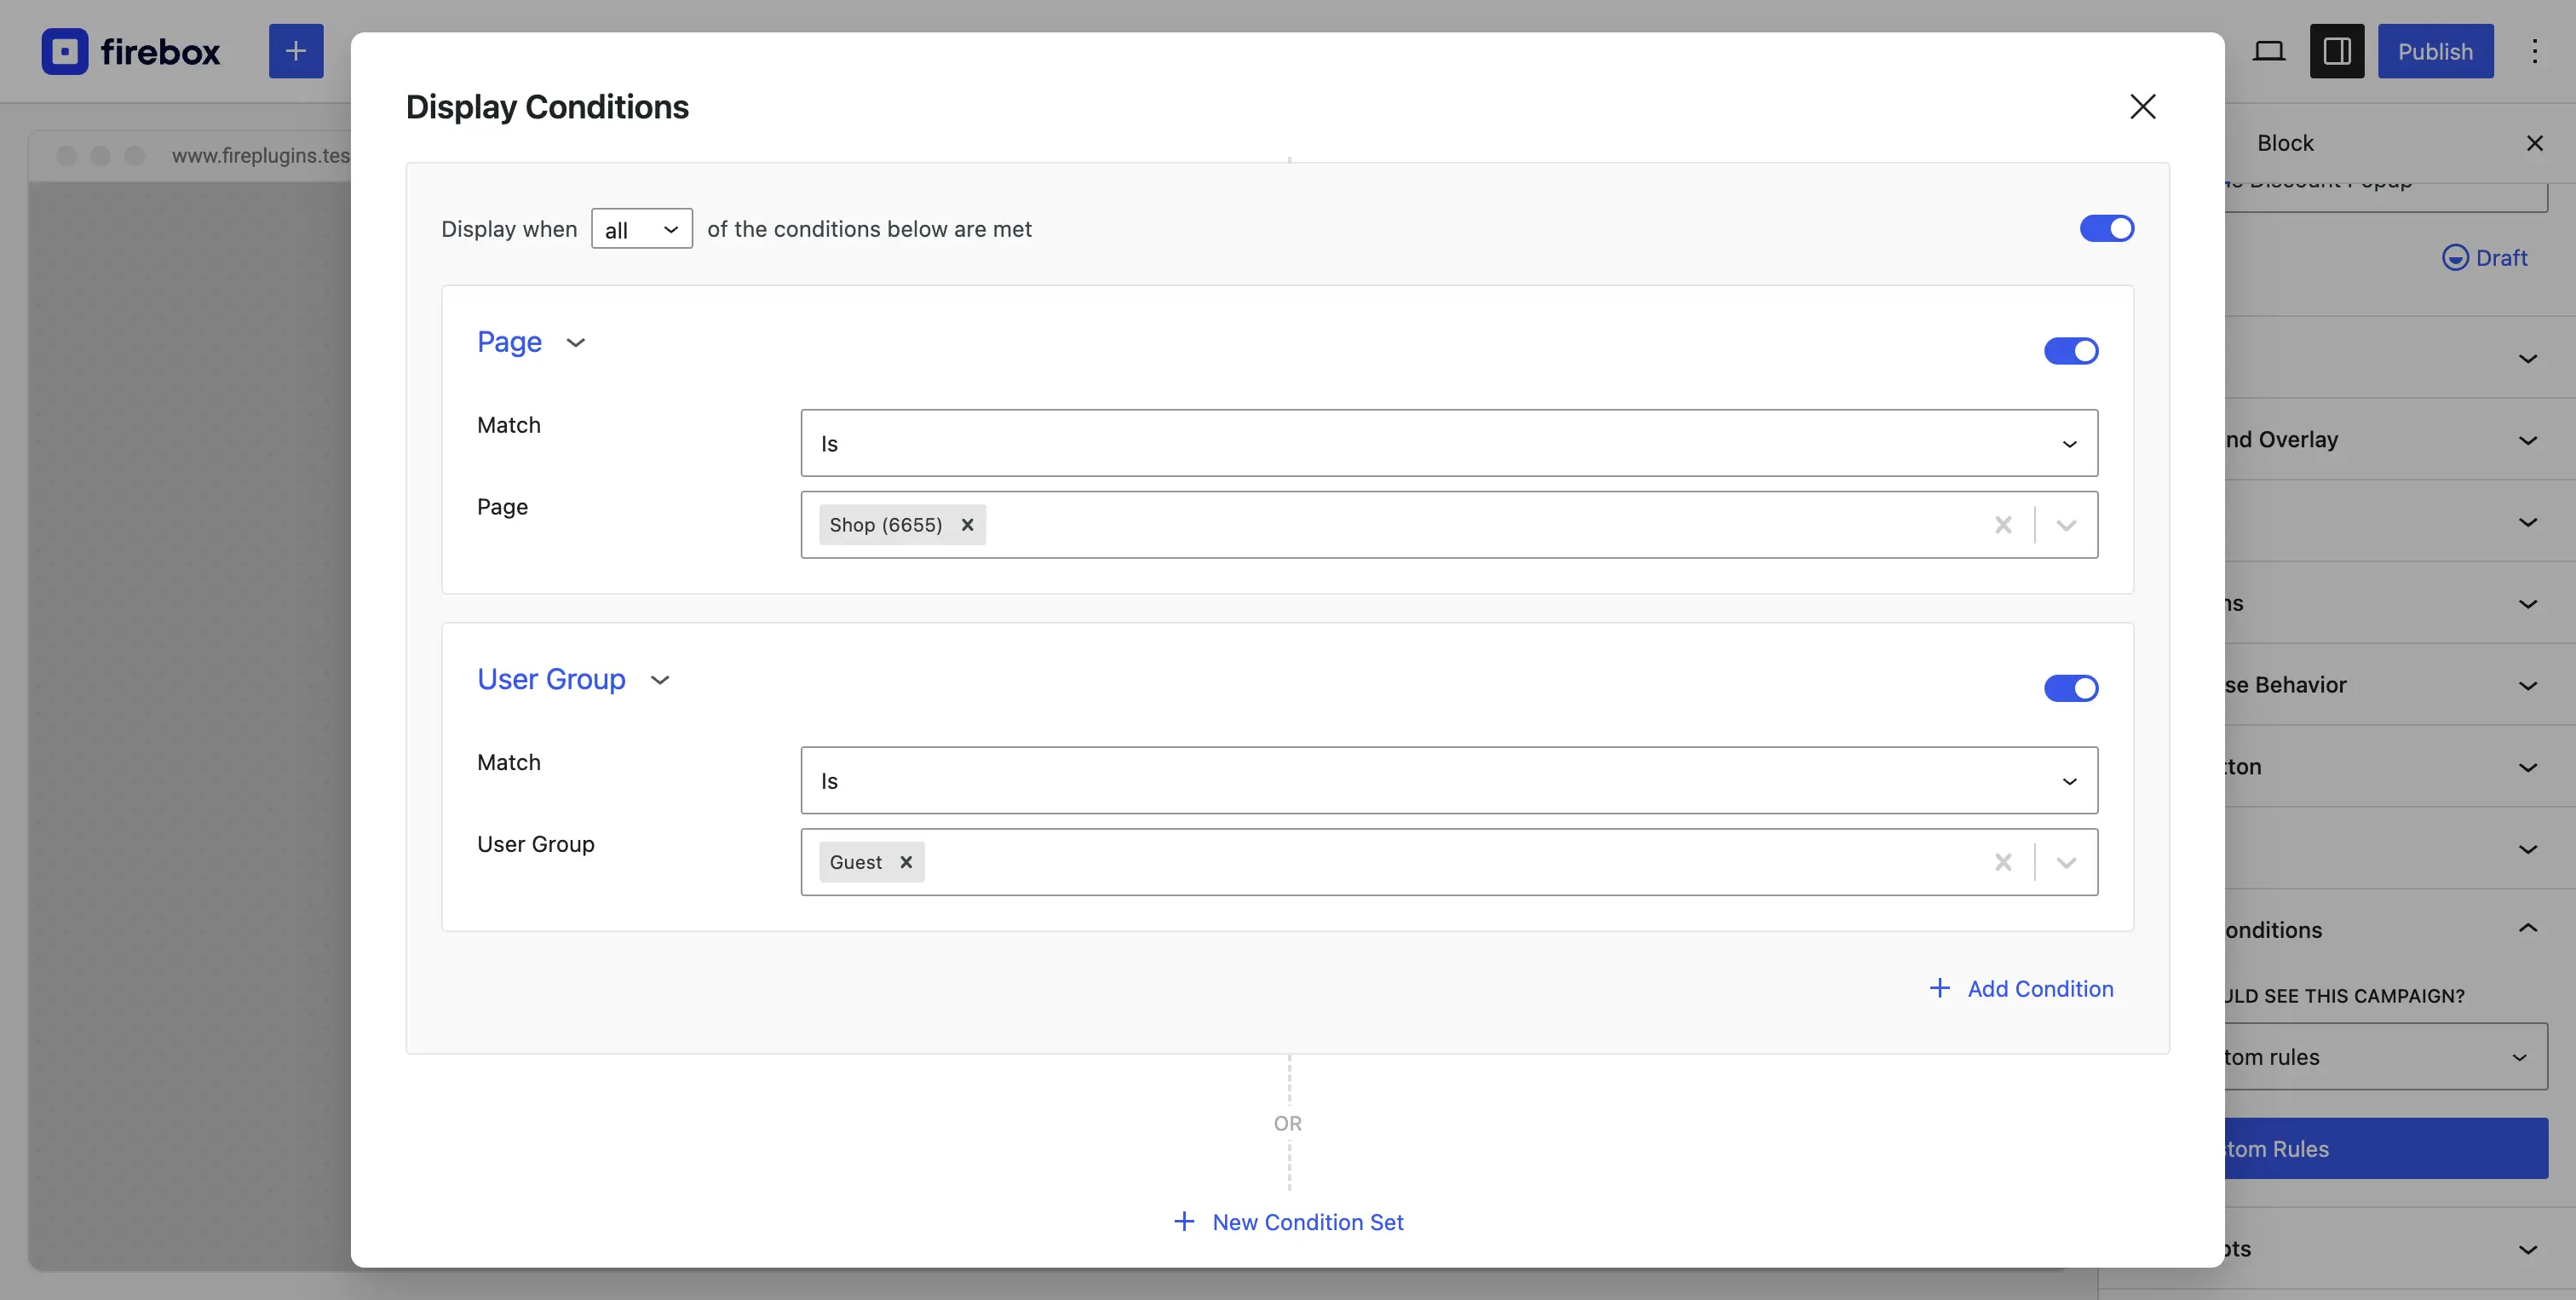
Additionally, you can use the Pro Display Condition called "User Group" which allows you to show the popup campaign only to guests.
- Next, click on the "Add Condition" again to add a second condition.
- This time, select the User Group Condition and select "Guest".
By combining these rules, you’ve created a highly targeted campaign that won't annoy your existing, logged-in customers. This is ideal for a welcome offer, but you can apply the same principles for other goals. For example, you can streamline the customer journey by creating a dedicated WooCommerce login popup that appears only for guest users on the checkout page. As you grow, you can explore even more powerful conditions detailed in our guide to Personalized WooCommerce Popups.
Step 6: Publish and Test
Your WooCommerce popup campaign is ready for action.
- Click the "Publish" button in the top right corner.
- Navigate to your store's shop page and wait 5 seconds. Your beautiful, targeted popup will appear.
Best Practices: Turning a Good Popup into a Great One
Creating the popup is half the battle. Implementing it with finesse is what guarantees success.
- Design an Engaging Experience: When you create a WooCommerce popup, design it so it feels like a natural part of your website, not a third-party ad. Use your brand's colors, fonts, and tone of voice.
- Write Copy That Converts: Focus on the benefit to the customer. "Get 10% Off" is good. "Unlock Your 10% Discount and Save Today" is better. Use active, exciting language for your CTA button.
- Mobile-First is a Must: Over half of all web traffic is mobile. A popup that looks great on desktop but is broken on mobile is a recipe for frustration. FireBox popups are fully responsive by default, but always double-check the mobile preview.
- Provide Real, Undeniable Value: The offer you present must be genuinely appealing. A weak offer will be ignored. A strong offer, like a significant discount, a free ebook, or free shipping, will drive action.
Common Mistakes to Avoid
- Vague Triggers: Don't show a welcome popup on your checkout page. Don't show an exit-intent popup the moment someone lands on your site. Context is everything.
- Making It Hard to Close: The "X" button should be clearly visible and easy to click. Hiding it will only infuriate visitors and can harm your brand's reputation.
- Asking for Too Much Information: For a newsletter signup, all you need is an email address. Asking for a name, phone number, and birthday will destroy your conversion rate. Keep it simple.
- Forgetting Returning Visitors: Don't show your welcome discount to someone who has already subscribed. Use FireBox's Submitted Form Condition to hide popups from users who have already seen or converted on them.
Conclusion
Congratulations! You haven't just learned how to create a popup; you've learned how to build a smart, automated marketing asset for your WooCommerce store. This single welcome popup will now work around the clock to convert new visitors into subscribers and customers, forming the foundation of your digital marketing strategy.
As your confidence grows, so can the sophistication of your strategy. With the tools and techniques you've learned today, you're now ready to explore the full potential of targeted engagement to drive real, measurable growth for your business.
Ready to create a WooCommerce popup that truly converts? Download FireBox for free and follow our step-by-step guide to get started!
Get FireBox for Free
Enter your WordPress website URL to install instantly.
Trusted by 9,000+ users

0 Comments