

How to connect FireBox with Salesforce Web-To-Lead

Salesforce Web-To-Lead
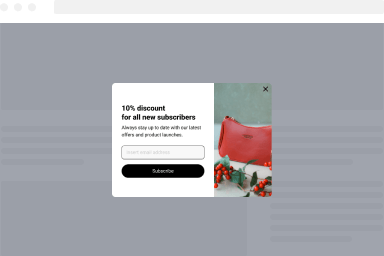
Would you like to grow your email marketing list with popups
that will level up your Salesforce marketing campaigns?
FireBox provides seamless integration with the Salesforce email marketing service. You can connect your Salesforce account with FireBox by following the steps below.
The Salesforce Web-To-Lead integration is available in the Growth plan.
Connection
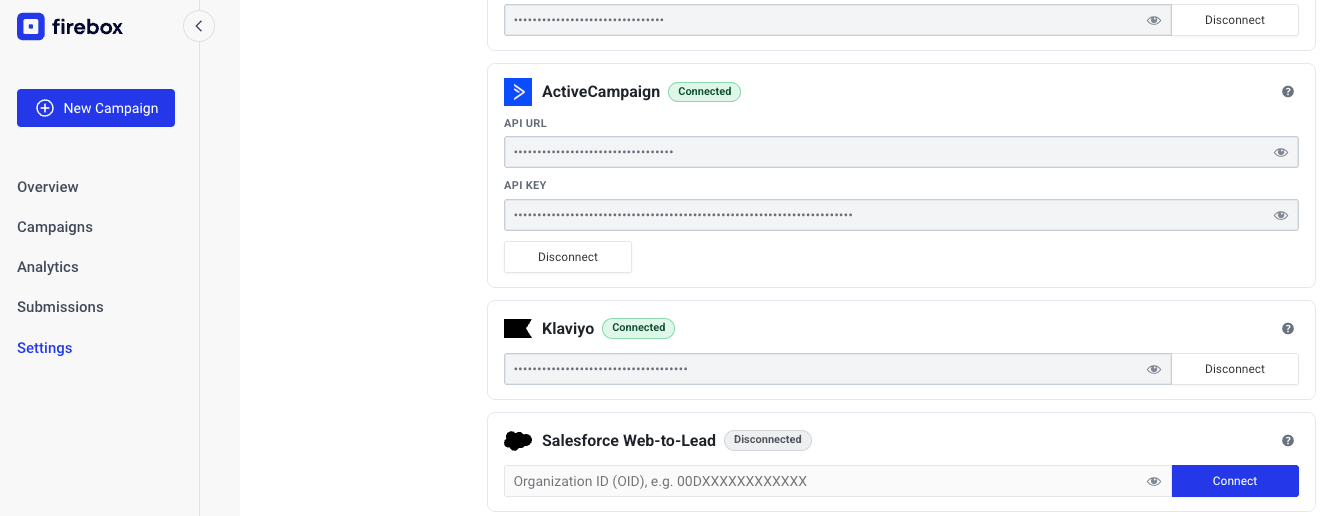
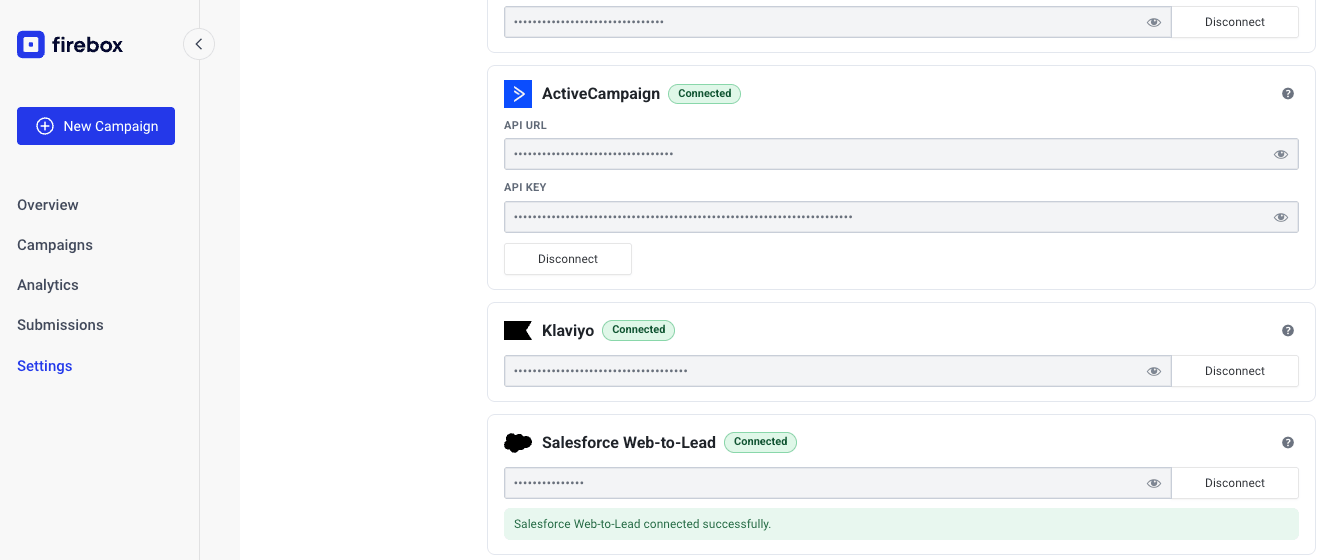
The very first thing you must set up is the connection between FireBox and Salesforce Web-to-Lead. To do this, go into FireBox > Settings > Integrations tab, enter your Salesforce Organization ID (OID), and click on the "Connect" button.
After clicking connect, you should see a green "Connected" badge and a green message letting you know that you've successfully connected to Salesforce Web-to-Lead.
Where can I find my Salesforce Organization ID (OID)?
To find your Salesforce Organization ID (OID), follow one of the methods below.
Step 1: Log in to your organization.
Step 2: Click on the gear icon on the page's top right, and select Setup.

Step 3: In the search box on the left-hand side, type in "company", and select Company Information from the results.
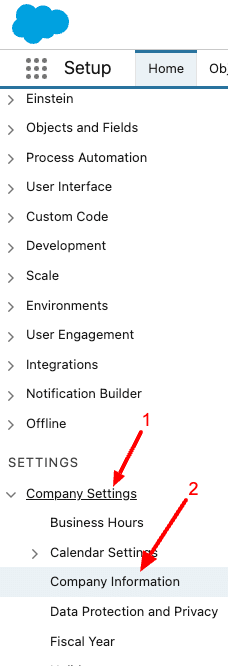
Step 4: Under the Organization Detail section, find the Salesforce.com Organization ID entry. This is your organization ID.

Integration Setup
To set up the integration and sync your submissions with Salesforce Web-to-Lead, click into your Form block, head over to Actions, and check "Salesforce Web-to-Lead".
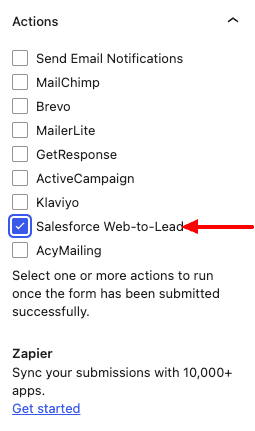
Once you have checked "Salesforce Web-to-Lead", a new panel should appear below "Actions", named "Salesforce Web-to-Lead Integration". This is where you set up your integration to allow your form to send submissions to Salesforce.
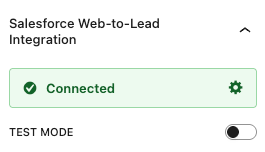
Test Mode
Enable Test Mode to send the lead to Salesforce's test Web-to-Lead endpoint instead of the live one.
This is useful while verifying your field mapping and connection before using the integration in production.
Disable Test Mode when you're ready to send real leads to your live Salesforce account.
Email Field
For FireBox to function properly with Salesforce Web-to-Lead, the form requires an Email field. This email field must have the Field Name set to "email".
Furthermore, this email field must always exist in your form so your users can enter their email address and so FireBox can process the submission correctly.
Salesforce Lead Fields
FireBox sends your form fields directly to Salesforce Web-to-Lead using each FireBox field's Field Name.
This means your FireBox Field Name must match the Salesforce Web-to-Lead field name you want to populate.
Let's take a look at a few common examples below.
First Name Field
To send the lead's first name to Salesforce, add a text field and set Field Name to "first_name".
Last Name Field
To send the lead's last name to Salesforce, add a text field and set Field Name to "last_name".
Company Field
To send the lead's company to Salesforce, add a text field and set Field Name to "company".
Phone Field
To send the lead's phone number to Salesforce, add a phone or text field and set Field Name to "phone".
Custom Salesforce Fields
If you want to pass additional lead data to Salesforce, create the corresponding field in your FireBox form and set its Field Name to the Salesforce Web-to-Lead field name expected by Salesforce.
FireBox will include that value in the Web-to-Lead submission automatically.
Note: Salesforce may require specific standard fields, such as Last Name and Company, depending on your Salesforce setup and validation rules. If those fields are required in Salesforce but missing from your FireBox form, Salesforce may reject the lead.
Note: If you use custom fields, make sure their field names match the names expected by your Salesforce Web-to-Lead configuration.