

How to connect FireBox with MailerLite

MailerLite
Would you like to grow your email marketing list with popups
that will level up your MailerLite marketing campaigns?
FireBox provides seamless integration with the MailerLite email marketing service. You can connect your MailerLite account with FireBox by following the steps below.
The MailerLite integration is available in the Pro plan.
Connection
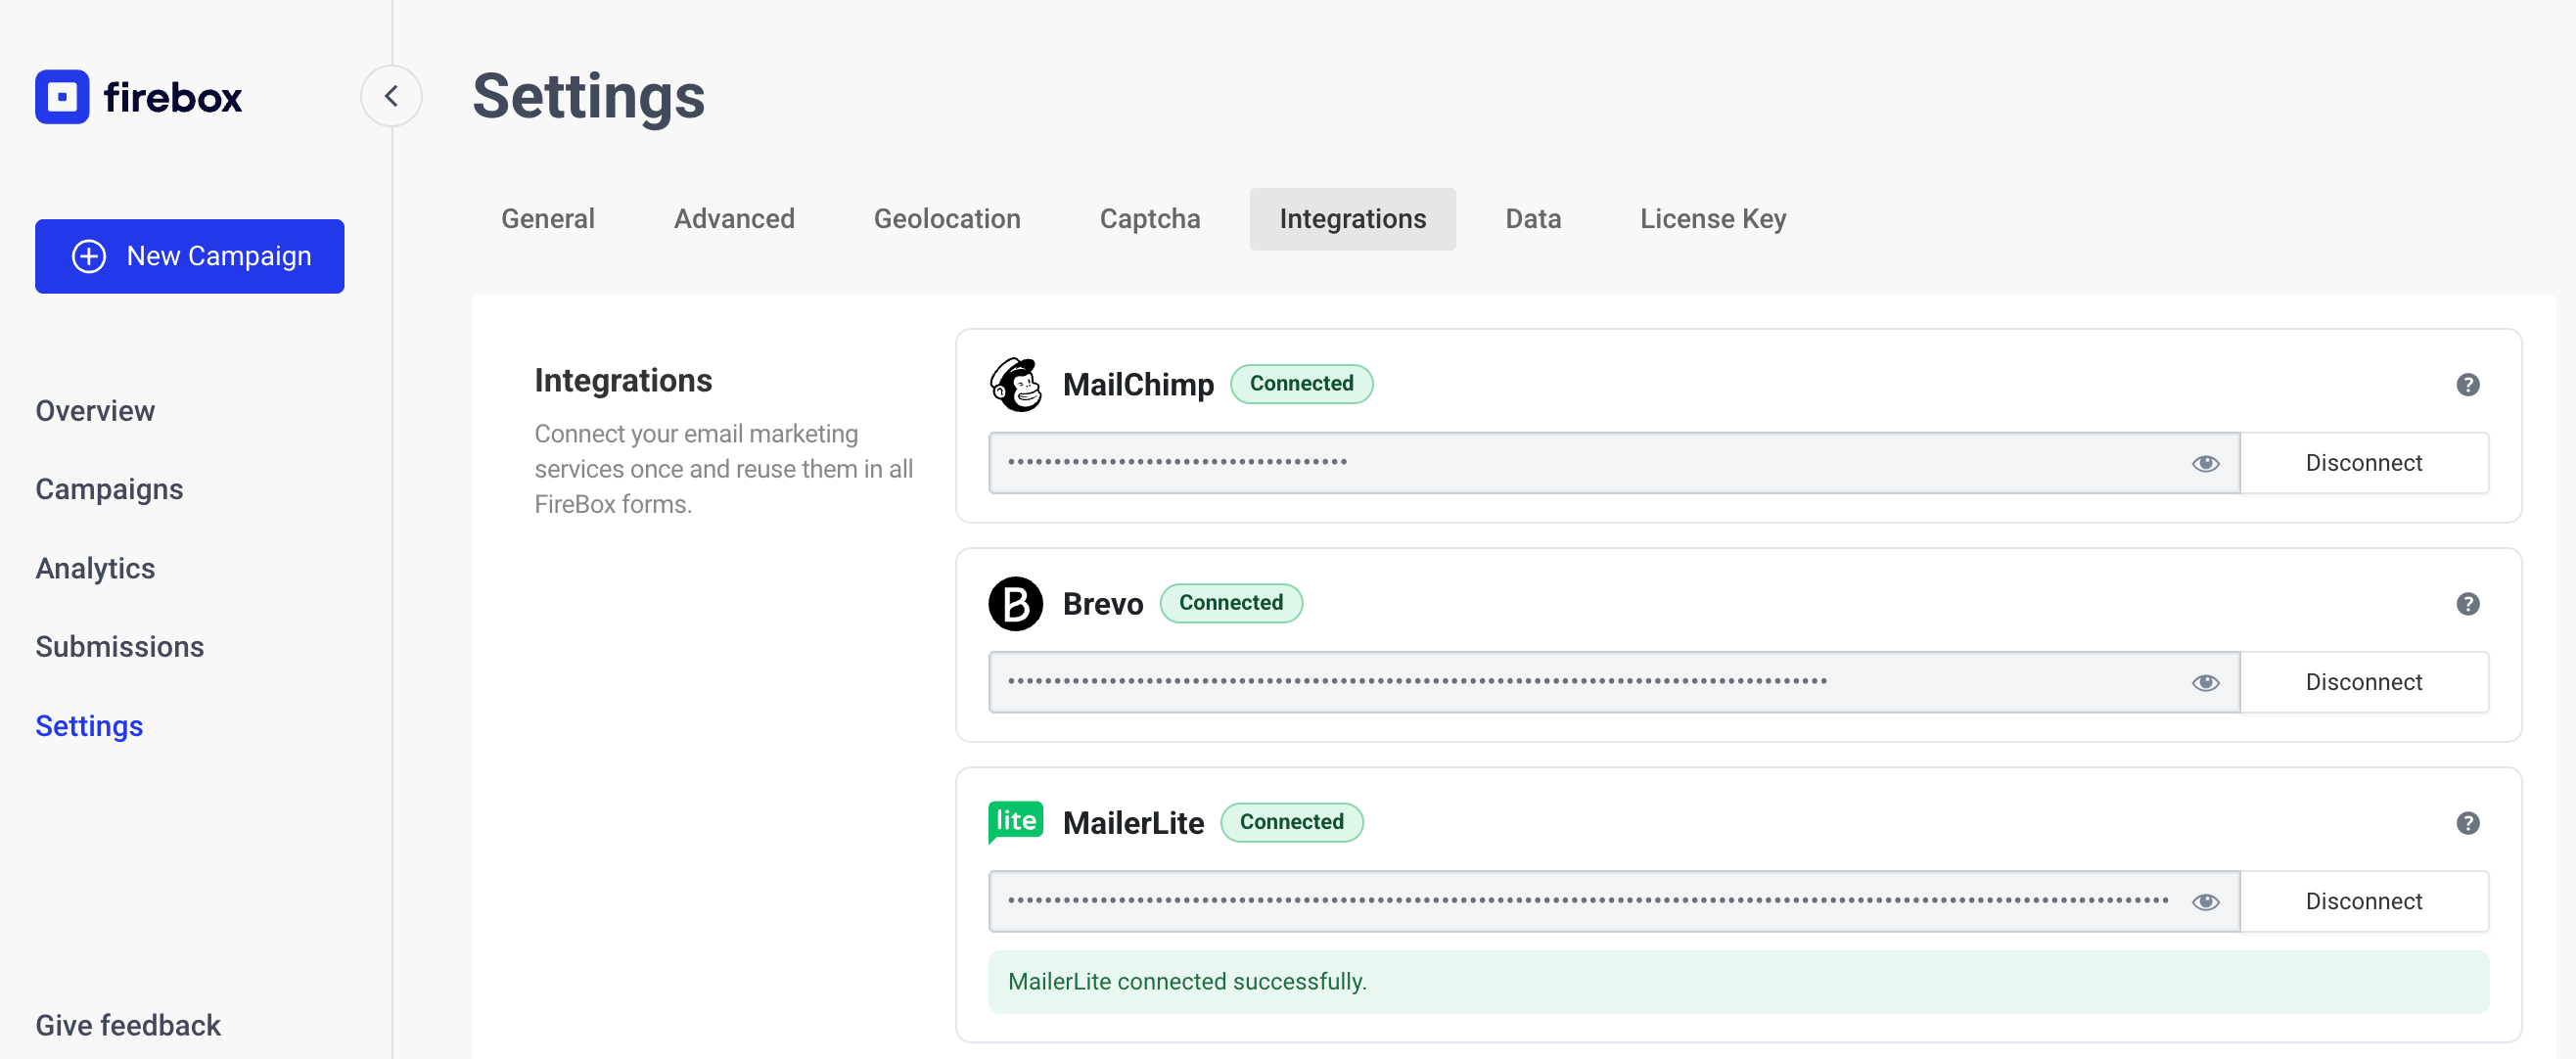
The very first thing you must set up is the connection between FireBox and MailerLite. To do this, go into FireBox > Settings > Integrations tab and enter your MailerLite API Key and click on the "Connect" button.
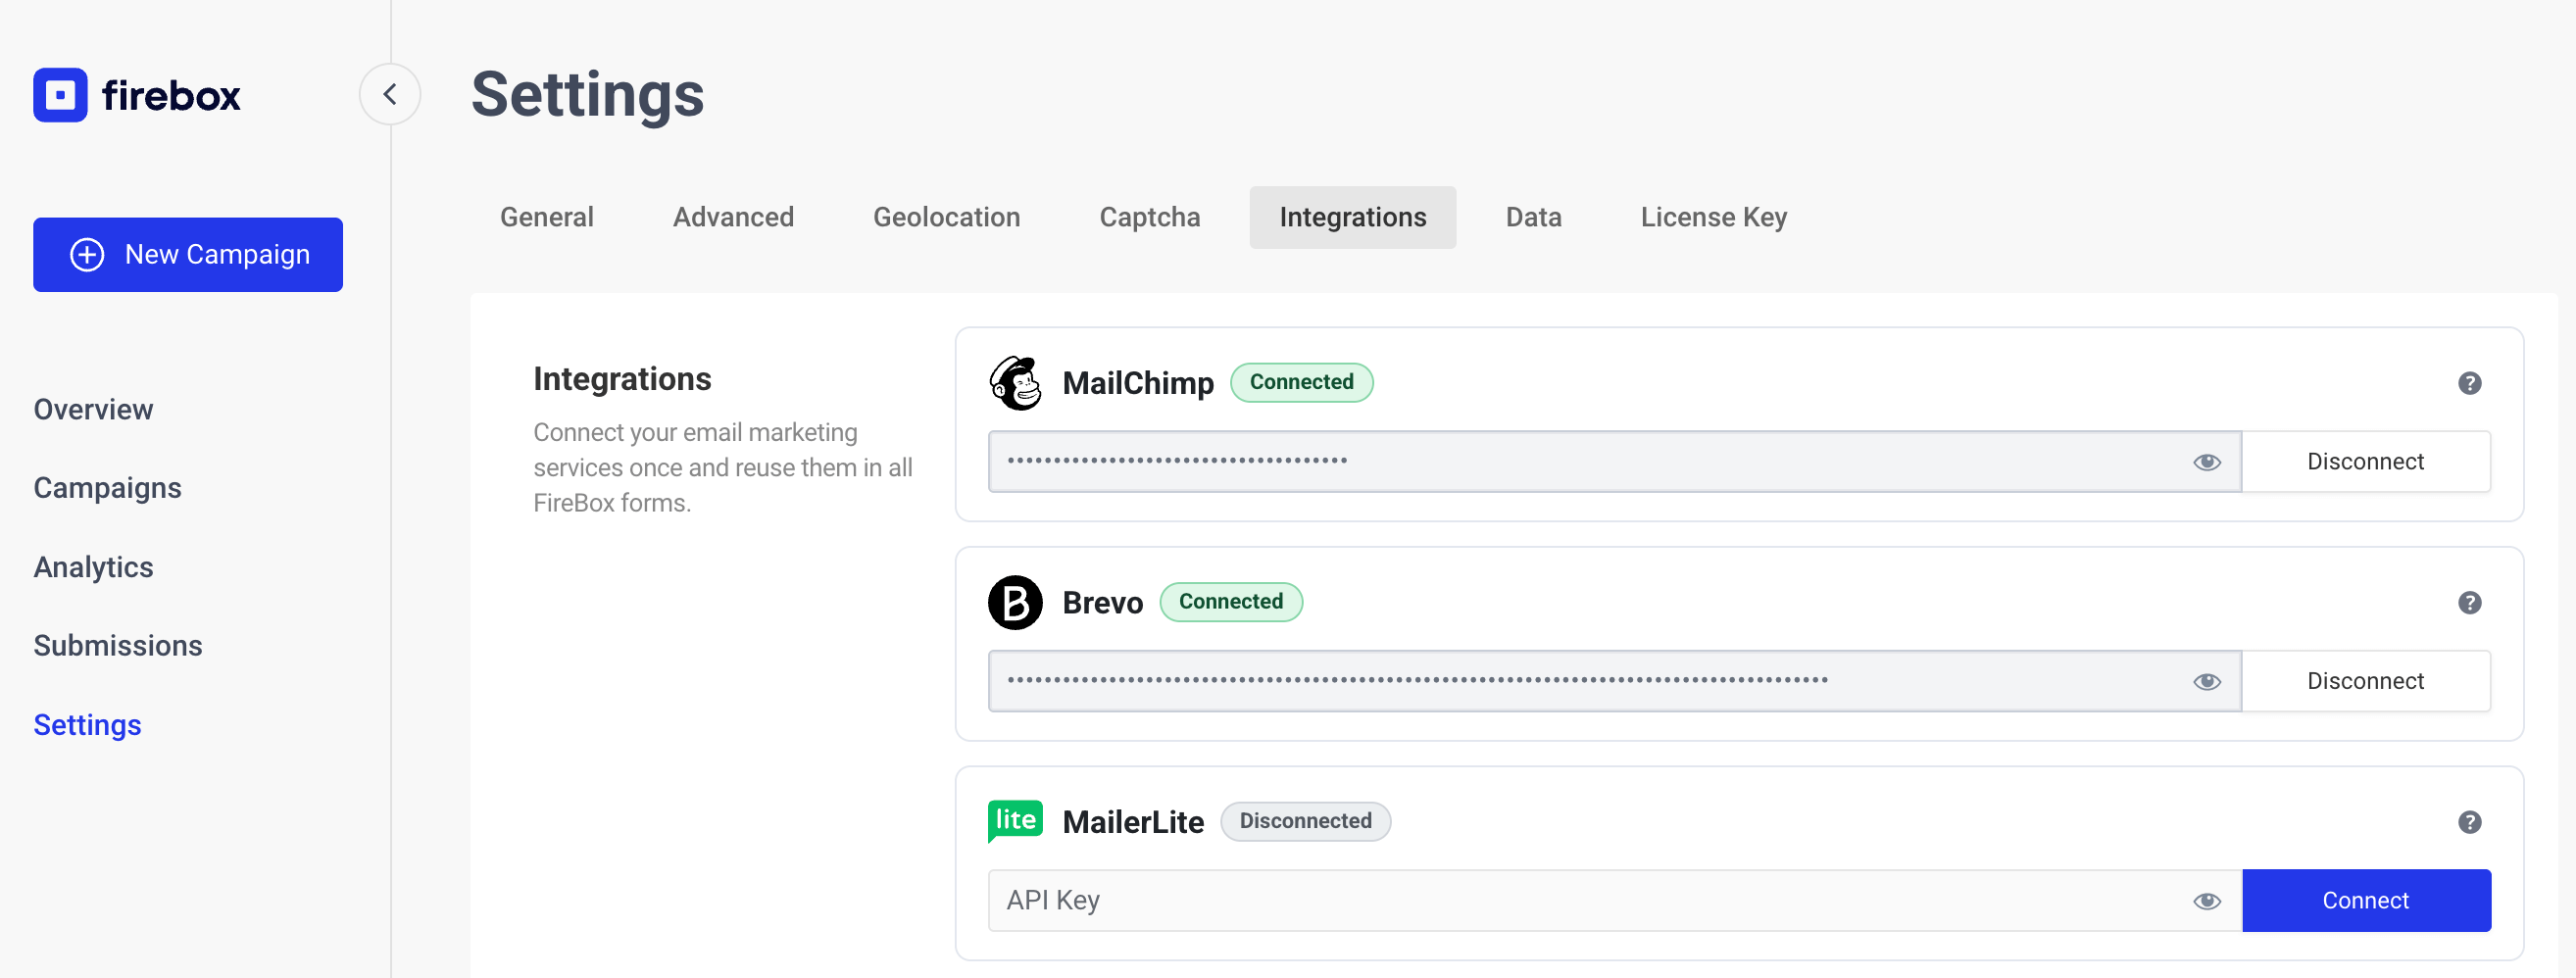
After clicking connect, you should see the a green "Connected" badge and a green message letting you know that you've successfully connected to MailerLite.
Where can I find my MailerLite API Key?
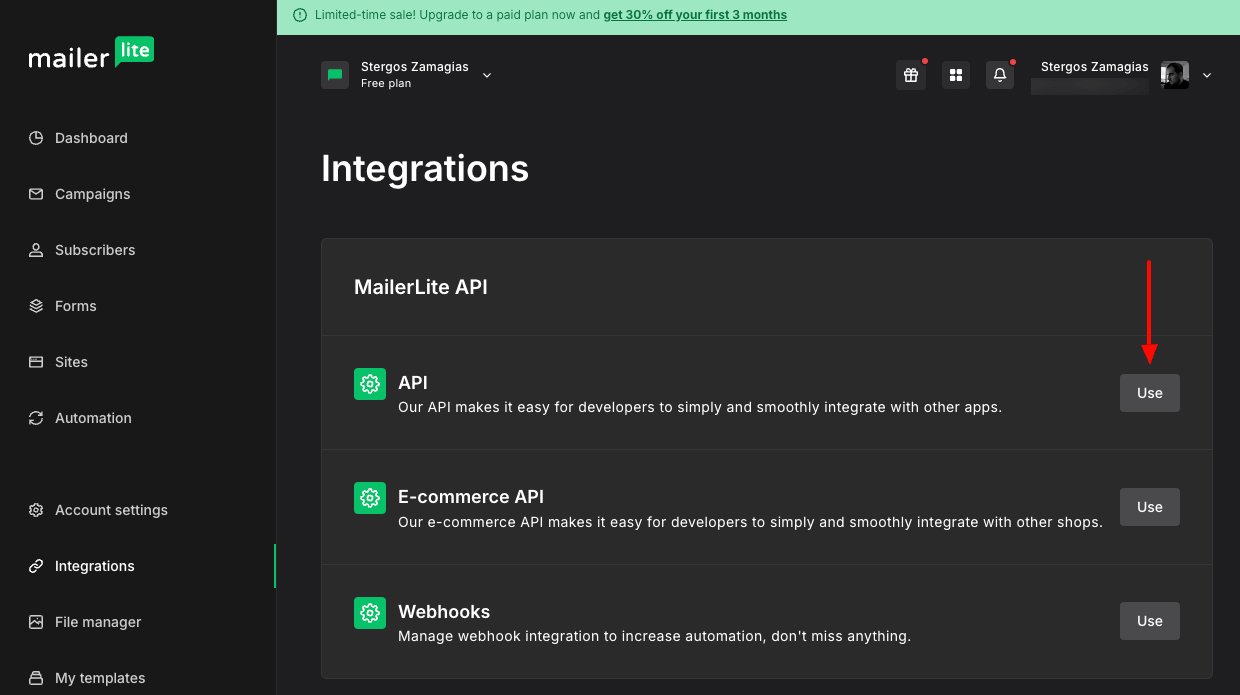
To find your MailerLite API Key, follow the steps listed below:
Step 1: Go to your Integrations page, on your MailerLite account by clicking here, and click on MailerLite API > API > Use
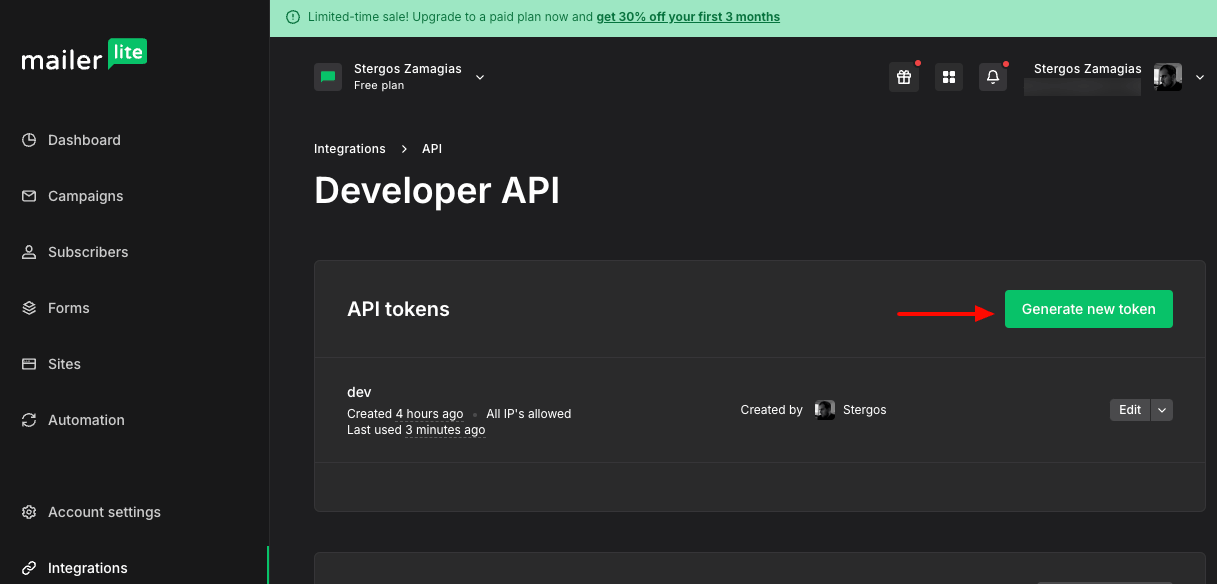
Step 2: Then, click on the Generate new token button.
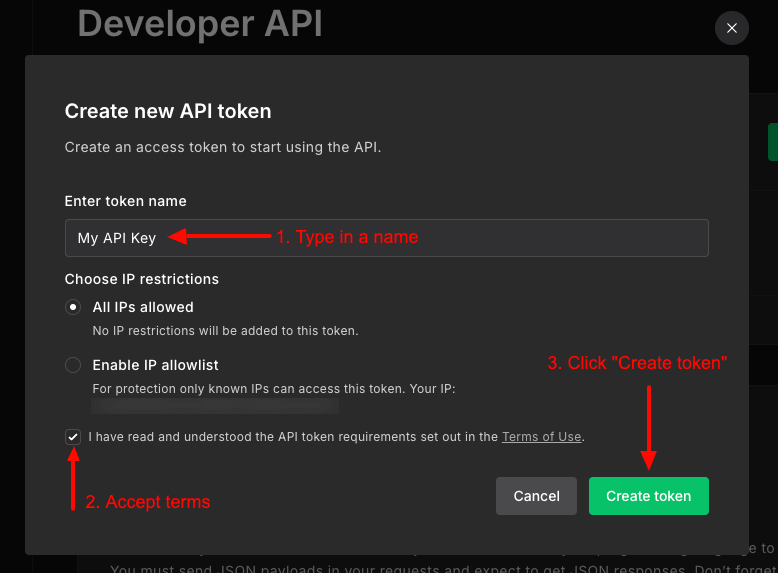
Step 3: On the modal that appears, type in a name for your API Key, accept the terms, and click the Create token button.
Step 4: Copy the generated API token which you will use in your Convert Forms MailerLite Task. You can also download it on your computer for later use.
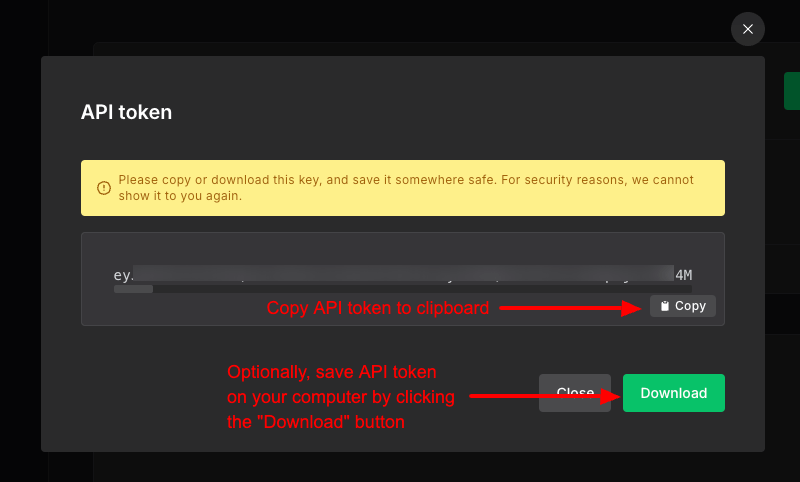
Note: Store the API Key somewhere safe, as MailerLite won't show it again for security reasons.
Integration Setup
To set up the integration and sync your submissions with MailerLite, click into your Form block, head over to Actions, and check "MailerLite".
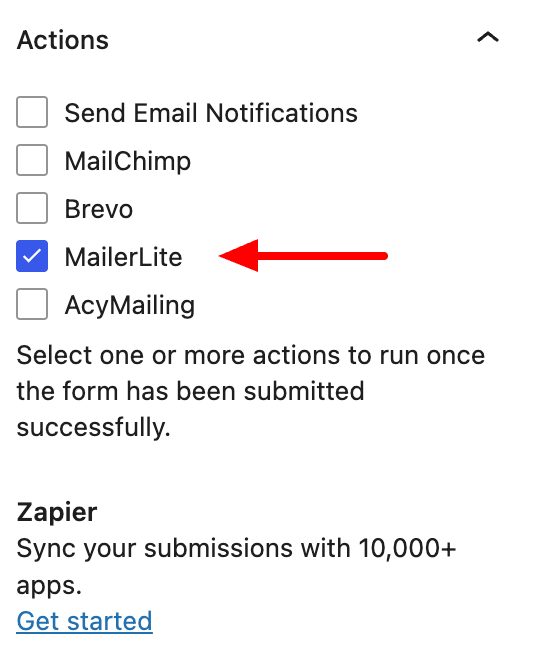
Once you have checked "MailerLite", a new panel should appear below "Actions", named "MailerLite Integration". This is where you set up your integration to allow your form to sync your submissions with MailerLite.
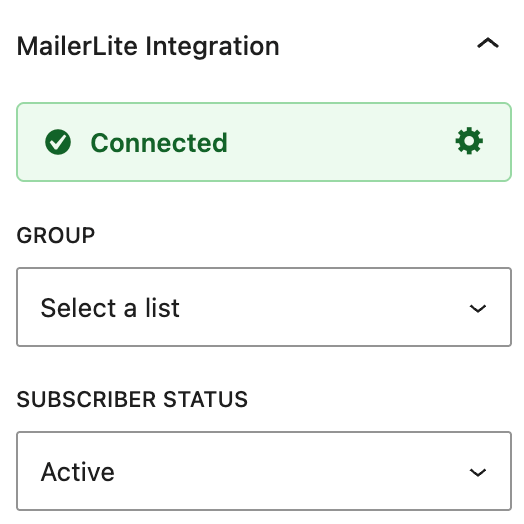
Group
Select the group to which all subscribers will be saved in your MailerLite account. A complete list of all your MailerLite groups will be available, and choose from any form field, or Smart Tag.
Subscriber Status
Select the subscriber status. Defaults to Active. Available values are Active, Unsubscribed, Unconfirmed, Bounced, or Junk.
Email & Name Fields
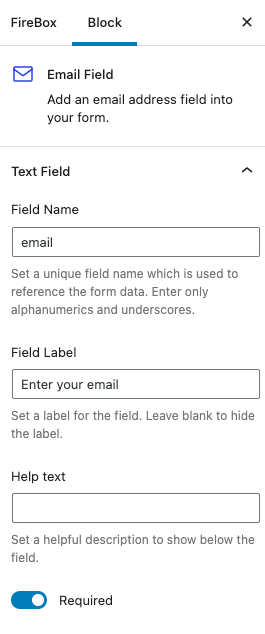
Email Field
For FireBox to function properly and subscribe the user to MailerLite, the form requires an Email field. This email field must have the Field Name set to "email". Furthermore, this email field must always exist in your form so your users can enter their email address, subscribe to your mailing list, and ensure the form functions properly.
MailerLite Custom Fields
MailerLite provides custom fields, which allow you to store additional information when a subscriber is saved on your MailerLite account, such as their name, age, company info, and more!
To create new field, you can go to your Subscribers page > Fields subpage.
Step 1: Click on the Create field button.
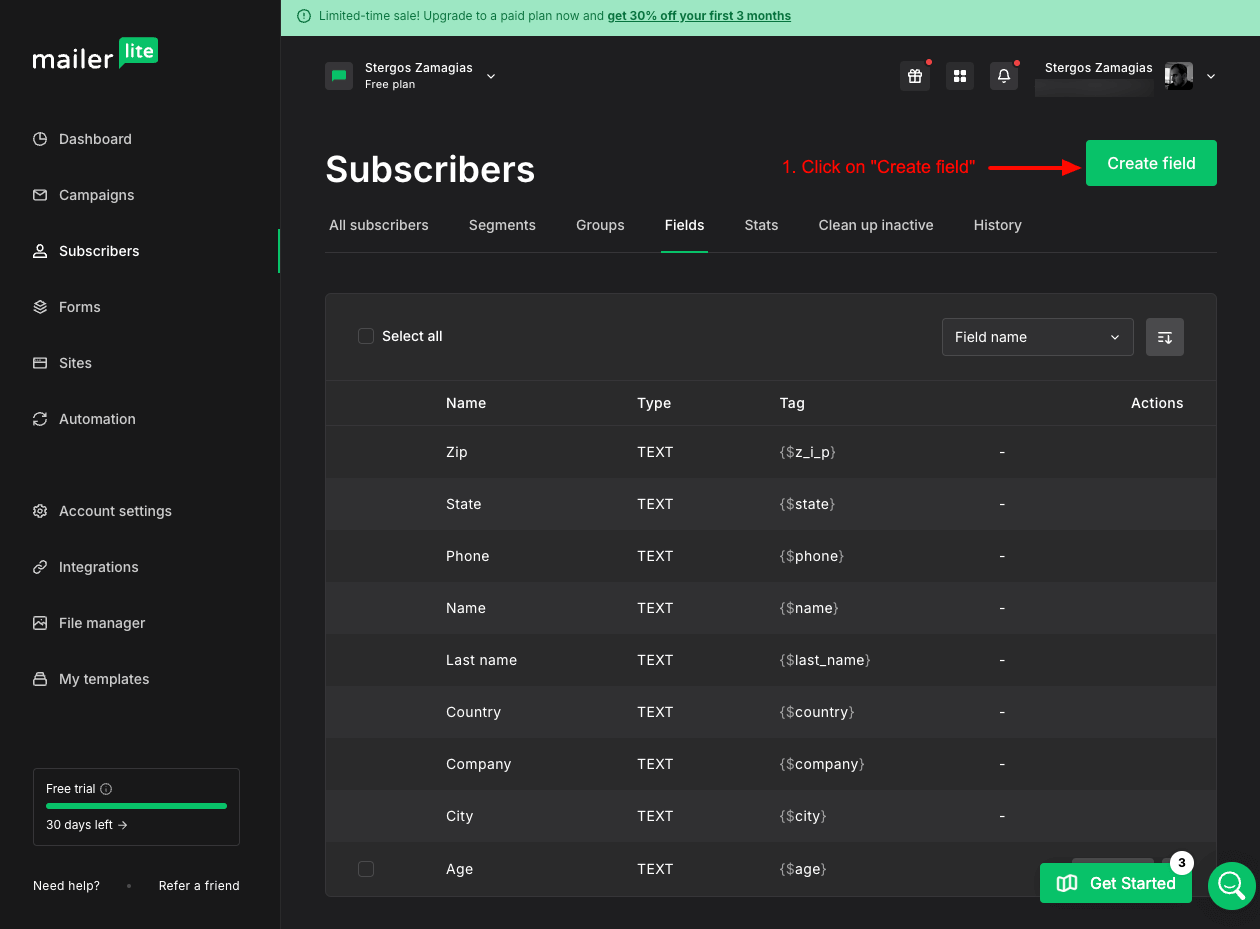
Step 2: Enter the field name, select the field type, and click on "Create".
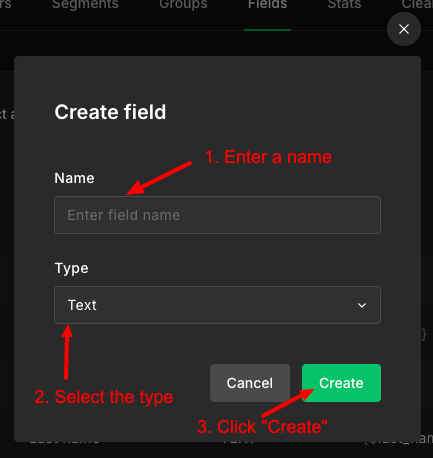
That's it! Your custom attribute is now available.
Once you have created your custom fields, you can setup your FireBox Form block fields to capture the contacts data and pass them to MailerLite. Let's take a look at two examples below.
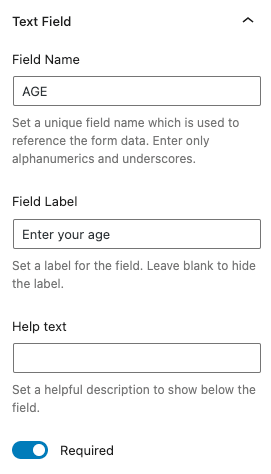
Age Field
Assuming you have created an Age custom field, where Tag = AGE, you can create a text field, set Field Name = AGE, and it will automatically sync with your MailerLite contact.
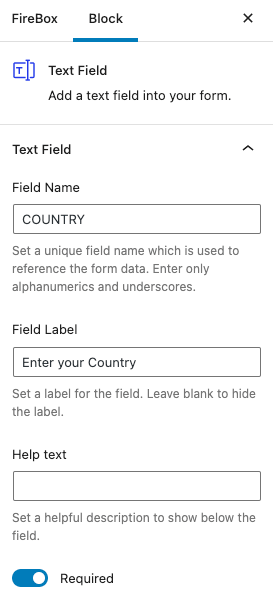
Country Field
Assuming you have created a Country custom field, where Tag = COUNTRY, you can create a text field, set Field Name = COUNTRY, and it will automatically sync with your MailerLite contact.