


Would you like to display a set of images on your WordPress site? Then creating a Gallery is the best choice for you. In this tutorial, you will find a step-by-step guide on how to create a WordPress Gallery.
Adding a Gallery helps you break the monotony of plain text and allows you to grab the attention of your users as well as boost engagement by displaying eye-catching photos in an organized way. It can also help your users visualize what your content is about and can be a great asset when promoting special offers or products.

While there are many ways of creating a Gallery using WordPress plugins, it is also very easy to use the built-in ways of WordPress to create a Gallery.
Why do I need an Image Gallery?
WordPress makes it very easy to add images to your posts and pages. All you need to do is use the Image block to upload your images and organize them one below another.
Using this method may seem right at first glance, however, you will soon realize that after you have added a few images, the result will start appearing messy, unappealing and your users will be forced to scroll to view them all.

This is where the Gallery comes in place, it allows you to display your beautiful images in a grid layout, thus, making them appear professional and more appealing to your visitors.
By having your images appear placed in a grid format, customizing the gallery is an easy task when you can see all images placed neatly.
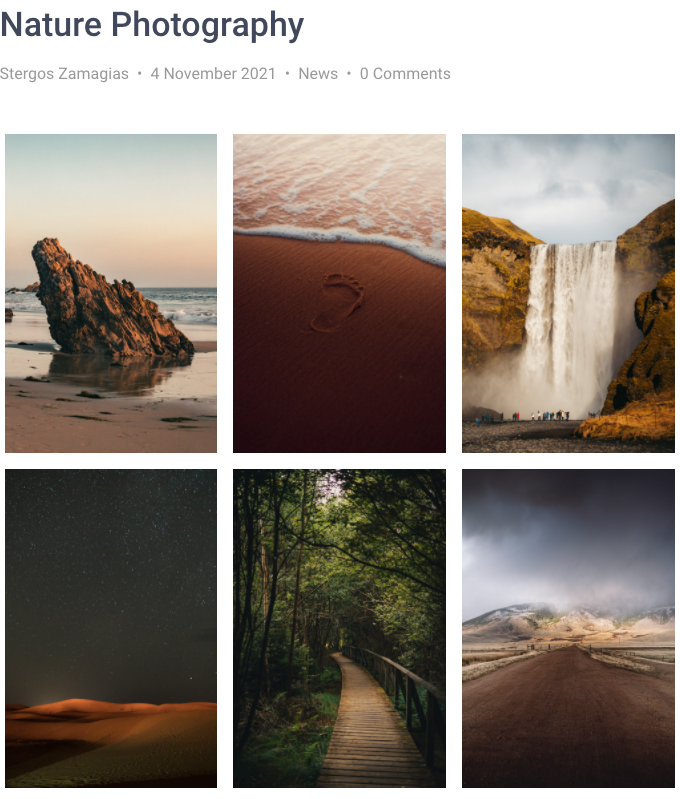
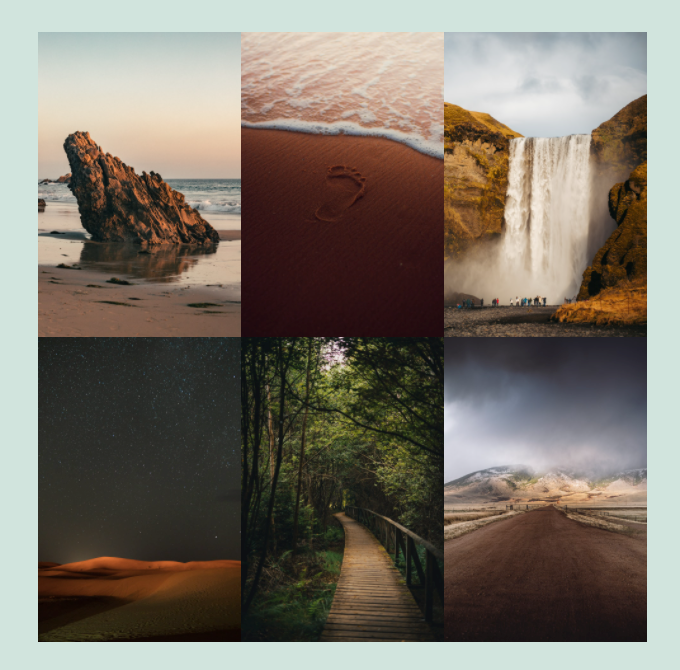
Below you can find an example of what you can create using the native WordPress Gallery and how yours will also look like.
IMPROVE SEO
Adding Galleries to your WordPress site can help improve SEO as Google (and other search engines) scan your page’s content and use the galleries found within your page to help you boost your rankings.
DISPLAY PRODUCTS
Galleries are a great way to showcase your products if you are running an online shop, display your beautiful pictures as a photographer, and so on.
BOOST ENGAGEMENT
Make your blog stand out by displaying a clean and professional-looking gallery to go alongside your content to easily draw your audience’s attention.
BUILD TRUST
Use the power of visual content to display different testimonials and showcase your customers using a Gallery, thus building social proof.
Let’s get started with creating our first WordPress Gallery.
Using the Gallery Gutenberg block
By leveraging the Gutenberg editor, you can remove the hassle of finding a 3rd-party WordPress plugin and maintaining it to produce Galleries. WordPress has it built into its Gutenberg editor using the Gallery block which you can use right away.
To get started creating your Gallery, create or edit a WordPress post or page.
Once you are in the Gutenberg editor, click on the “Plus” sign to display the available blocks.

Once you have added the Gallery block to your Gutenberg editor, you are ready to start populating your Gallery!
You can upload your own photos by pressing the Upload button or select any previously uploaded images from the Media Library by clicking the Media Library button.
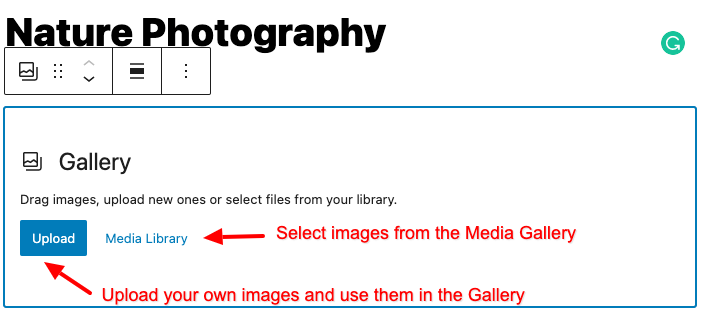
While you are selecting the images for your Gallery, you can also set meta details for each image such as alt text, title, caption, and a description. These settings allow you to set a specific caption per image or for the whole Gallery, as well as benefit your site by improving SEO.
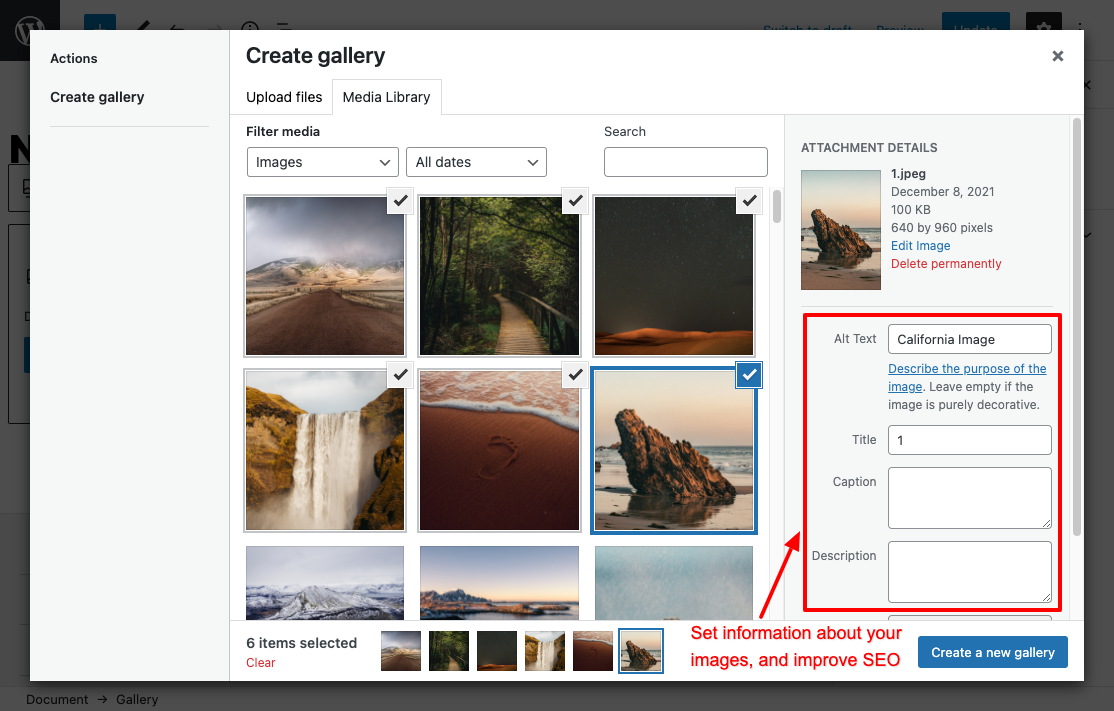
After selecting your Gallery images, click on Create a new gallery button.
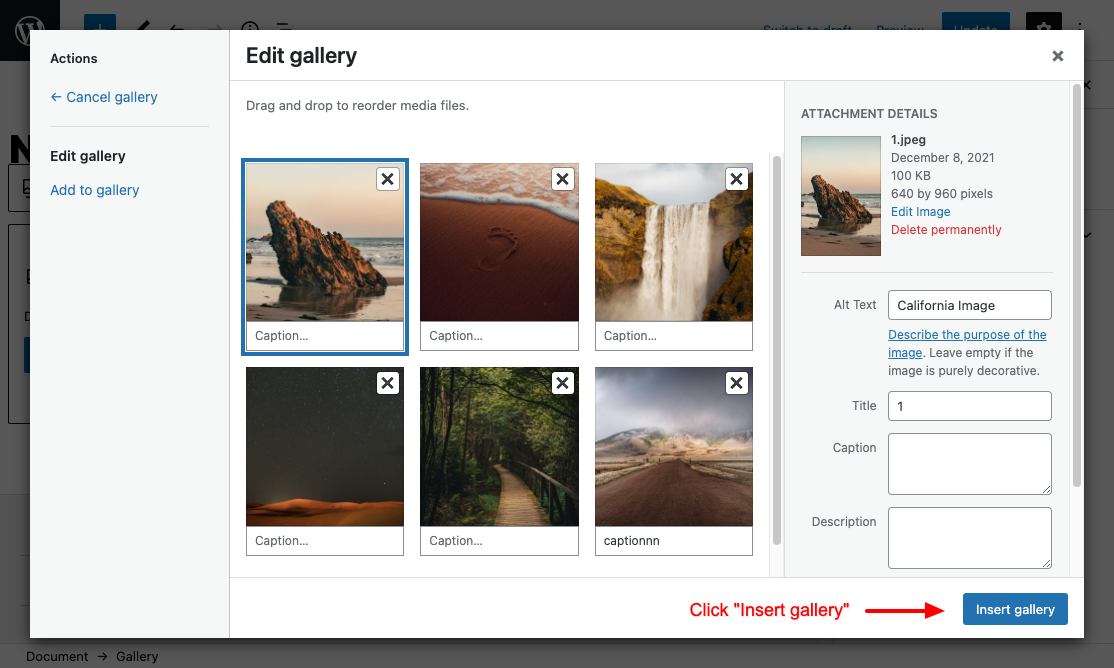
You can now arrange your gallery images as you please to create the desired outcome.
Your Gallery should now be visible from within your post.
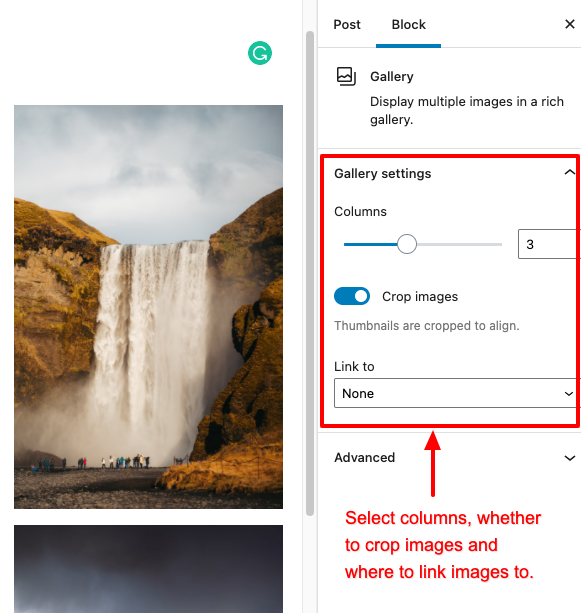
Even though you have added your Gallery to your post, you can still configure your gallery by setting the gallery columns, rearranging the gallery items, or adding captions from within the post, without worrying about any extra steps, super easy.
To set the Gallery Columns, click in your Gallery, and on the right-hand side, you can configure the columns per row, set whether to crop the images and whether to link your images.
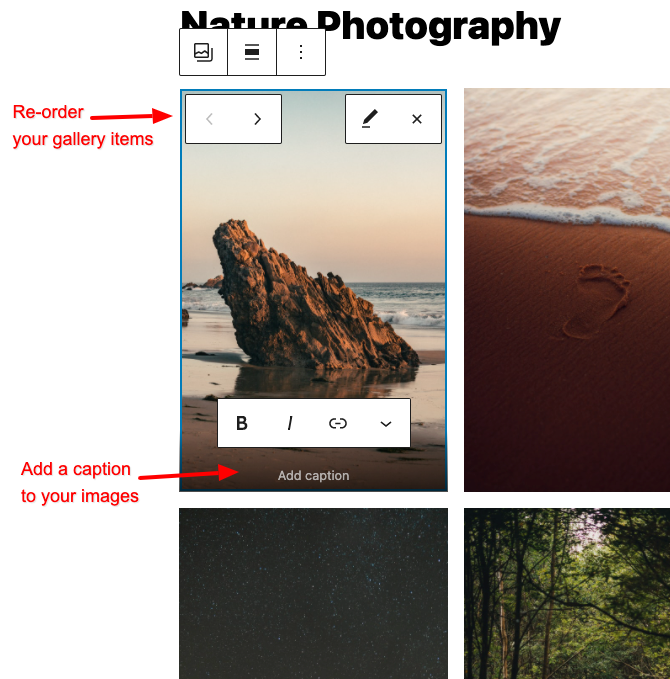
To configure your Gallery images, simply click on a gallery image, go to the top left of a gallery item to rearrange it, and if you’d like to set a caption, click on “Add caption” from the bottom center of the image to enter your desired caption.
Once your gallery is ready, you can click Update. That’s it! Your Gallery is available on your site and you can view it by going to the post/page.
Wasn’t this quick and easy?
It also looks clean and professional. However, you will soon realize that the Gallery Gutenberg block lacks essential features that define a Gallery Manager.
As an example, there isn’t support for lightbox and thus if you link your images, the full image will appear on a new page. This is not very user-friendly and thus makes your users go back to your page to continue reading your content.
Additionally, if you’d like to embed the Gallery elsewhere on your website since it's not saved, you’d need to re-create it.
Since there aren’t many customization options available, the gallery’s appearance will depend on your theme which means in most cases, you will get a basic style unless your theme has taken this into consideration and created a unique gallery style.
Furthermore, the built-in Gallery block lacks features such as organizing your galleries into albums, tags, etc…
If you’re looking for a more advanced Gallery Manager, we recommend using a 3rd-party WordPress plugin to get these extra features you may be looking for.
Using a shortcode
Another way to display Galleries on your WordPress website is to use native shortcodes, and more specifically, the following shortcode:
[gallery]Basic Usage
To get started, go to a Post or Page (even in Gutenberg Editor) and enter the shortcode:
[gallery columns="3"]You may enter it either as a text or by using the Gutenberg blocks, Paragraph or Shortcode.

Once you’ve entered the shortcode, you can save the page and view it on your site. You will notice an image gallery with 3 columns displaying a variety of random images. Since we haven’t defined which images to show, WordPress will pull all image attachments of the current post.
Shortcode Options
Now that we have seen the basics of the gallery shortcode, let’s dive deeper into all the different options for creating a more customized gallery. The gallery shortcode provides the following options:
- columns
- id
- ids
- size
- link
- Include
- exclude
- orderby
- order
- itemtag
- icontag
- captiontag
Let’s see each option briefly:
columns
[gallery columns="4"]The columns option allows you to specify how many columns each row of the gallery will consist of. By setting it to 4, we will have a gallery where each row will contain 4 columns, setting it to 2, we will have a gallery where each row will consist of 2 columns, and so on.
id
[gallery id="1234"]The id option allows you to define a Post ID and pull all associated image attachments of that post. However, if no Post ID is defined, it will try and find all associated image attachments of the current post.
ids
[gallery ids="20,40,50,60"]The ids option helps combine specific images and create a gallery. The value must be a comma-separated list of IDs. The image’s IDs can be found from within your WordPress dashboard > Media > Library.
size
[gallery size="large"]This defines the image size that will be used for the thumbnails of your WordPress Gallery (“thumbnail” is used by default). Other values that can be used include “thumbnail”, “medium”, “large”, “full” and any other image size that may have been added to your theme.
Note: The sizes for “thumbnail”, “medium” and “large” sizes can be configured from within your WordPress admin dashboard > Settings > Media.
link
[gallery link="file"]By default, when a gallery is rendered, it allows you to click on each image and go to another post (attachment page) that will display the image itself as an attachment. If you’d like to link to the actual image, you should use the “file” value. You can also disable the linking of your gallery images by using the value “none”.
include
[gallery include=”13,42,54”]To include only specific images, you should enter a comma-separated list of image IDs. You can find the IDs of your images by going to Media > Library.
exclude
[gallery exclude="85,24,67"]This option is the exact opposite of the above. It excludes specific images from the gallery by setting a comma-separated list of IDs. You should enter a comma-separated list of image IDs. You can find the IDs of your images by going to Media > Library.
Note: You should not combine the “include” and “exclude” options as if both are used, only the include will be used.
orderby
[gallery orderby="menu_order"]This defines how the gallery images are sorted. By default, the menu_order is used. All options are:
- menu_order
- You can define the order of your images via the Gallery Tab of the Add Media popup
- title
- Order by title of the image
- post_date
- Sort by date/time
- rand
- Order randomly
- ID
- Order by the image ID
order
[gallery order="ASC"]Once you have set the “orderby” option, you can set either “ASC” or “DESC” to the “order” option to define whether the order will happen in ascending or descending order.
Note: Do not use this if you have not used the “orderby” option.
itemtag
[gallery itemtag="figure"]This option allows you to change the HTML output by altering which HTML Element will be used to create the gallery item. By default, the “figure” HTML element is used.
Icontag
[gallery icontag="div"]This option allows you to change the HTML output by altering which HTML Element will be used to wrap the gallery image. By default, the “div” HTML element is used.
captiontag
[gallery captiontag="figcaption"]This option allows you to change the HTML output by altering which HTML Element will be used to wrap the caption of the gallery item. By default, the “a” HTML element is used.
Conclusion
That’s it! These are the 2 ways you can add a native photo Gallery to your WordPress site.
While the built-in ways are easy to use as well as allow you to create a clean and professional-looking Gallery, they lack essential features that are a must for Galleries. So if you are looking for advanced features, you should look into 3rd-party WordPress plugins to get that extra functionality.
We hope you found this tutorial useful. If you liked it, be sure to also check out our other posts over on our blog.
And don’t forget to sign up for our newsletter for more helpful tutorials, guides straight into your inbox! You can also find us on Twitter and Facebook.
Get FireBox for Free
Enter your WordPress website URL to install instantly.
Trusted by 9,000+ users


0 Comments