


Are you looking into creating a child theme?
There are times that you find yourself an article showcasing an awesome feature that you can add to your theme but you are stuck in the words “create a child theme” and that discourages you or even deters you from doing it.

You don’t need to worry anymore. In this article, we will dive into what is a child theme, how you can benefit from customizing it, and adding the bits of code you found earlier to enhance your WordPress site.
A child theme allows you to modify the functionality and/or appearance of your WordPress site, without modifying your theme files directly. The reason this is useful, it is important to understand the differences between parent and child themes.
What is a Parent Theme?
A parent theme is a complete theme, meaning, it includes all WordPress site templates files required for the theme to function properly.
The required template files for a WordPress theme to run are index.php and style.css (the main template and style files, respectively). Although almost all themes also include a set of additional PHP, localization, CSS/Javascript as well as graphic files to create a complete theme.
All themes are (except for child themes) are considered parent themes. Now that we have covered what is a parent theme, let’s look into what is a child theme and the benefits for a WordPress site owner.
What is a Child Theme?
A child theme inherits the look, feel as well as functionality of the parent theme and is used to make modifications to the theme.
This means that any modifications made are kept separate from the parent theme. Doing so helps you move these changes from one site to another both faster and easier.
By utilizing a child theme, you ensure that by upgrading the parent theme you will not lose any modifications made to your WordPress site. Without doing so, you’d need to edit the parent theme files which means you’d be losing all these changes each time you update the parent theme. Yikes. This would mean that you’d have to store these changes somewhere and re-apply them each time you updated your theme or bite the bullet and not keep your theme up to date.
Why do you need a Child Theme?
If the above is not proving to you that child themes are rather useful, the following questions can answer this question easily.
Do you need to customize the look, feel, and functionality of your WordPress site?
Do you need to modify your template files to introduce new sections, or customize existing ones?
Then the answer is yes and using child themes is the fastest and easiest way to achieve this as you are both saving time and effort. Having the parent theme intact while you are improving certain aspects of your theme means you don’t have to code everything from scratch.
Creating a Child Theme
You can create a child theme by creating the theme folder and files manually or you can use a 3rd-party WordPress plugin to create one for you.
The former is rather useful as you get more involved with how WordPress works while the latter is more user-friendly.
You only need to follow one method to create a child theme, you can jump to the one that suits you best using the links below:
Below, we’ll cover each one in-depth for you to follow along. Also, we will be using the Twenty Twenty-Two WordPress theme as an example.
Using Code
To get started creating your child theme, you’ll need to create the following things:
- The child WordPress theme directory
- The style.css file
- The functions.php file
Step 1: Create the child theme directory
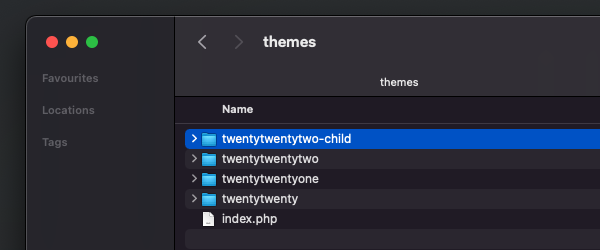
Firstly, you need to create the child theme’s directory. To do so, you will need to go to your WordPress site root directory and more specific into wp-content/themes.
The new child themes need a name, so you will need to create a new folder and it's best practice to use the parent theme name followed by -child.
For this example, since we are using the twentytwentytwo theme, our child theme will have the name twentytwentytwo-child.
Within the child theme directory, we need to create the style.css as well as the functions.php files.

Step 2: Create the stylesheet file for your child theme
Once the child theme directory is ready, one of the core files of a child theme is the style.css file which not only contains all styling of your child theme, it also lets WordPress read the child theme so we can also select and use it from within the WordPress admin panel.
Create a new file and name it style.css within the child theme directory.
The stylesheet file must contain the following required header comment at the top of the file.
/*
Theme Name:   Twenty Twenty-Two Child
Theme URI:    https://fireplugins.com/blog/how-to-create-a-wordpress-child-theme-beginners-guide
Description:  Twenty Twenty-Two Child Theme
Author:       FirePlugins
Author URI:   https://fireplugins.com
Template:     twentytwentytwo
Version:      1.0.0
License:      GNU General Public License v2 or later
License URI:  http://www.gnu.org/licenses/gpl-2.0.html
Tags:         light, dark, two-columns, right-sidebar, responsive-layout, accessibility-ready
Text Domain:  twentytwentytwochild
*/
This tells WordPress information about the theme, including the fact that this is a child theme with a particular parent theme.
The information that is necessary from above is the following:
- Theme Name
- This is a unique name tied to your child's theme.
- Template
- This is the name of the parent theme directory. Since we are using the theme Twenty Twenty-Two theme, the directory name is twentytwentytwo.
You may also add or remove information from the header section based on your needs. You can find the full list of information you can have, here.
You can later when you’re ready to start customizing your child theme, start adding your custom CSS in this file.
Step 3: Create the functions.php file
This will allow us to enqueue the stylesheet of both the parent and child theme.
This means that our child theme inherits all of the parent theme styles and we can even start activating the child theme. It also means that the child theme’s stylesheet is loaded before the parent theme, without overriding it. By doing this, we can add our custom CSS and/or functionalities to the child theme and override those of the parent theme.
To do so, create a functions.php empty file and add the following PHP code:
<?php
add_action( 'wp_enqueue_scripts', 'twentytwentytwochild_enqueue_parent_styles' );
function twentytwentytwochild_enqueue_parent_styles() {
   wp_enqueue_style( 'parent-style', get_template_directory_uri() . '/style.css' );
}
?>
Step 4: Install and activate the child theme
Child themes are installed exactly the same way as any other theme.
You can either install it by manually copying the child theme folder over to wp-content/themes using your favorite FTP software or install it by creating a zip folder of the child directory and installing it by going into your Admin panel > Appearance > Themes > Add New.
You can now activate the child theme.
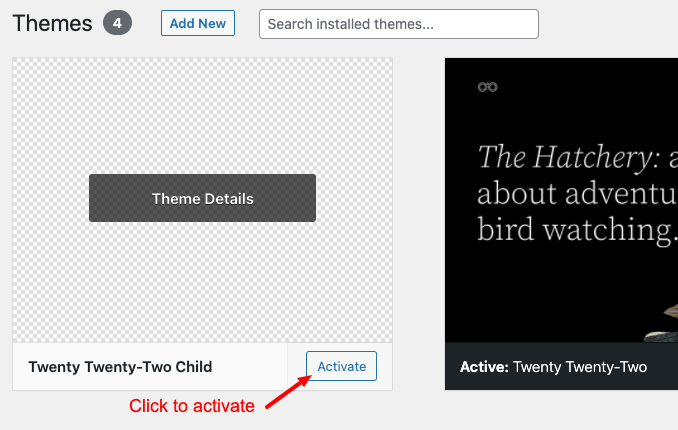
Once it's uploaded, you can press “Activate” to activate your child theme.
The good news is that your child theme is now active. Hooray!
The bad news is that it looks exactly the same as the parent theme. You can now start customizing your child's theme.
To read more about customizing the child theme, go to Customizing the child theme section.
Using a Plugin
You can use any WordPress plugin that allows you to create a child theme, for example, Child Theme Configurator which allows you to not get involved with the barebones needed to create a child theme, although a not that difficult process.
First things first, you will need to install Child Theme Configurator as you’d do with any other WordPress plugin.
Once the plugin has been activated, you will need to navigate to Tools > Child Themes.
From this screen, you should select the theme and click “Analyze”.
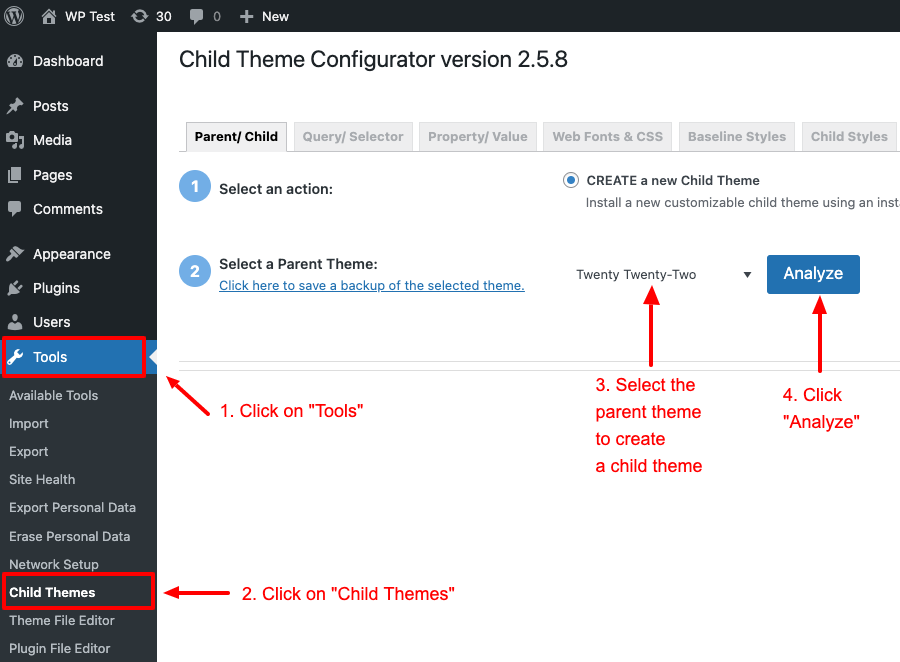
Once you have clicked “Analyze”, the plugin will check whether the selected theme can be used as a parent theme for your child theme.
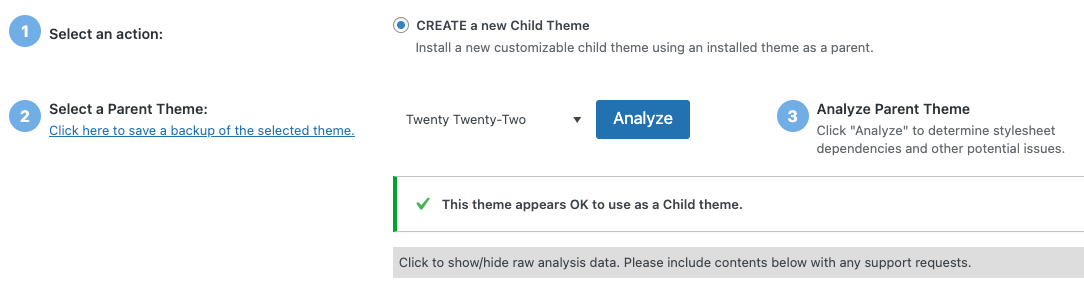
Once it finishes loading, you should be able to see a success message indicating that the theme is compatible.
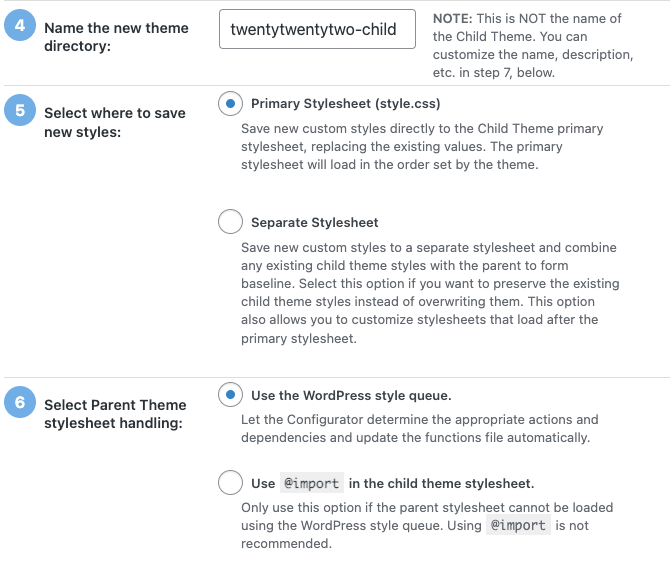
You can now proceed with naming the folder and configuring a few details to finalize the child theme. For now, we will go with the default settings.
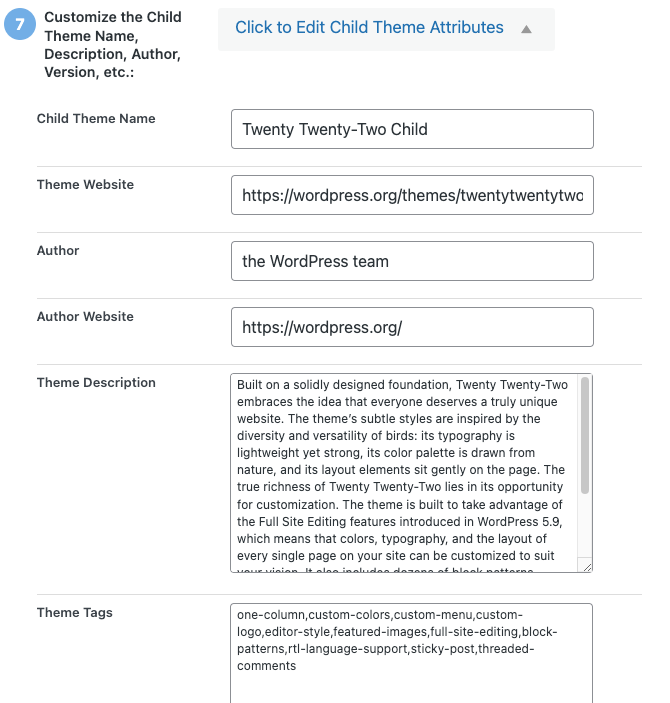
Under Section 7, click on “Click to Edit Child Theme Attributes” to fill in the details of your child theme.
A useful setting provided by Child Theme Configurator is located under Section 8, which helps you keep menu, widgets, and customizer settings from the parent theme over to the child theme.
You can check this option if you’d like to save these settings.
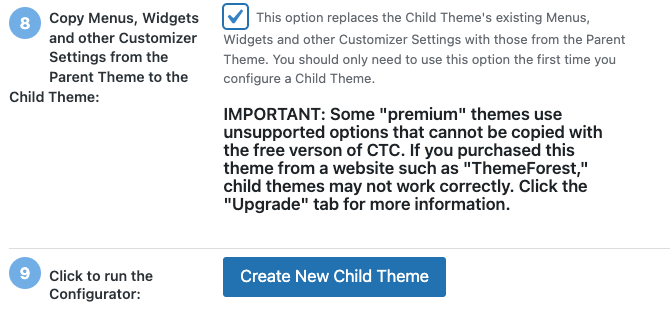
You can now click on the “Create New Child Theme” button to create your child theme. The plugin will create a new folder under /wp-content/themes named twentytwentytwo-child (for our example) with the files functions.php, style.php as well as screenshot.png.
The files mentioned above (apart from the image file) can be used to customize your child's theme.
You can now activate and start using your child theme!
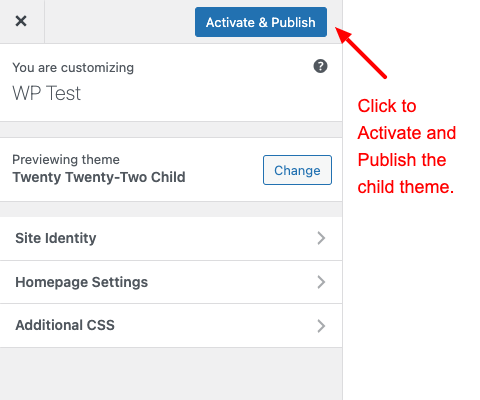
Note that you can preview it prior to activating it by clicking on the “Preview your child theme” button located at the top of the page.

Once your child theme is working as expected, you can activate and publish it.
Customizing the child theme
You are now ready to start customizing your child theme and make it appear a bit different than the parent theme.
All styling adjustments can be done via the style.css file whereas all functionality changes should be done via the functions.php file.
Adding new styles
To add custom CSS to your child theme, you will need to open the style.css file and at the bottom of the page, add your own CSS.
Example:
p {
   margin: 0 0 15px 0;
}
Adding new functionality to your Child Theme
You can add new functionality to your child theme, for example, register a custom menu page, at the end of your functions.php file.
/**
 * Register a custom menu page.
 */
function wpdocs_register_my_custom_menu_page() {
    add_menu_page(
        __( 'Custom Menu Title', 'textdomain' ),
        'custom menu',
        'manage_options',
        'myplugin/myplugin-admin.php',
        '',
        plugins_url( 'myplugin/images/icon.png' ),
        6
    );
}
add_action( 'admin_menu', 'wpdocs_register_my_custom_menu_page' );
Overriding parent theme templates
Child themes can also be used to override how your parent theme behaves by either creating a template file from scratch or copy/pasting it from the parent theme over to the child theme.
For example, let’s say you want to modify the footer of the twentytwentytwo theme and want to add a copyright text at the bottom.
You’d need to copy parts/footer.html file over to your child theme/parts/footer.html and add the following HTML at the bottom of the file:
<div style="max-width: 1000px; margin: 0 auto;">
Copyright © 2022 - TwentyTwentyTwo
</div>The final file should look like this:
<!-- wp:group {"style":{"spacing":{"padding":{"top":"var(--wp--custom--spacing--large, 8rem)"}}},"layout":{"inherit":true}} -->
<div class="wp-block-group" style="padding-top:var(--wp--custom--spacing--large, 8rem)">
<!-- wp:pattern {"slug":"twentytwentytwo/footer-default"} /-->
</div>
<!-- /wp:group -->
<div style="max-width: 1000px; margin: 0 auto;">
Copyright © 2022 - TwentyTwentyTwo
</div>Final Thoughts
A WordPress child theme will help you create a brand new site without having to create a theme from scratch by extending your parent theme.
With a bit of customization, you can make it look and feel as you desire.
We hope this tutorial has helped you understand what a child theme is and hopefully created your very first child theme via our step-by-step guide. Even better if you made some modifications too!
We hope you found this tutorial useful. If you liked it, be sure to also check out our other posts over on our blog.
And don’t forget to sign up for our newsletter for more helpful tutorials, guides straight into your inbox! You can also find us on Twitter and Facebook.
Get FireBox for Free
Enter your WordPress website URL to install instantly.
Trusted by 9,000+ users


0 Comments