


How to set up Auto-Responder Emails
Are you interested in using an auto-responder (automatic reply) email to be sent when a user submits a form on your website? FireBox simplifies the process of configuring automated email notifications like welcome emails, autoresponse emails, auto-reply emails, confirmation emails, or automatic replies that are instantly delivered once a user submits a form on your site. Let's explore how you can achieve this with FireBox.
- Setup an Email Notification
- Email the Person Who Filled Out the Form
- Troubleshooting Email Notifications
- How to use Smart Tags
Set up an Email Notification
To set up an Email Notification, follow the steps listed below:
- Edit your campaign
- Select your FireBox - Form block
- Open the Actions Panel on the right-hand side
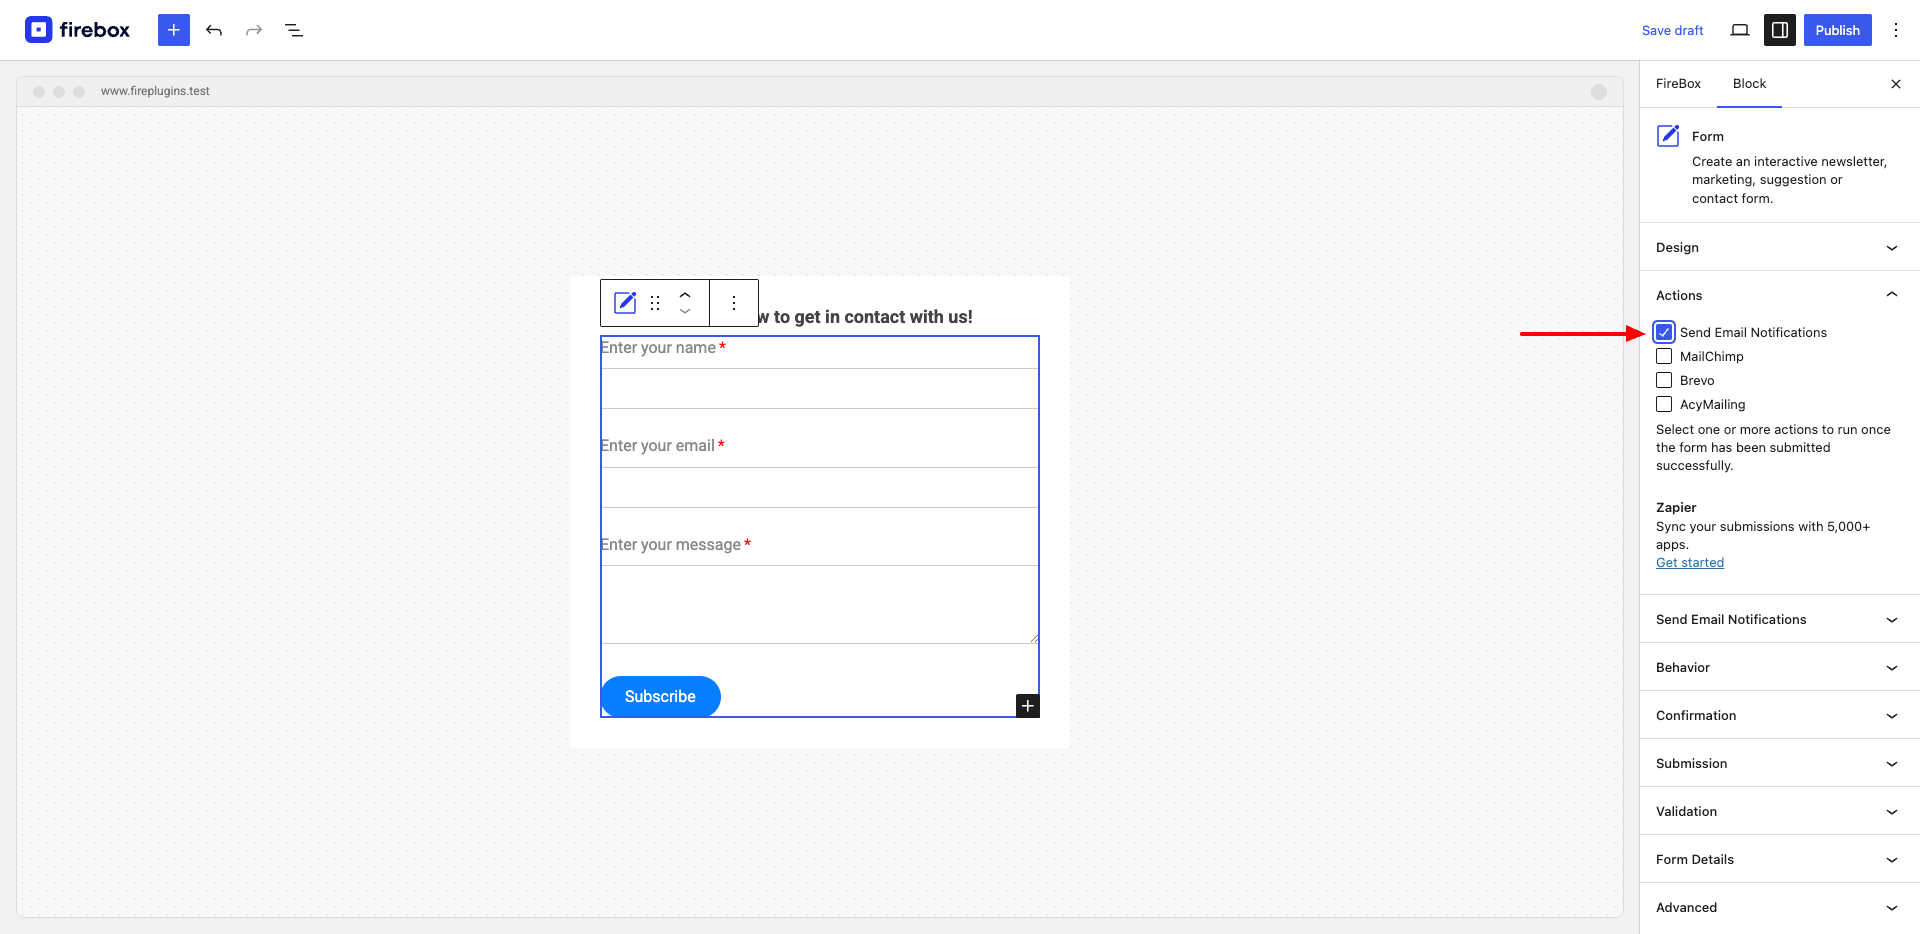
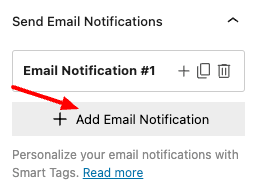
- Check the "Send Email Notifications" action.
- Once you have enable the action, a new tab named "Send Email Notifications" will appear where you will be able to configure your email notifications, as seen below:
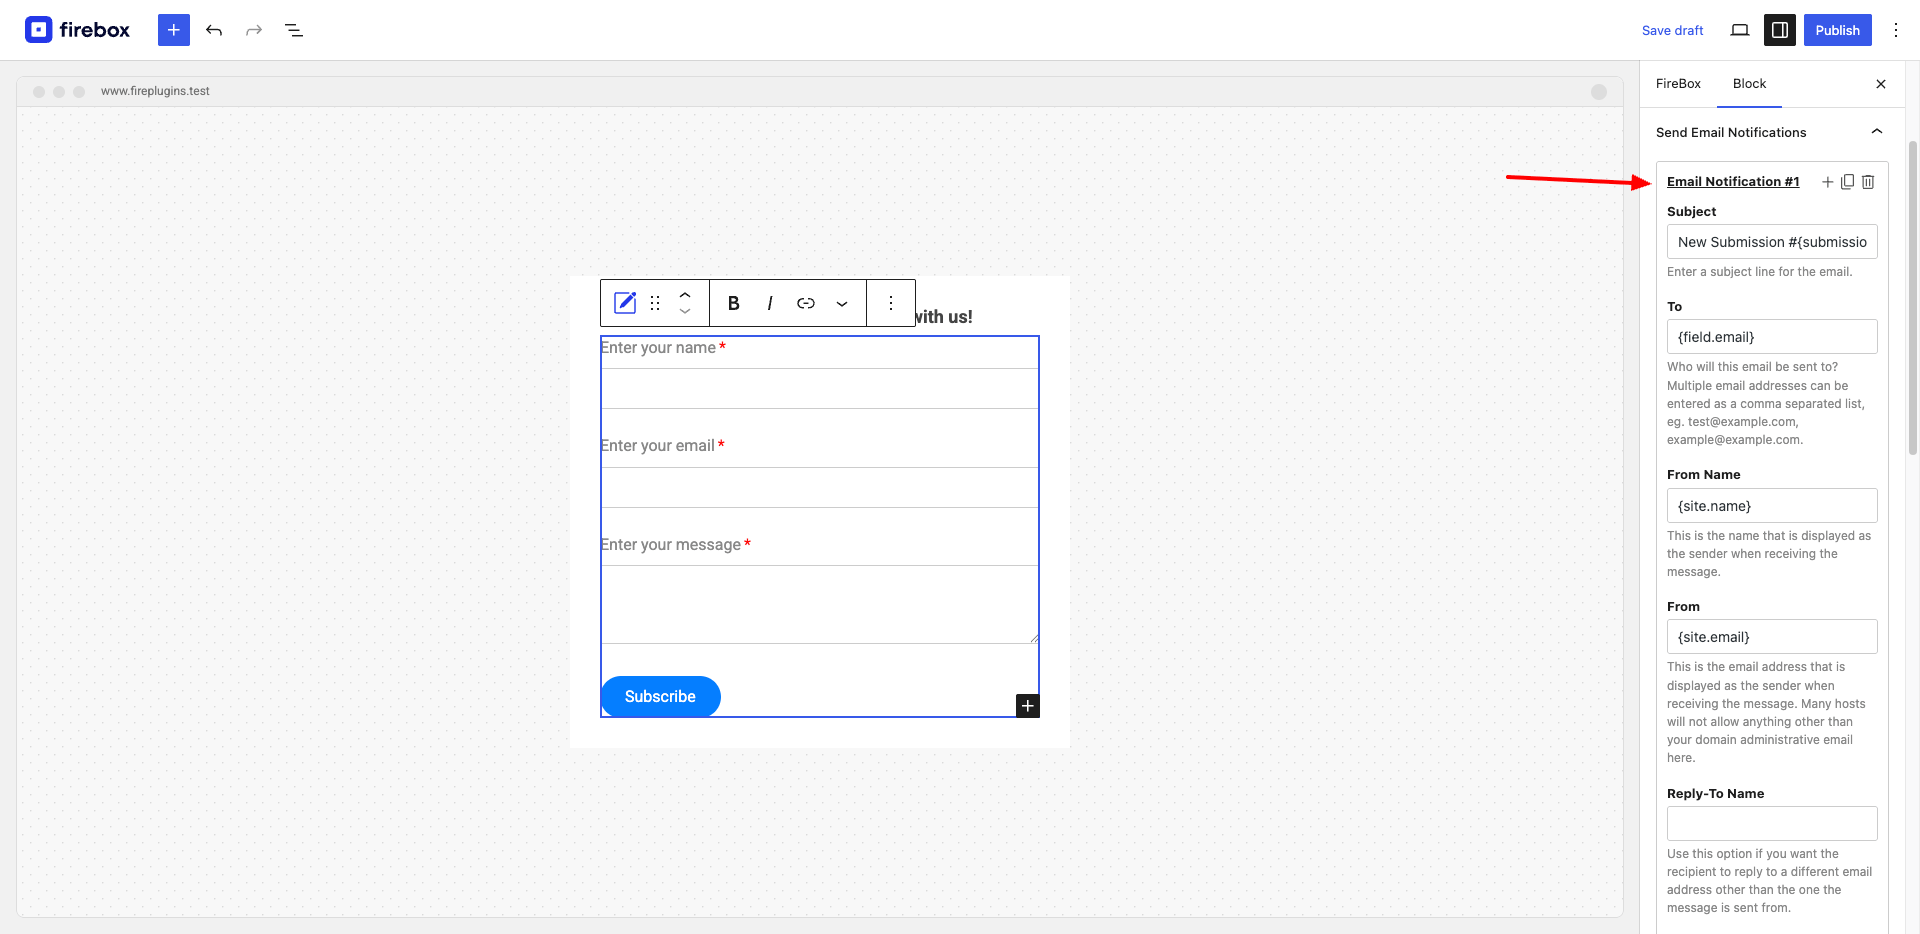
Upon clicking the email notification label, you will be presented will all available settings for the email notification.

There are several fields you’ll need to fill out when setting up a form email, and we’ll go into more detail for each below.
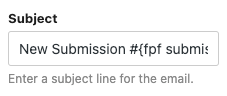
Subject
This field is where we type the subject of the email notification. There aren't any restrictions on what you write here. You can also choose to mix in a Smart Tag as we did in the example. The Smart Tag {submission.id} represents the unique ID of the submission.
To
This field is where we add the email of the notification's recipients. It can be one email address or a comma-separated list of email addresses.
By default, the field's value is set to the {site.email} Smart Tag, which pulls the administrator email from your WordPress settings. However, you can replace this or add additional emails if you'd like.
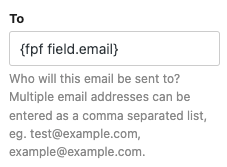
If adding more than one email address, just place a comma between each email.
Read the Email the Person Who Filled Out the Form section to learn how to send an automatic email to the person who filled out the form.
From Name
This field is where we fill in the name of the sender. Your forms will by default set the From Name to the {site.name} Smart Tag, which pulls the Site's Name from your WordPress settings.
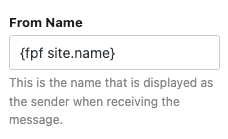
If you'd like to change this to the name of the person who filled the form, you will need to use the respective field-based Smart Tag.
The Smart Tag format is:
{field.FIELD_NAME}Where FIELD_NAME is the Field Name value of your form fields.
From
This field is where we type the sender's email. Your forms will default set the From Email to the {site.email} Smart Tag, which pulls the administrator email from your WordPress settings.
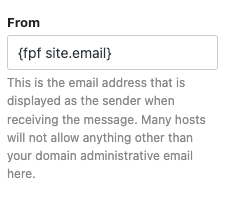
If you have configured your WordPress website to send emails through an authenticated SMTP, it is often recommended that you use the email with which you authenticate.
Reply-To Name
This is where you define the Name that will be used with the Reply-To Email option. If left empty, the Reply-To Name will default to the From Name.
Reply-To Email
If your recipient clicks “reply” from this email message, most email clients will automatically send the reply to the email address specified here instead of the “FROM ADDRESS.
This option serves as the default reply email address when a user clicks the Reply button in their email program or webmail. Setting this to a Smart Tag that pulls the user's email from the submission may be useful.
There can only be one Reply-To email address; if left empty, it will default to the From Email.
CC
Setting up CC allows you to send additional recipients a copy of the email. Other recipients will see CC'ed email addresses.
BCC
Setting up BCC allows you to send a copy of the email to additional recipients without the other recipients knowing.
Body
Here, you can create the body of your email.
By default, the Message will contain the {all_fields} Smart Tag, which displays all user-entered fields plus hidden fields and their labels.
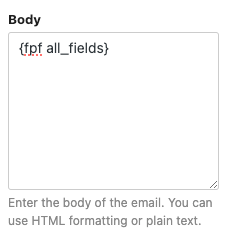
If you only want specific fields to appear instead of every field on the form, you may use Smart Tags to include only the fields you desire.
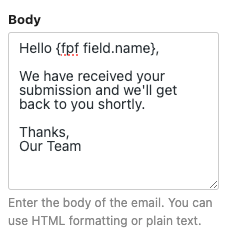
If you’d like to customize the notification content further, you can add additional text, Smart Tags, and even HTML or inline CSS to this Message field.
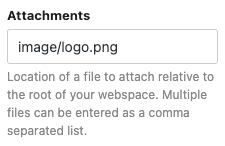
Attachments
With the attachment setting, you can define files that will be included as attachments to the email notification. This option accepts only local paths relative to the root of your WordPress site. You can define multiple files by separating them with a comma.
Email the Person Who Filled Out the Form
A confirmation email to the user who submitted the form is a great way to acknowledge that you've received their entry quickly.
To set this up, edit your form and go to the Send Email Notification tab. Then, locate the Send To Email Address field and use the Smart Tag:
{field.FIELD_NAME}Replace FIELD_NAME with the Field Name of the field where your users enter their Email Address.
When the email is sent, this Smart Tag will automatically pull the email the user entered into the form.
Troubleshooting Email Notifications
Are you seeing issues with the delivery of your form's autoresponder/autoreply emails? Many factors can contribute to email deliverability, but in most cases, the solution is to adjust notification settings or set up an SMTP.
Some important things you must check are the following:
- Ensure you've set From email to {site.email}.
- Ensure you're using SMTP to send emails. You can use any 3rd-party plugin to set up your email to be sent via an SMTP provider such as Google Mail, Outlook, etc...
- Do not set a recipient of the same domain as the sender.
- Test your From email with https://www.mail-tester.com/ to increase the likelihood your emails will get delivered.
How to use Smart Tags
The Email Notification section accepts Smart Tags, allowing you to send personalized messages to your users.
You can find all available Smart Tags here: How to use Smart Tags.
Send multiple email notifications
FireBox makes it easy to send multiple email notifications. To add multiple email notifications, simply go to your Send Email Notifications action and press the "Add Email Notification" button.
This will automatically add a new email notification to the list allowing you to customize it as desired.
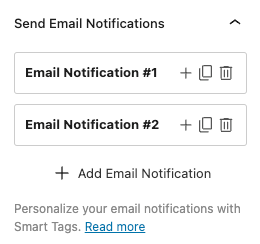
You need to have the FireBox Pro version installed to send multiple email notifications.