

How to connect FireBox with Zapier
Zapier allows you to instantly connect FireBox with 5,000+ apps to automate your work and find productivity superpowers.
How it works
FireBox comes with a JSON-API which among other data exposes submissions to specific endpoints that can be read by 3rd party apps like Zapier. Using polling triggers, Zapier looks for new data at specified intervals (depending on your plan on Zapier) in order to pull new submissions and execute your Zaps.
Keep in mind that the Zapier addon doesn’t have a bidirectional connection. Only Zapier can connect to your website and not vice versa.
Connect Zapier to FireBox
FireBox needs to be prepared to allow Zapier to connect to it and retrieve its data. The steps listed below will help you set up FireBox.
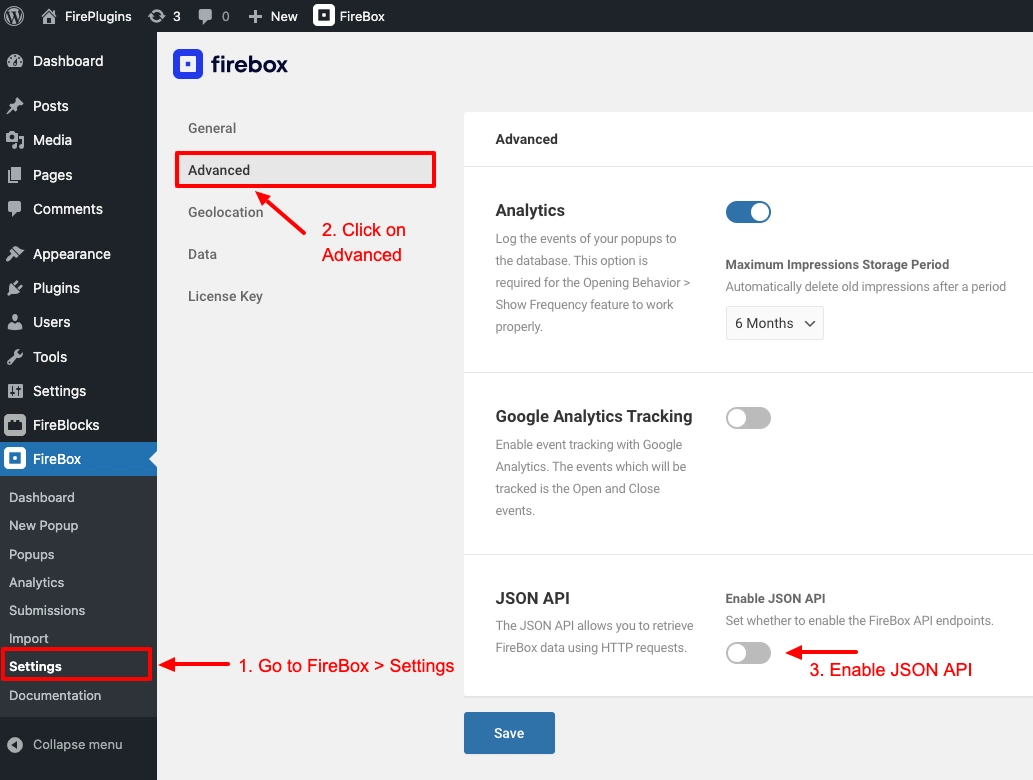
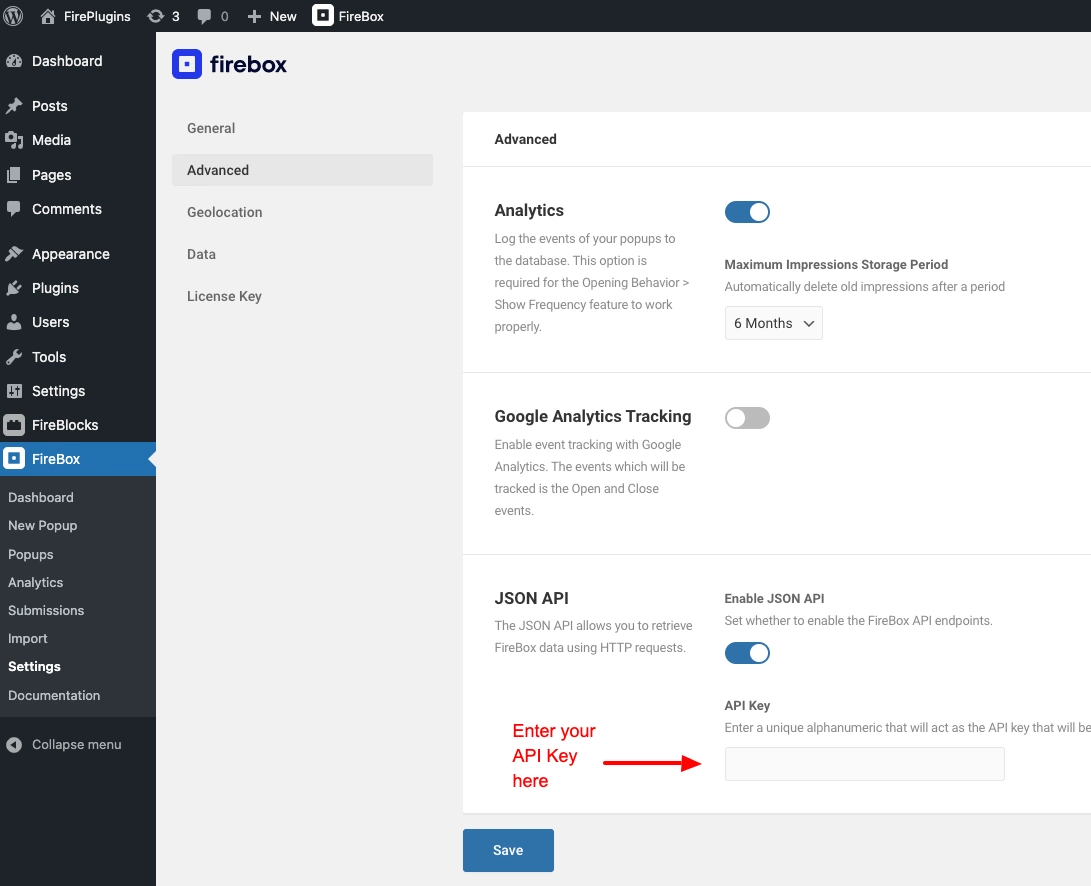
Step 1: Enable the JSON API
Navigate to FireBox > Settings > Advanced and enable the JSON API.
Step 2: Enter your API Key
Once the JSON API is enabled, you can type in your random alphanumeric API Key. It is preferable if you type a key longer than 20 characters.
Step 3: Connect Zapier to FireBox
Click on the following link to get started: https://zapier.com/apps/firebox/integrations
You can click on the “Connect FireBox” button.

On the redirected page you’ll see that FireBox App is pre-selected, and you can set the Trigger Event to New Submission.
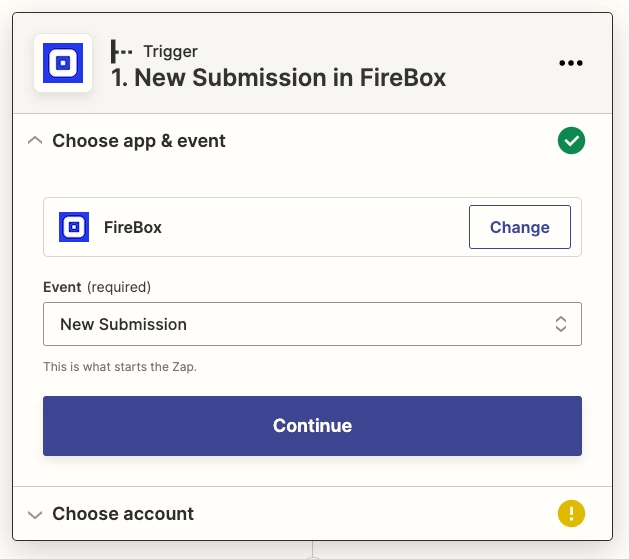
You can now click Continue to choose your account and get started.
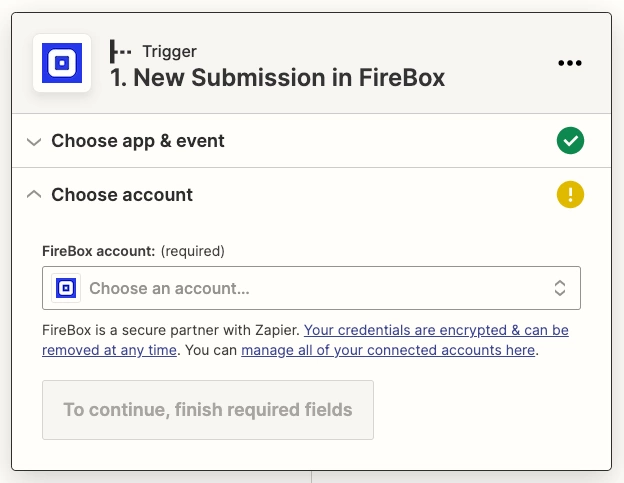
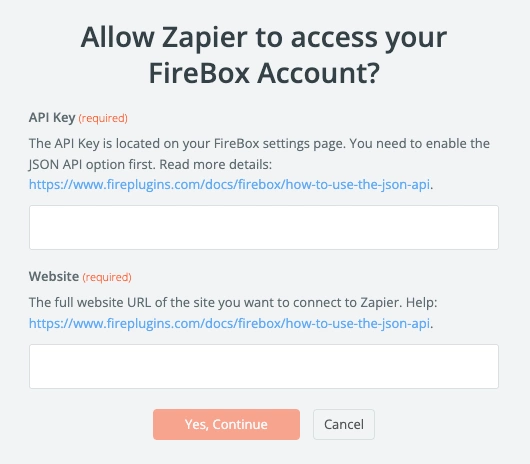
Now, you need to connect your account. Click on Choose an account and then click o the Connect a new account button. A new popup window will be opened and you’ll be asked for an API Key and your website’s URL (The one you’ve entered in the FireBox settings page). Make sure you’ve entered your full website address starting with http://www.
Once you have chosen an account, you can click Continue.
On the next screen, you will be asked to select the FireBox Form you would like to connect. If you have successfully entered the correct API Key and website you will be able to see the list of your forms. (If not, go back and check the API Key).
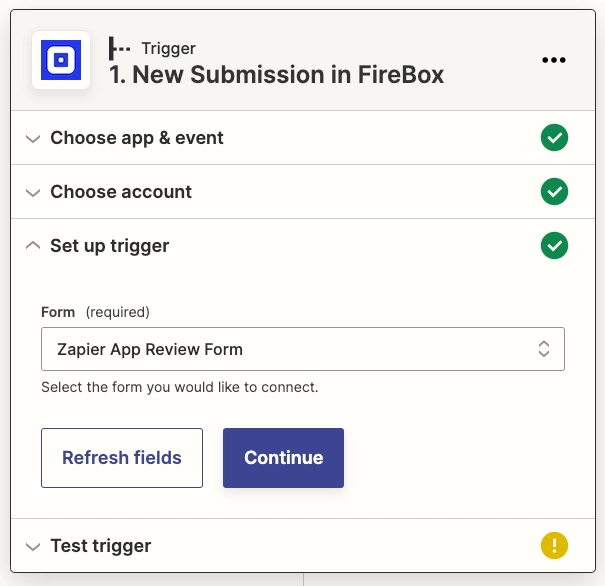
After selecting your form, click Continue.
You should now test the trigger by clicking the Test Trigger button.
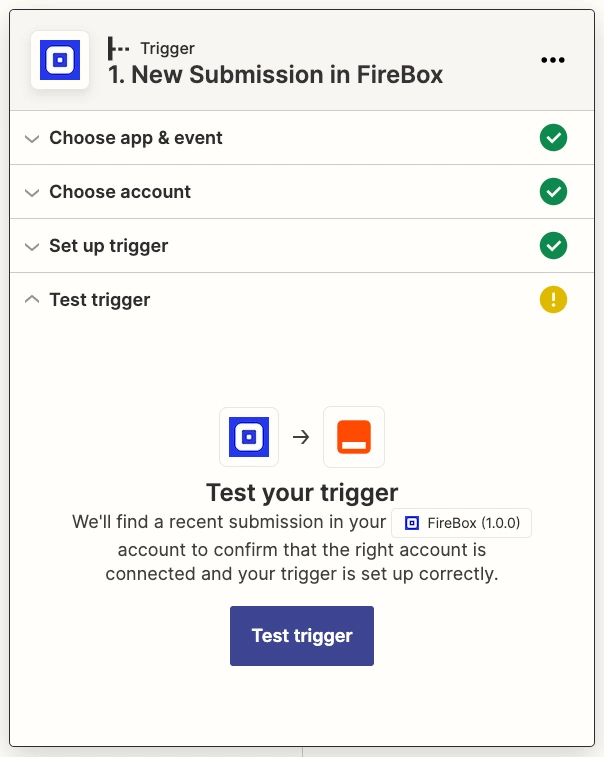
Zapier will try to fetch a form submission from your website. If you see a green notification ‘Test Successful!’ you are set! Click on the Continue button now.
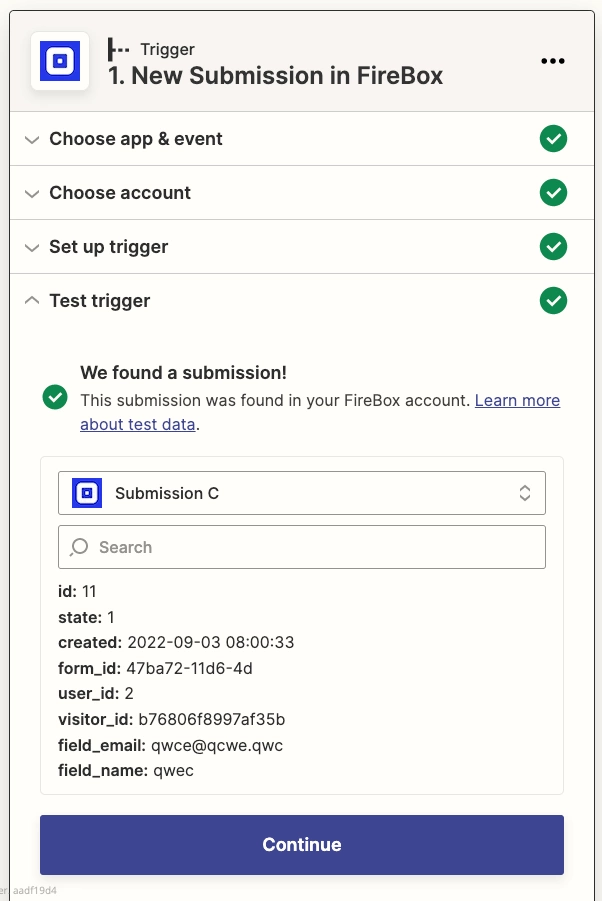
If the test trigger fails, you’ll need to submit the FireBox form on your website and re-try so Zapier can detect the submission and ensure the JSON API works as expected.
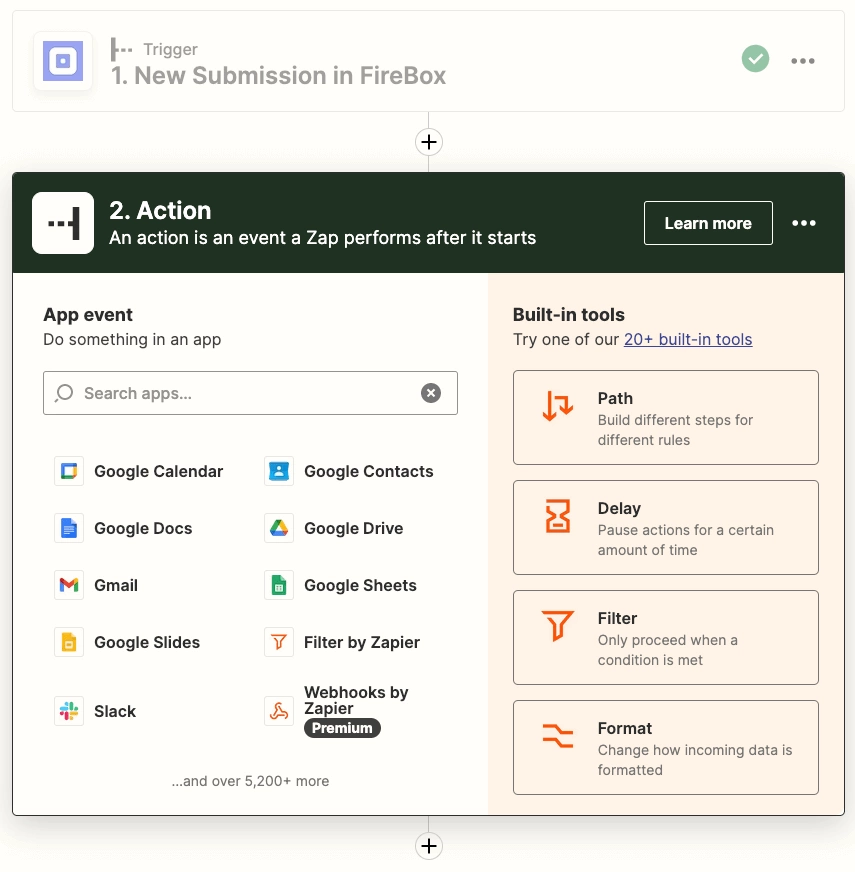
Now that you’ve configured the communication between Zap and FireBox you need to add an Action Step for your Zap, like sending you back an e-mail whenever a submission is generated or syncing your leads with your favorite CRM app.
If you face any issues please create a support ticket.
Troubleshooting Zapier Connection
In some cases you may not be able to create your Zap or Zapier may suddenly stop working. Below we have a list of useful resources that should help you resolve the issue you are facing.
Ensure JSON API is enabled
Enable JSON API, found under FireBox > Settings > Advanced > JSON API, must be enabled for 3rd-party services such as Zapier, to be able to read your forms and submissions data.
Note that having this enabled does not mean that any 3rd-party service can read our FireBox data, a combination of JSON API and API Key must be present to be able to retrieve any data.
Ensure an API Key has been set correctly
API Key, found under FireBox > Settings > Advanced > JSON API, must be set and contain alphanumerics without any special characters.
This must be set by you. You will need to use it when you create your Zap, alongside Enable JSON API which is required in order for Zapier to be able to retrieve and sync your FireBox data with a 3rd-party service.
Ensure FireBox API endpoints return valid data
After setting the above options, you need to ensure the FireBox API return data. To do so follow the steps listed below:
- Get the Base URL of your site
All the requests to the JSON API are of the type “GET” and they need to be sent to the following URL.
https://www.example.com/wp-json/firebox/v1/
Replace https://www.example.com with the domain of your WordPress website. - Try to get all your forms
https://www.example.com/wp-json/firebox/v1/{API_KEY}/forms/get
Replace {API_KEY} with your API Key you set above. - If all the above endpoint returned your forms then the FireBox JSON API is enabled and works correctly. Zapier should be able to find your data and sync them with your favorite app.
You can find complete documentation of the FireBox JSON API, here: How to use the JSON API
Issues with Zaps
If you are having other problems with a Zap that you have created, we recommend contacting Zapier Support.
They are usually the best people to help you with any issues that you have within the Zapier dashboard, Zap configuration, or behavior.
Authentication Issues
The authentication process involves the Zapier service connecting to your WordPress site using your FireBox API Key and your site URL.
Please ensure you complete the authentication correctly:
- In the API Key field, enter the Secret Key you set under FireBox > Settings > Advanced > JSON API > API Key.
- In the Website field, enter the URL to your WordPress site. Be sure the URL starts with https:// and does not include the trailing slash.
For example: https://example.com.